


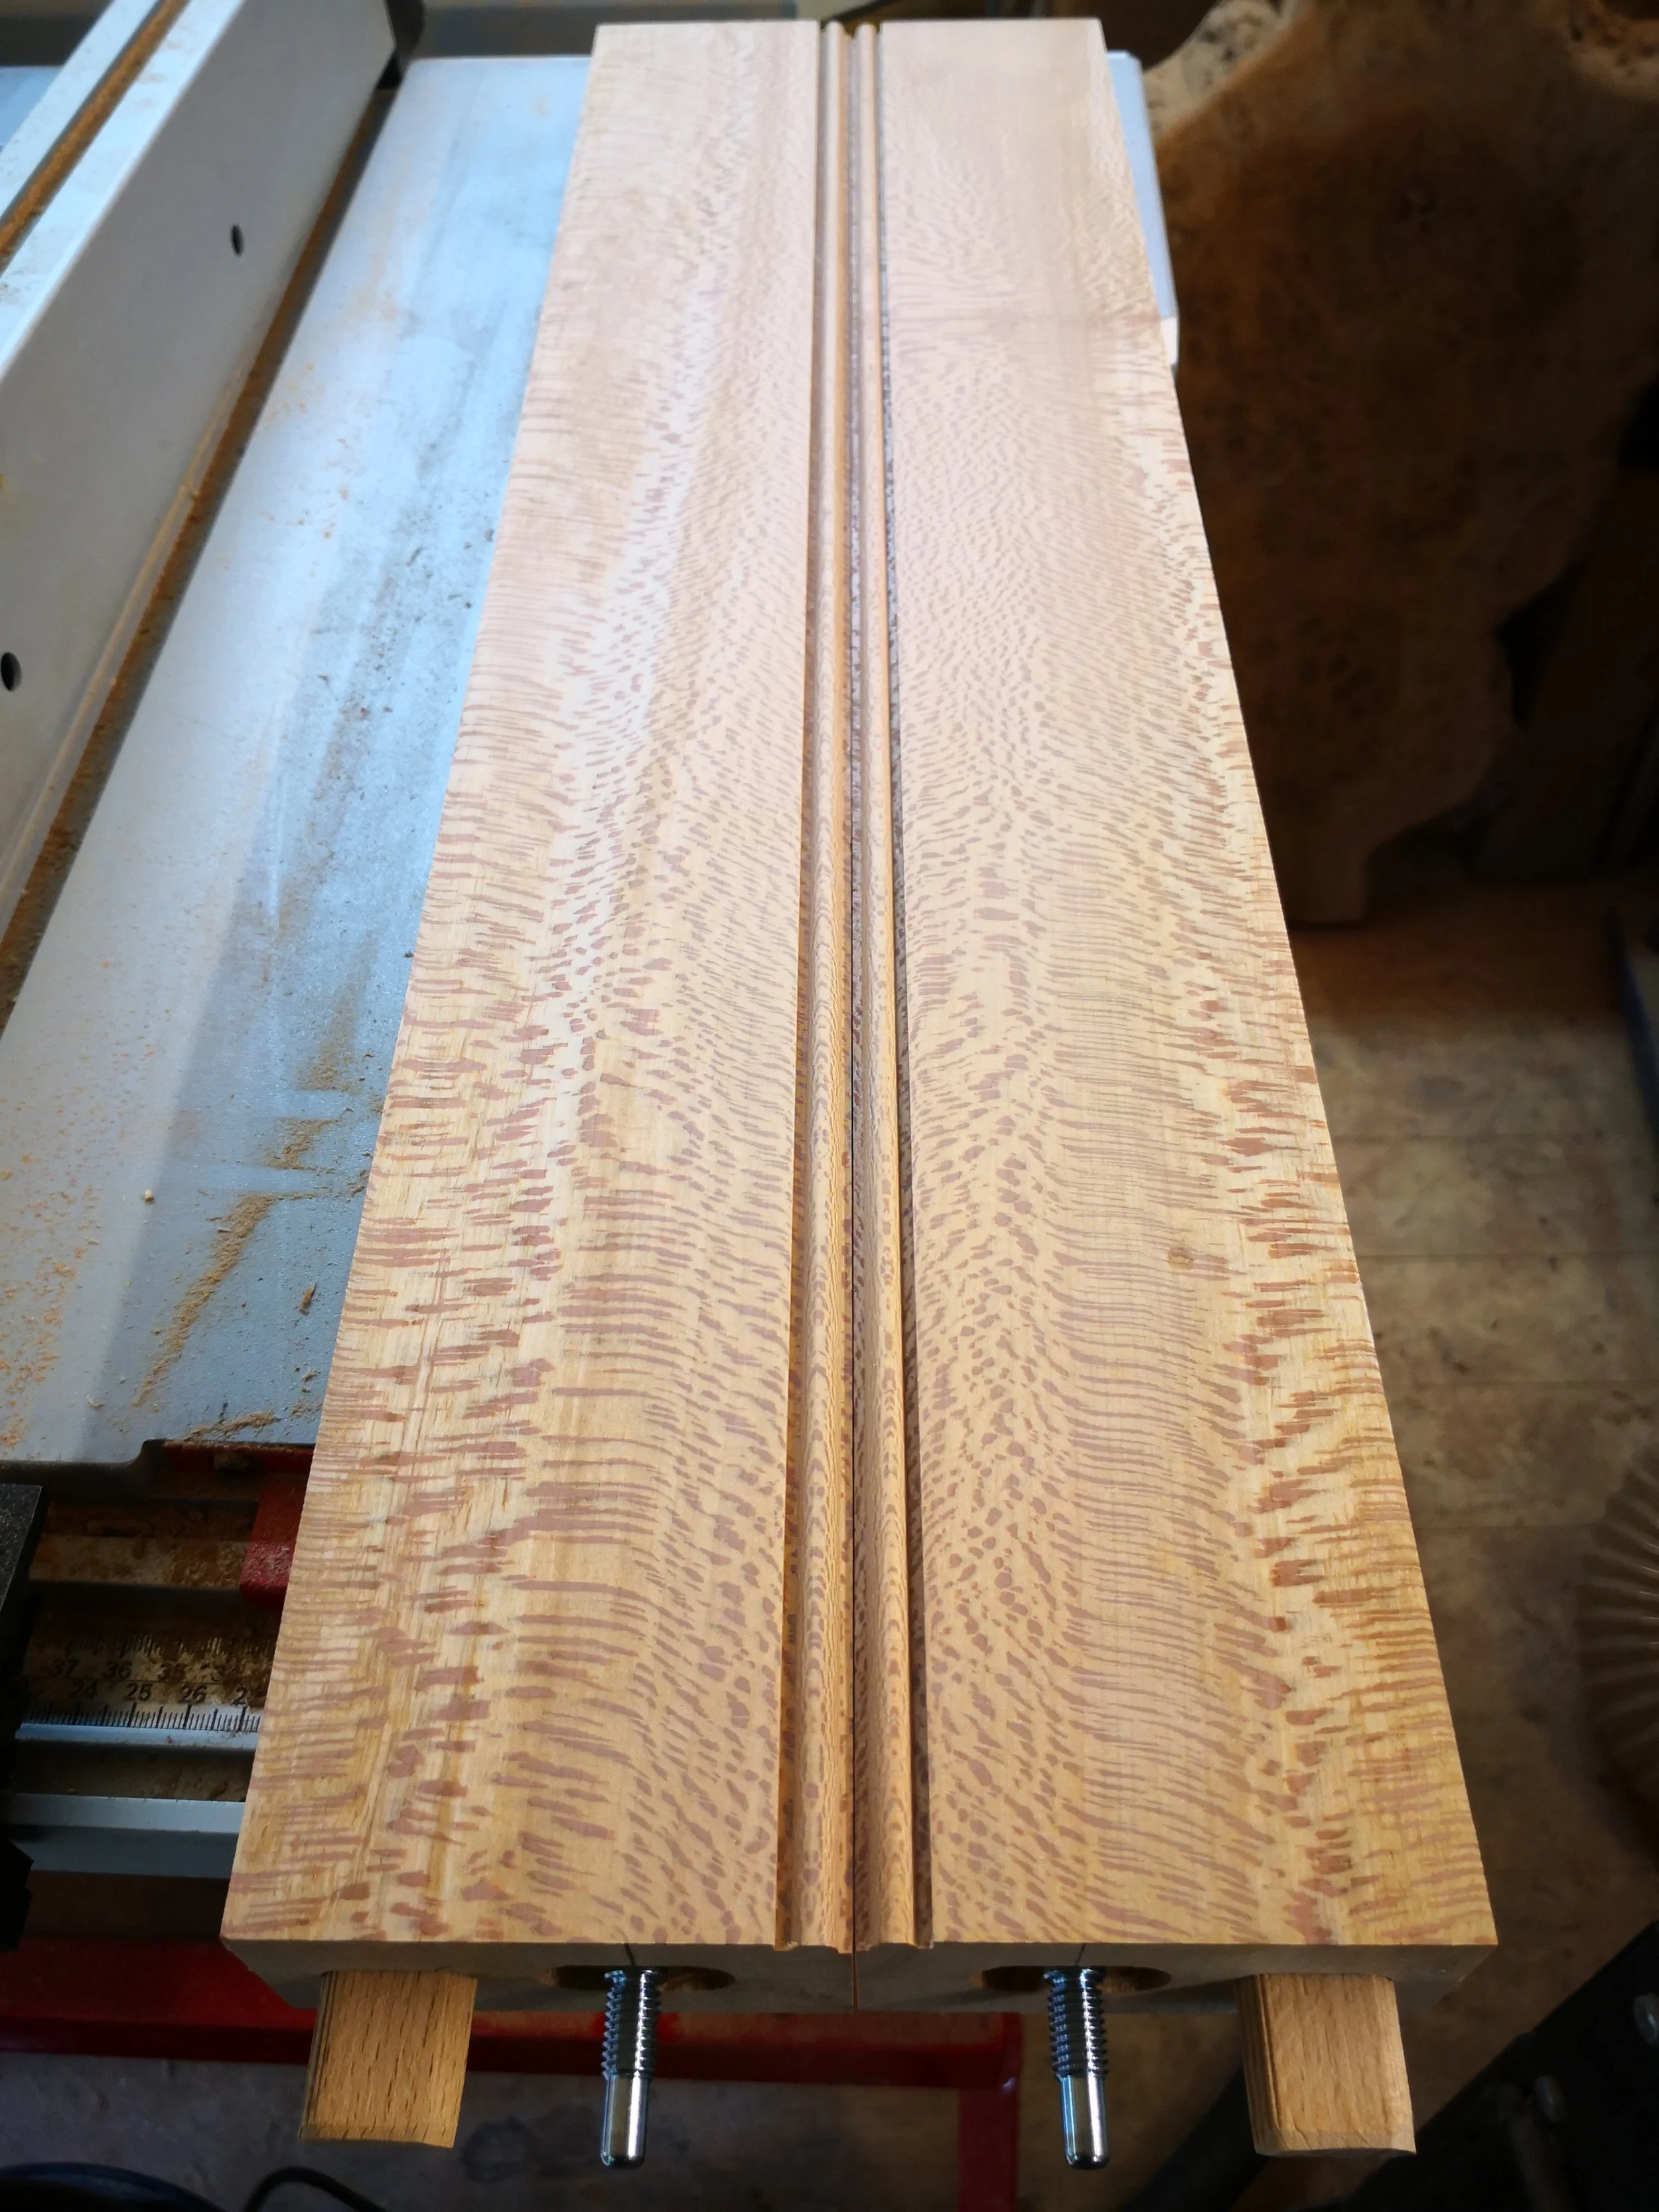
A couple of years ago I had the pleasure of getting to mill up a London plane tree in Roehampton. Its the only Plane I have ever milled and it was a real joy to uncover the grain inside of it, especially the ‘lacewood’ which can be seen most prominently on the quarter sawn faces of the wood. The Arb company I was milling the tree for were kind enough to let me keep a few of the boards and I have stacked and dried them for a couple of years.
I wanted to use them for a project of my own as they were such special looking planks. I needed a dining table and decided I wanted to use these boards for it. I only had about half of what I needed but fortunately I was contacted by the same company to mill an Oak tree for them and we worked out an agreement so I could get enough for my table.

I tested the moisture content in the middle of summer and they read around 15 percent which isn’t quite dry enough for interior use. I stored them in the roof of my garage for a month (a very dry and warm space) or so which got them down low enough to start on the project. Its important not to try and dry timber out too fast and even at 15% I had concerns about storing them somewhere so warm.
The first step was to plane and thickness the boards down to equal dimensions for the top. I tried a few different layouts before I was happy with the orientations and grain patterns. With such irregular grain patterns its pretty difficult to get them matched up.

I didn’t have any thick enough Plane to make the legs out of single pieces so I glued two boards together to make legs thick enough. In hindsight I should have spent more time on the legs and made them out of 4 pieces rather than 2 so the grain doesn’t contrast too much. I could have also bought thicker stock but I wanted to make it all out of the same wood. I chose to give them a 4 way taper to reduce the chunkiness of the table. To cut these I made a simple jig which is adjusted purely by how far the screw at the bottom is wound out. With a clean sharp blade and a slow feed it left very slight kerf marks which only took one pass over the planer to remove.
On The short rails/aprons I decided to use the domino connectors which allow for the frame to be taken apart and stored/ transported easier. Using these along side a normal domino gives a very strong joint.
I cut a bead into the bottom of the aprons to give it a subtle detail. The grain is quite striking on these and shows the importance of quartersawing . Not only is it usually the prettiest grain it also dries flatter and is more stable when dealing with seasonal movement. There are downsides to quartersawn timber for certain projects. It does have the tendency to split slightly easier if you nail/screw straight through it with no pilot hole.

For the longer aprons I used a haunched mortise and tenon joint which was then glued and pegged. The dowels where then cut with a flush cut saw and then pared down with a sharp chisel.
Using a haunch on this kind of joint is pretty important as it allows a full width tenon to prevent the rail cupping but reduces the amount of short grain at the top of the mortise.

The corners have a brace held in with pocket hole screws for extra strength.

To hold the frame to the top I made some table buttons. these are slightly offset so when the screw is tightened into the top it clamps the top down. It also has space to move in and out and side to side which allows for the top to expand and contract with the changing seasons whilst still retaining a tight connection. Because the top is made of quarter sawn timber the type of shrinkage you have to worry about is radial which can be up to 4%. Using flat sawn you have to worry about tangential which can be up to 8% expansion/shrinkage seasonally.. The overall length or longitudinal movement is very minimal at 0.01%.

I glued the boards together using Titebond II and Festool dominos. Once cured I started sanding with a belt sander with 120 grit before moving onto a random orbital sander with 120,180,240,320 grits before a gentle block sand with 400 grit paper
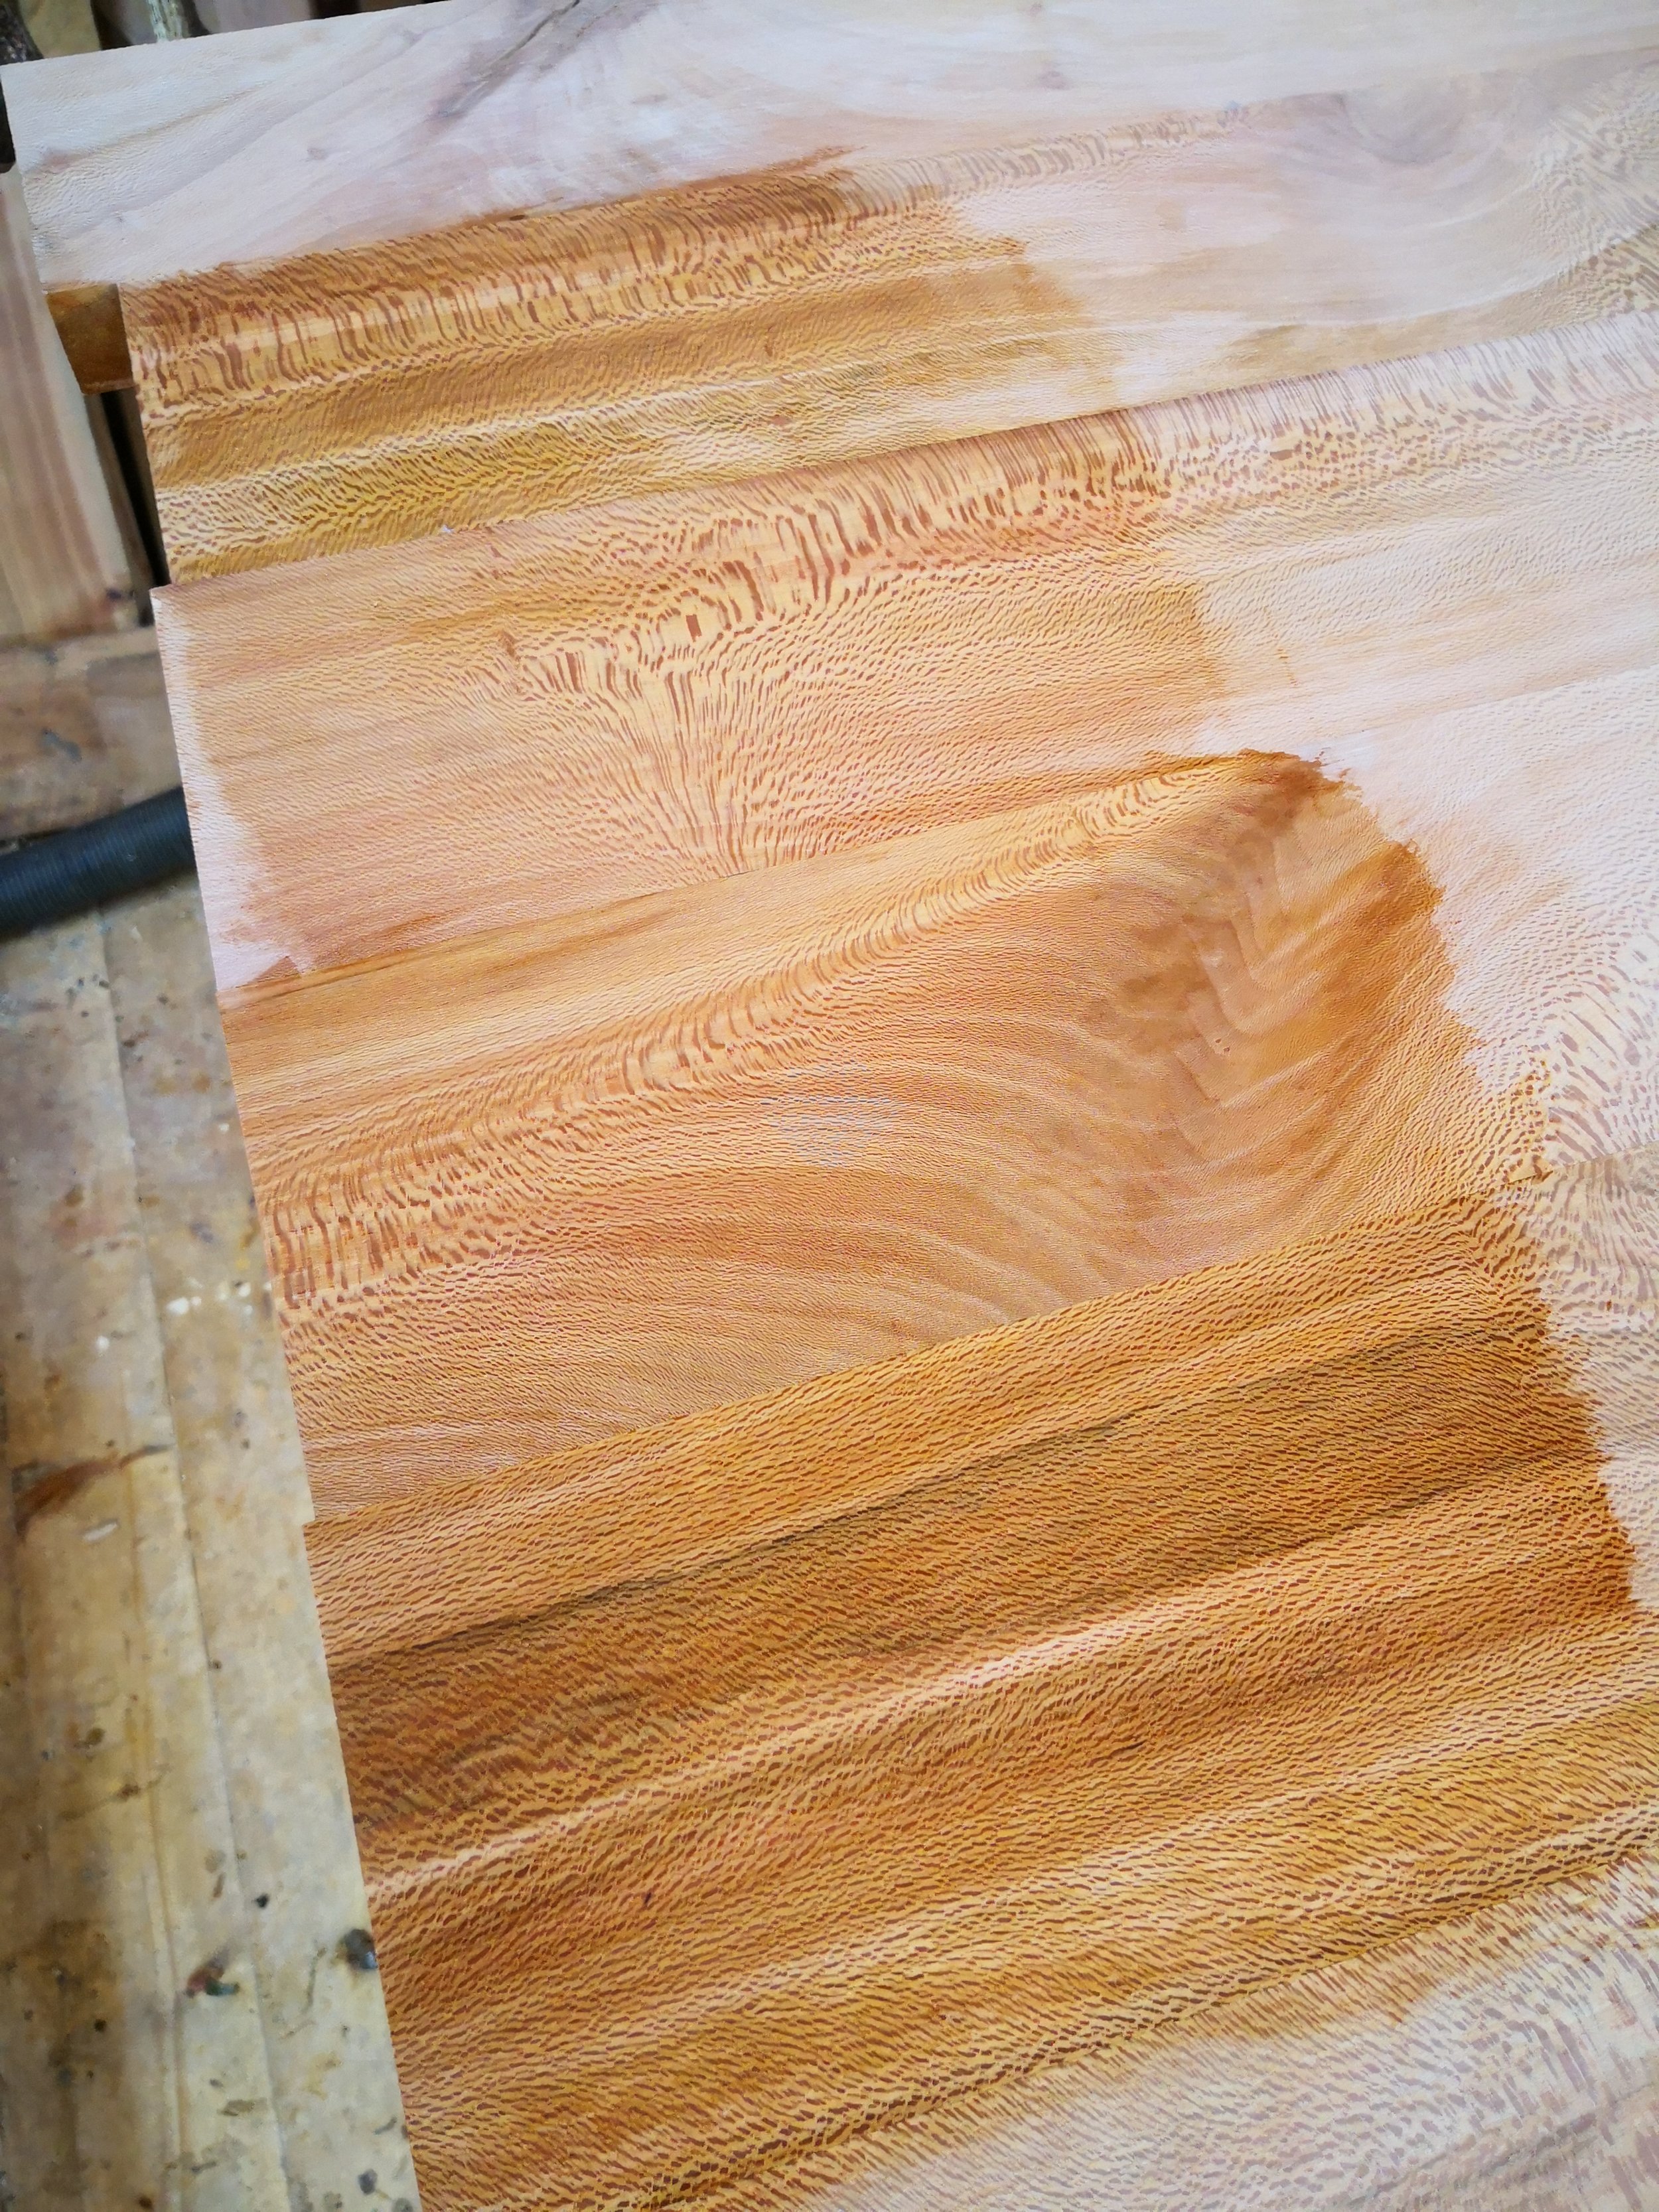
I usually use Osmo Polyx oil for finishing as its pretty reliable and i’ve mostly got good results with it. The top half is matt and the bottom half is satin. Personally i’m not hugely into really shiny wood but the matt finish was a bit too flat for the plane and I went for satin. I quite like the look of a matt finish on smaller wooden objects and on darker species of wood. I applied the oil very thinly with a foam brush, after 10 minutes I used my orbital sander with a fine cloth attached to the bottom of it to polish out any brush marks. I’ve not tried this before and it worked surprisingly well. After drying for another day I rubbed the top down lightly with 400 grit mirka sandpaper to remove any dust lumps and then applied a second coat in the same way.

Finished.

