Cypress timber frame cabin build part 1

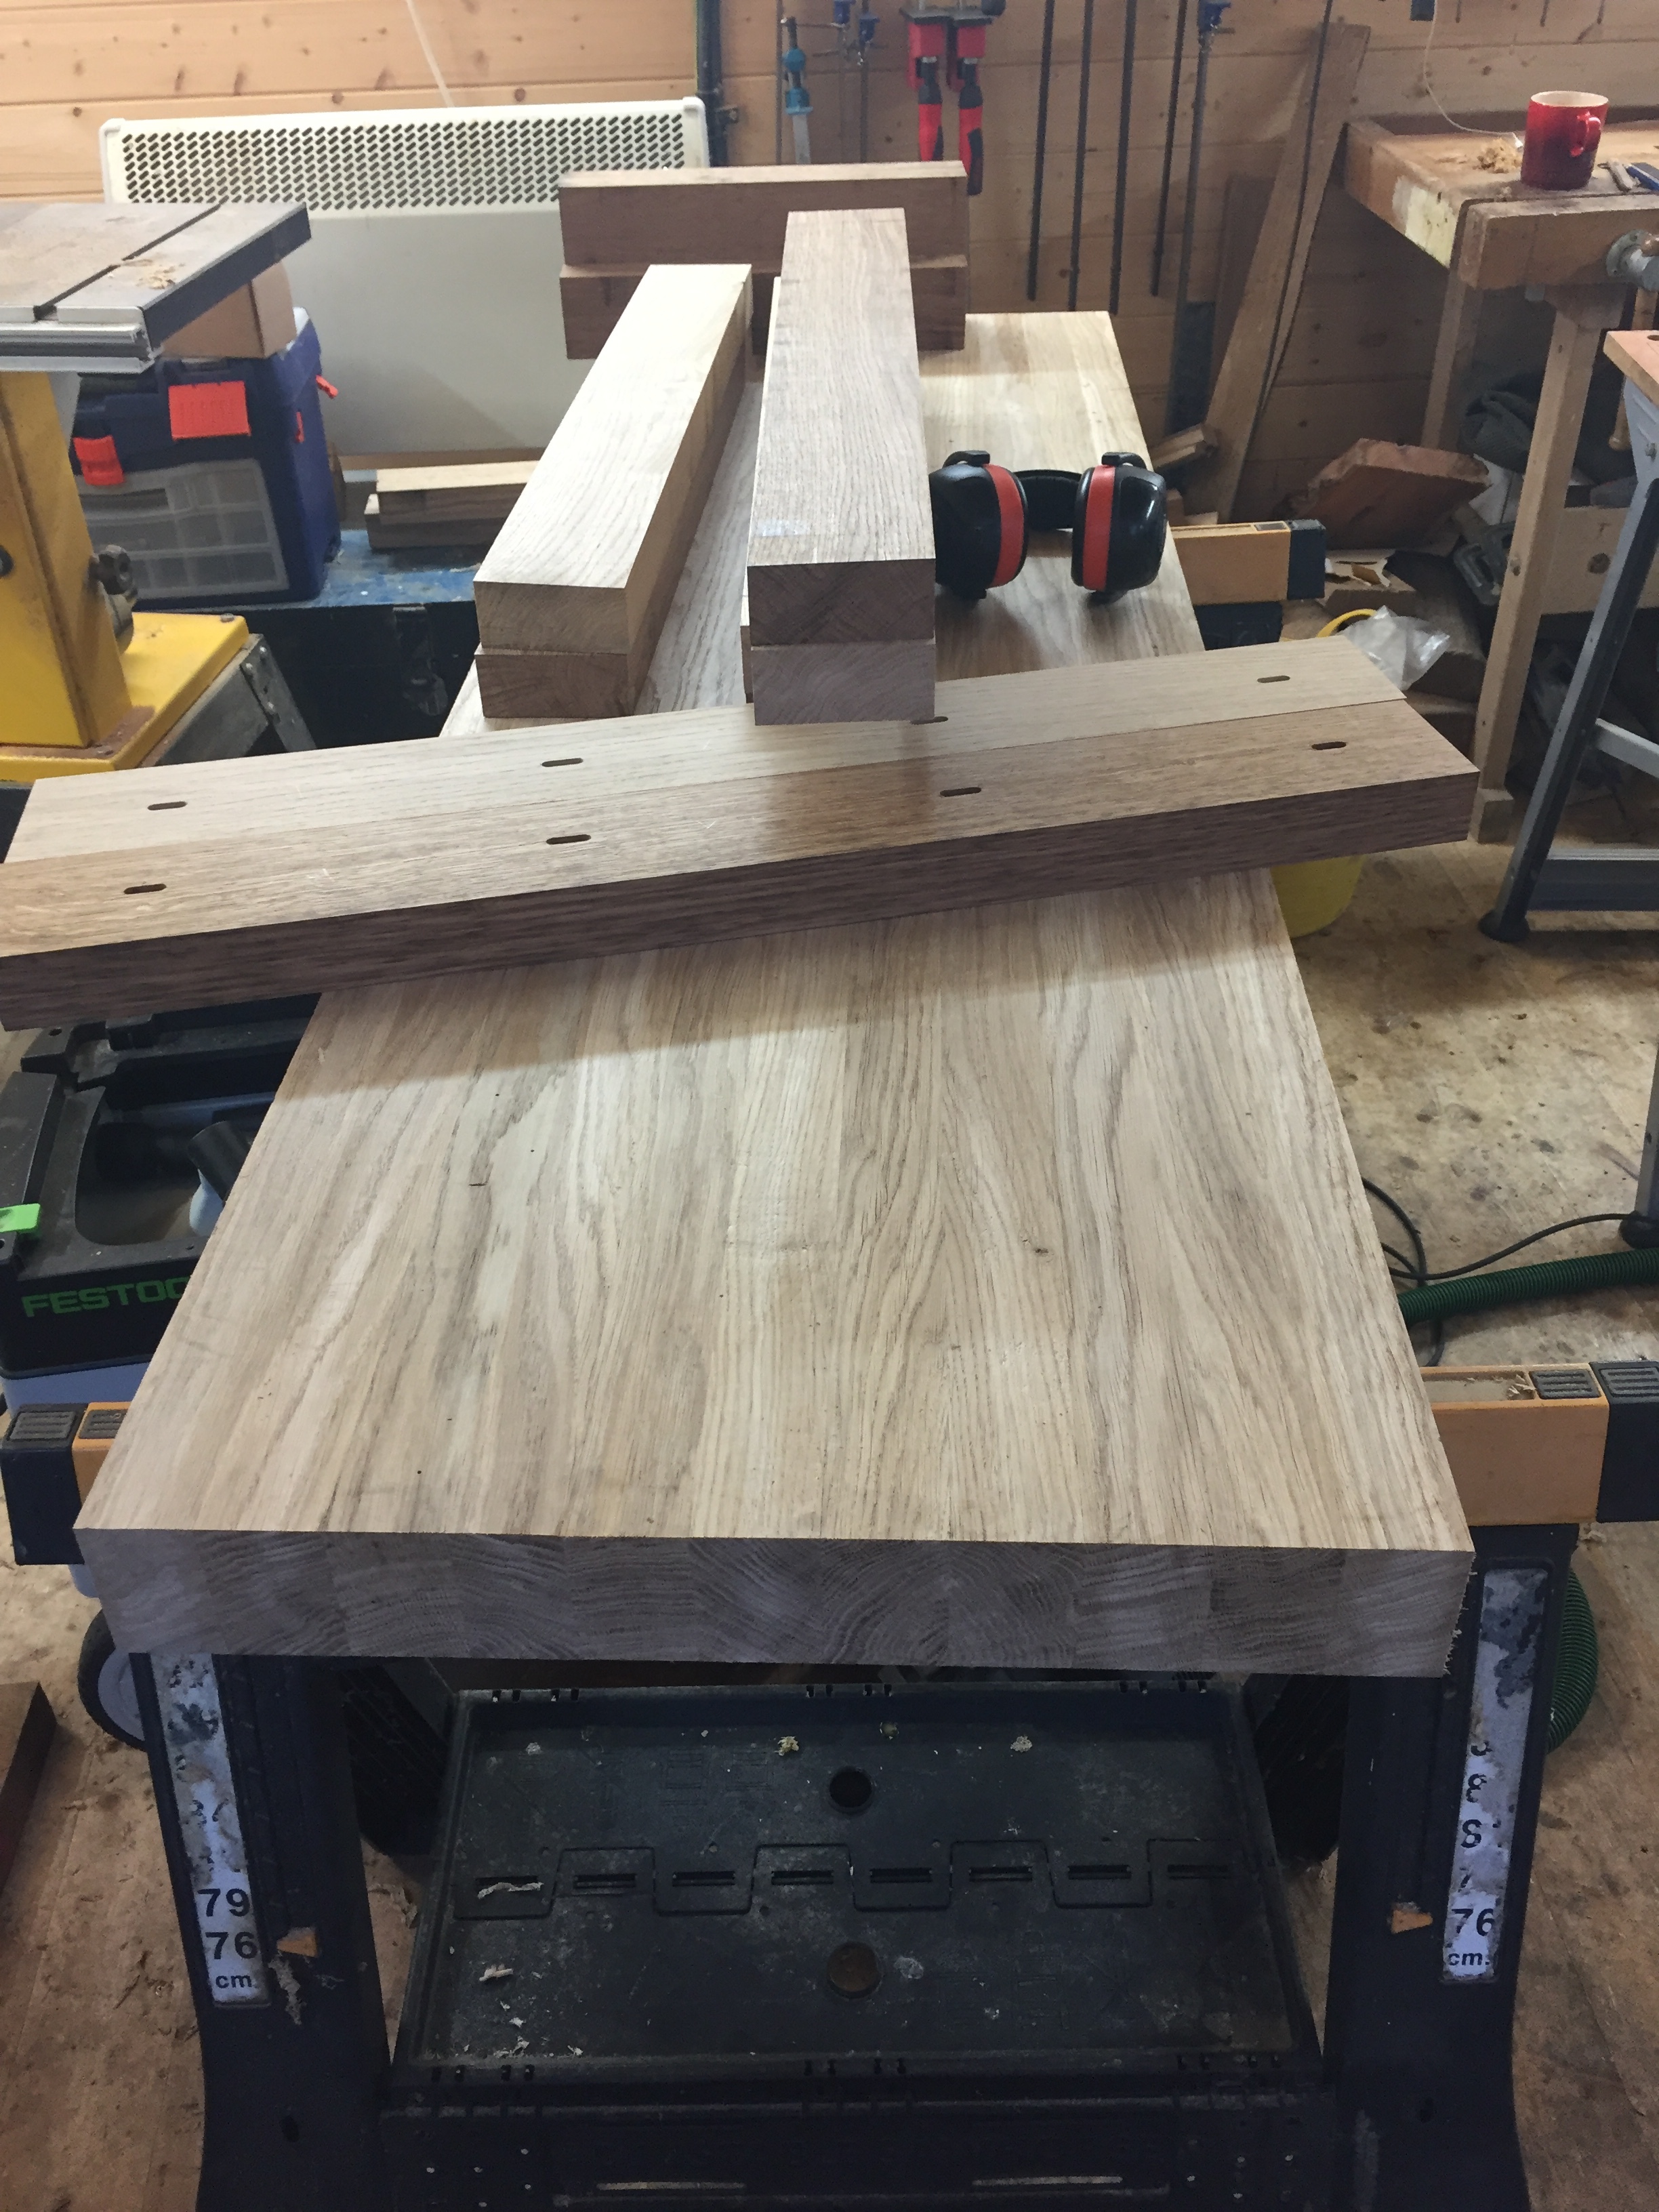
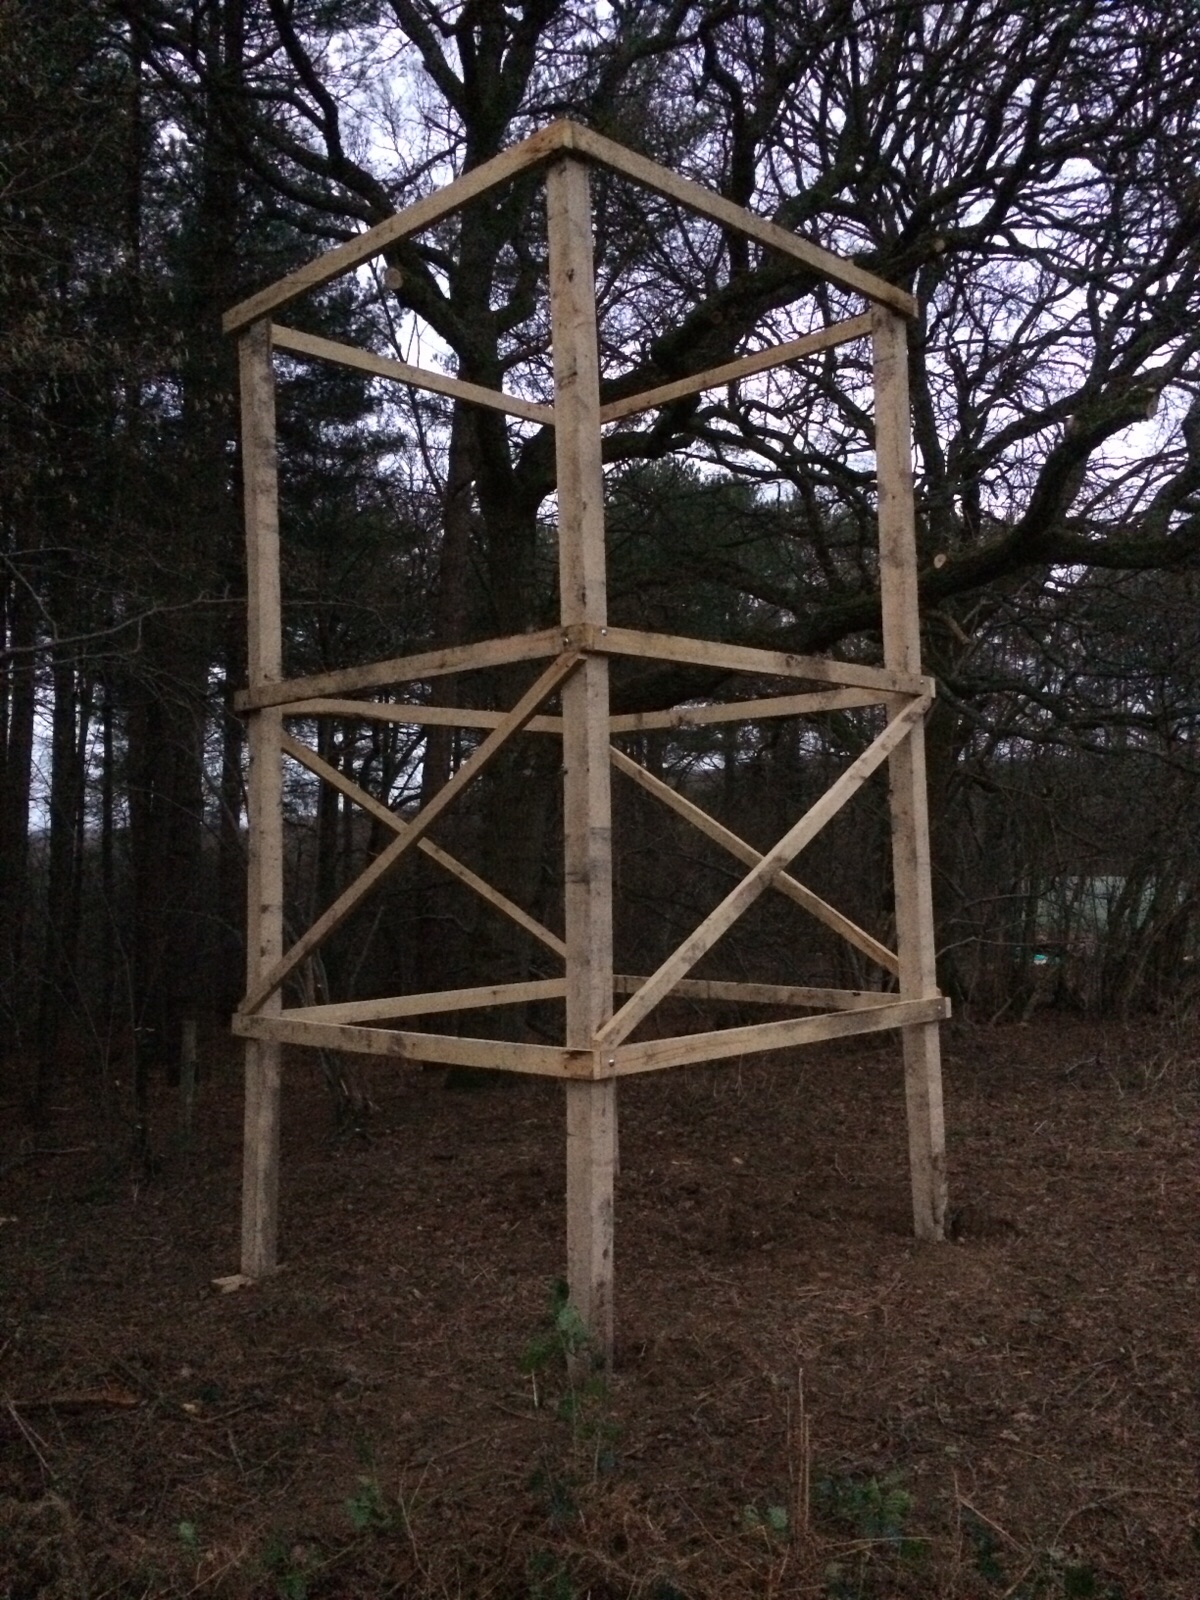
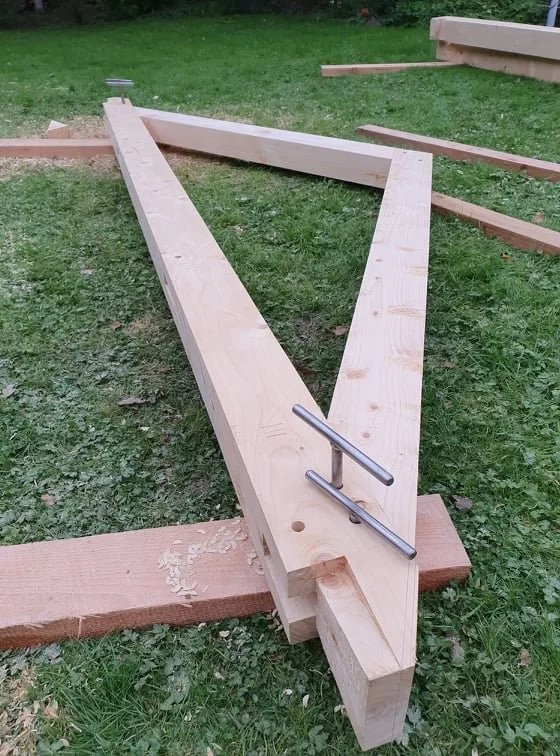
I like to use traditional joinery methods in the construction of the small timber frames that I build. Utilising the English tying joint, which has been in use since at least the 17th century, to allow the connection of the top plates and tie beams all to happen in one corner. It relies on 2 mortise and tenons on a Jowl post along with a dovetailed lap joint. Its a shame such a beautiful piece of joinery can’t be seen once its all put together!

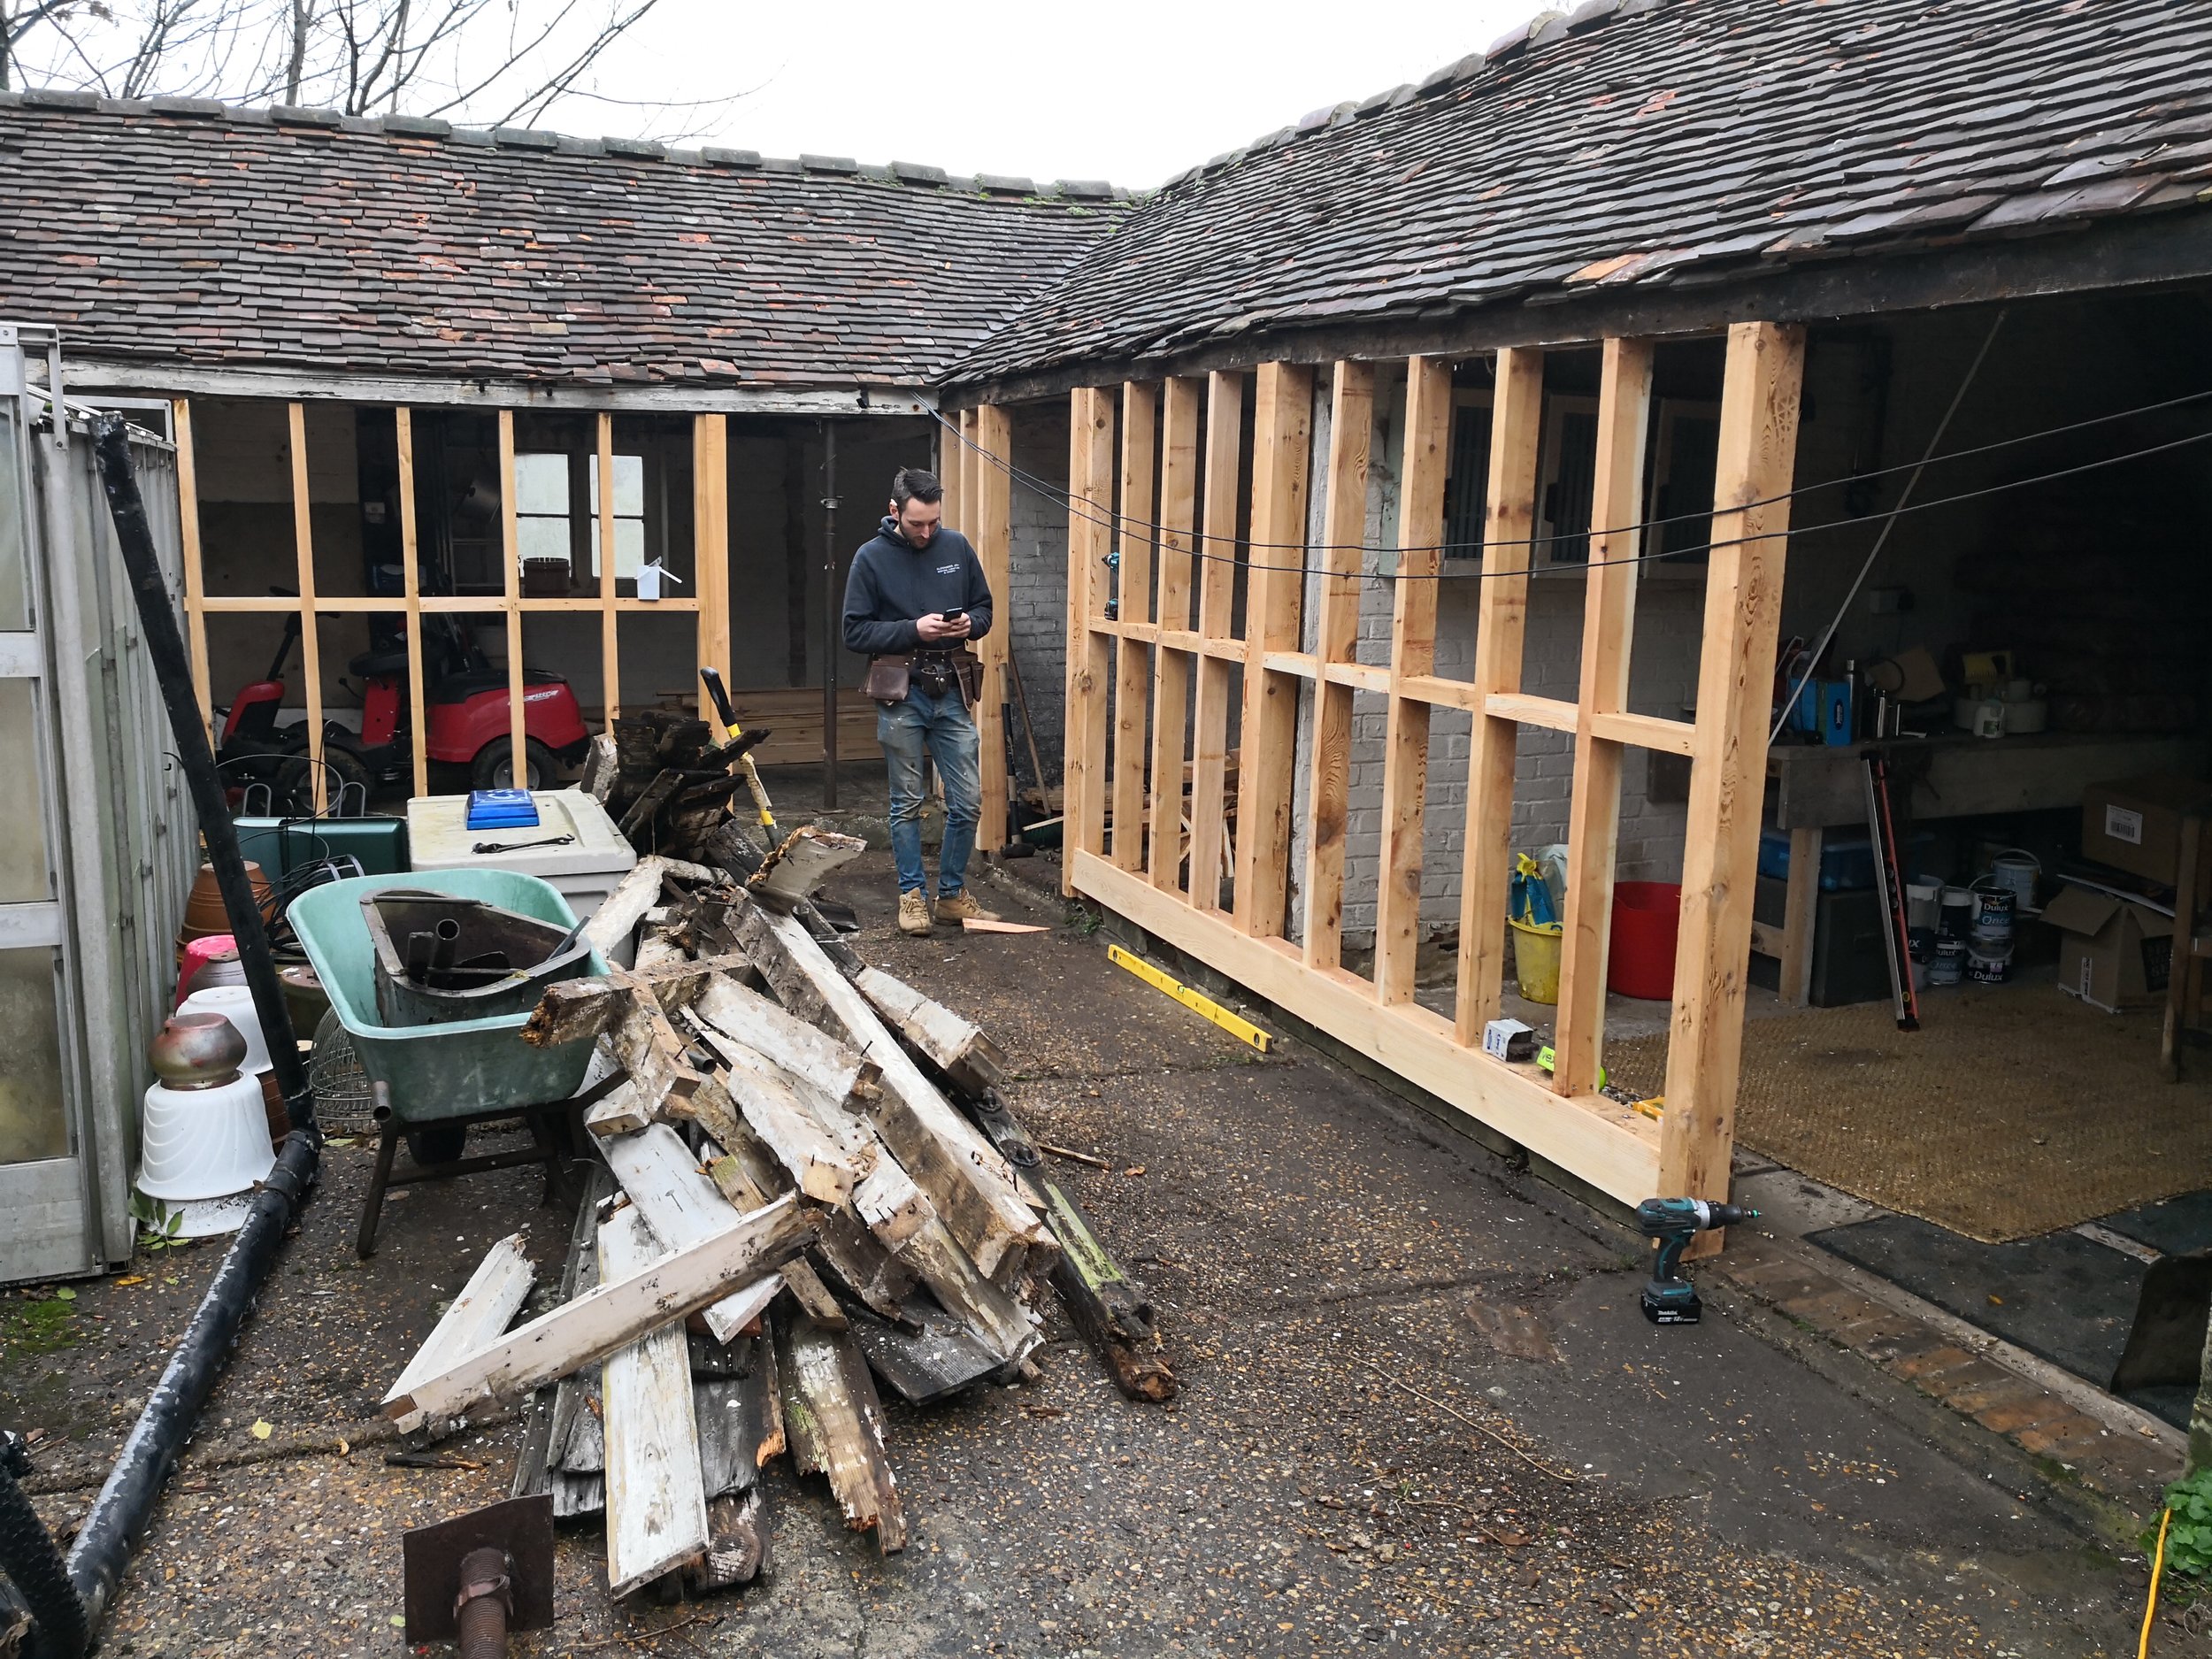
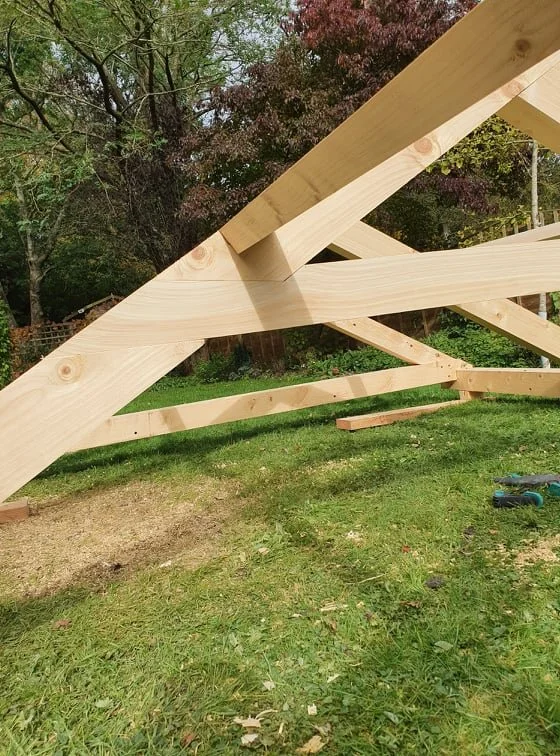
Timber framing has always been a fascination of mine since I was a child. It shows off the intricacy of furniture making, in regards to cutting tight joinery, but on a much larger scale. I am constantly inspired by the work I see other more advanced timber framers doing and I try and push myself further into it every time I get the chance to build something like this. Its really one of the most enjoyable types of work I do.

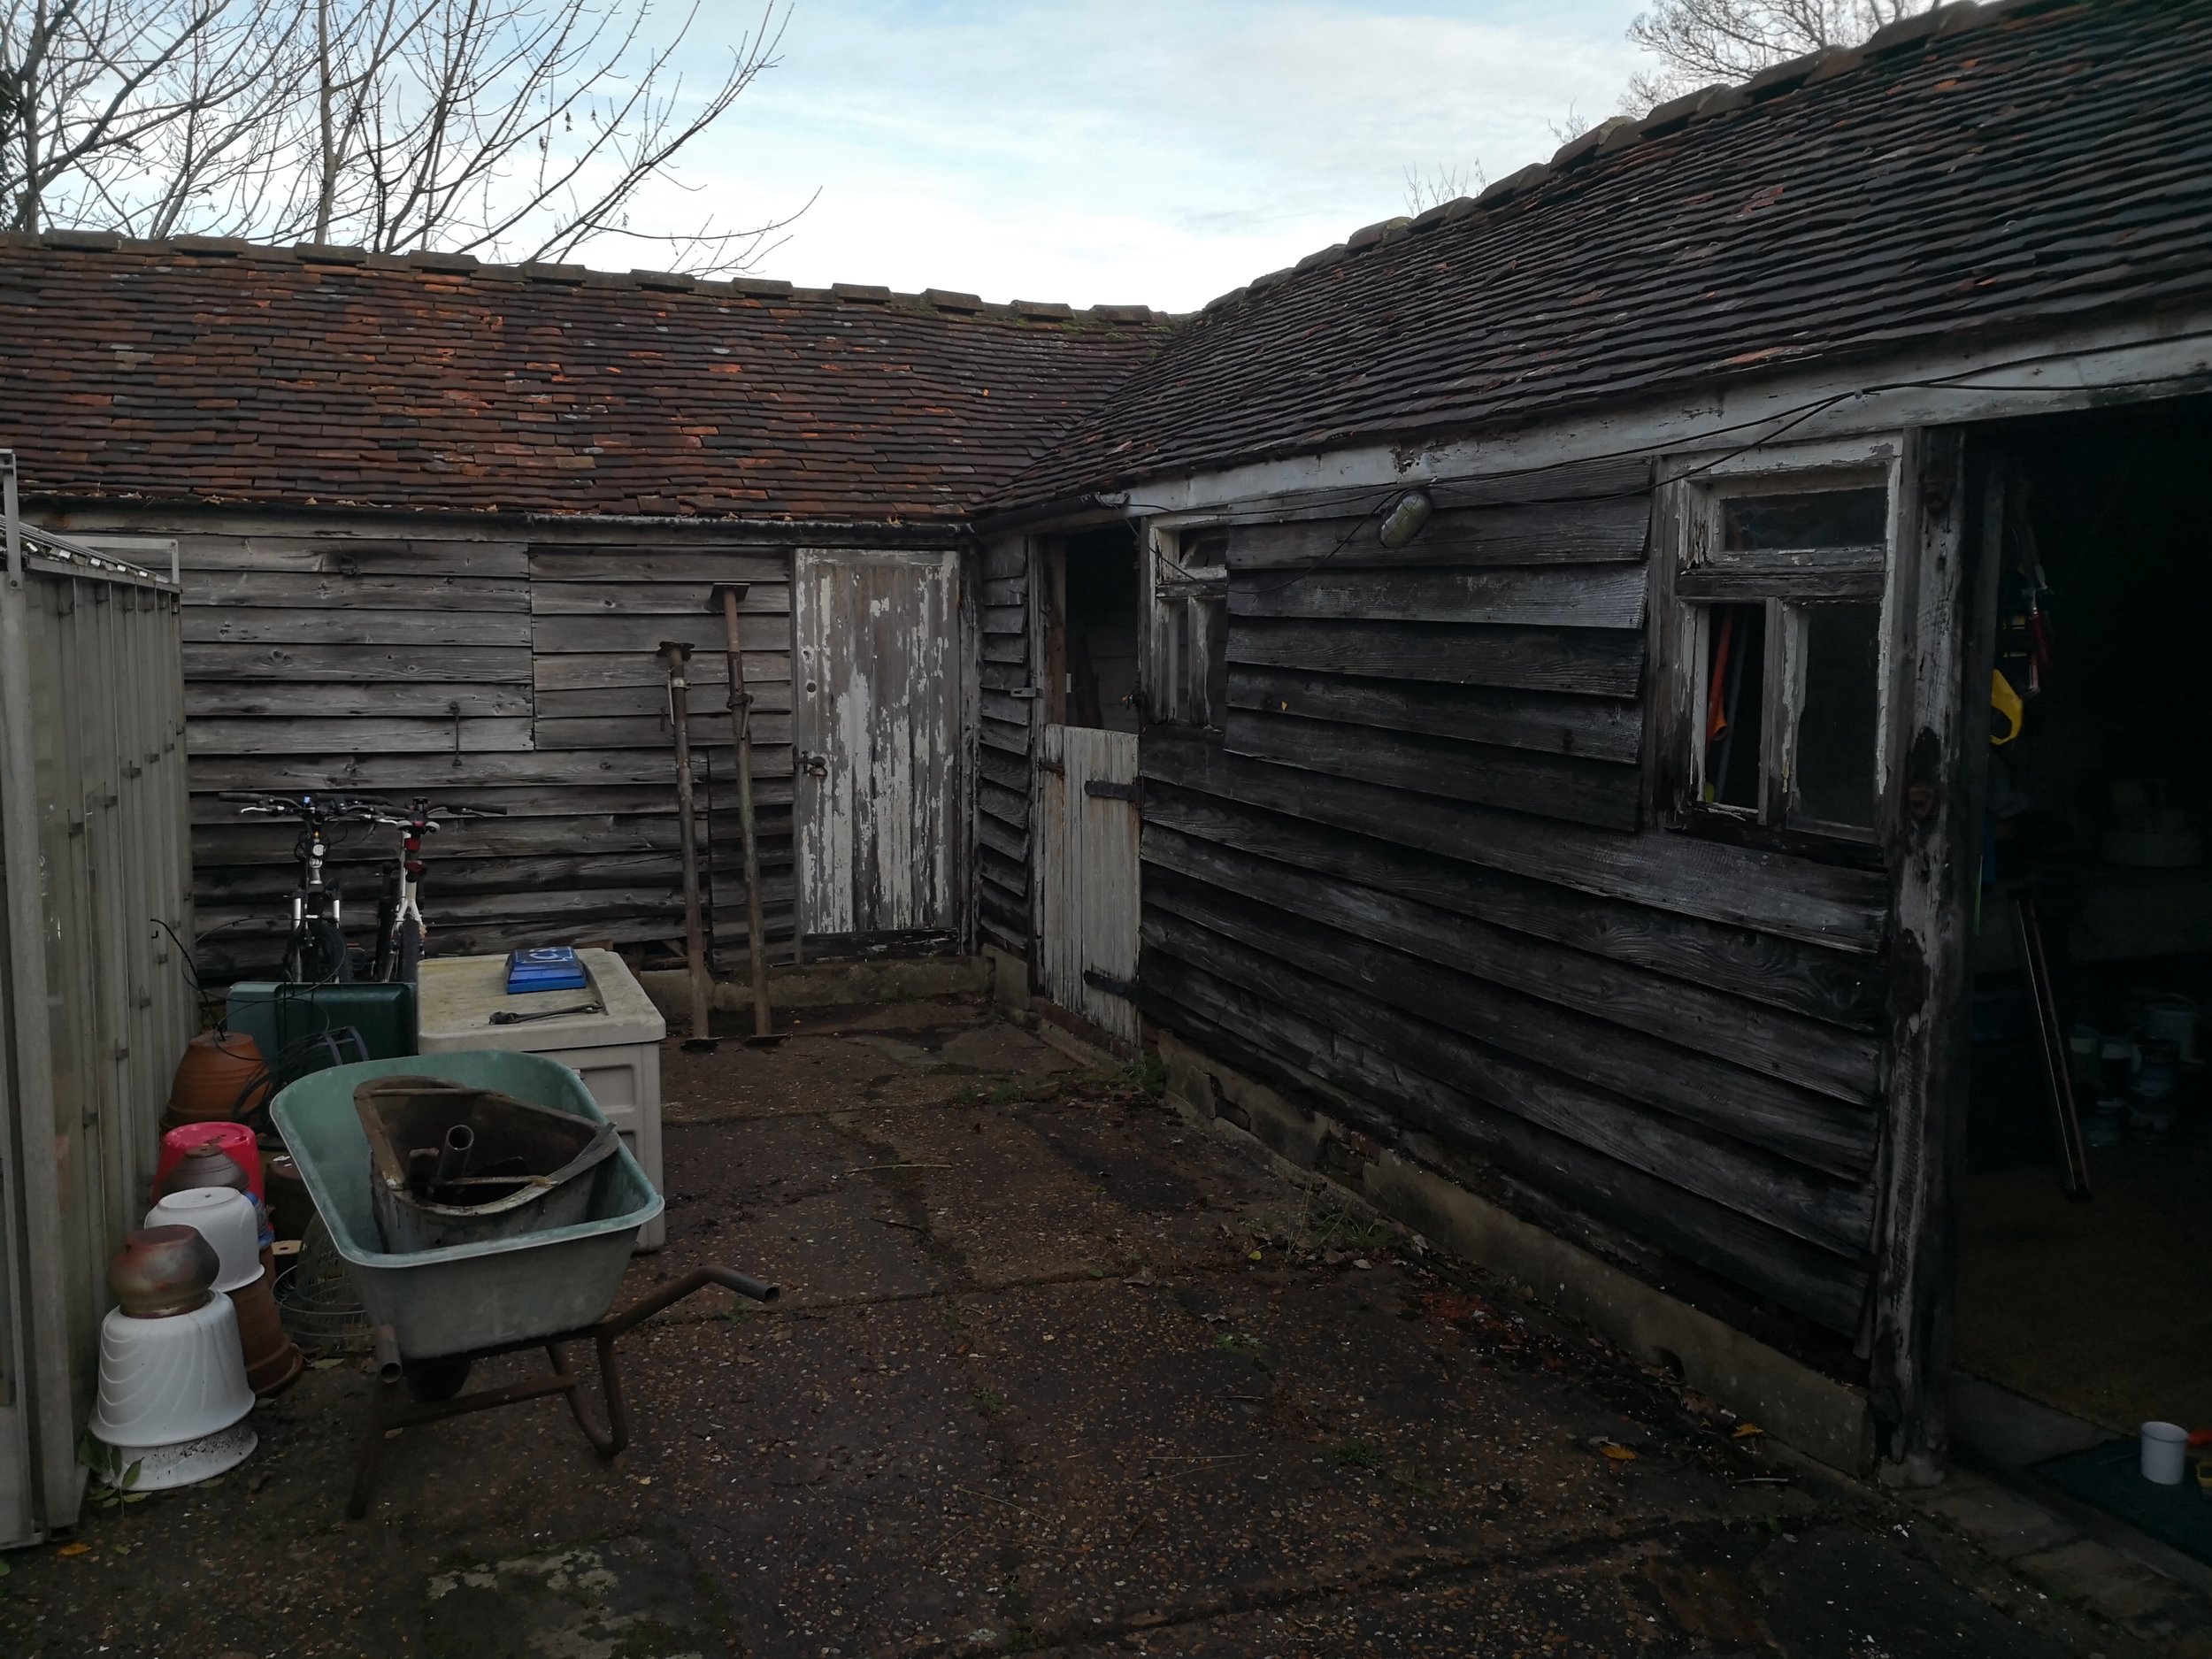
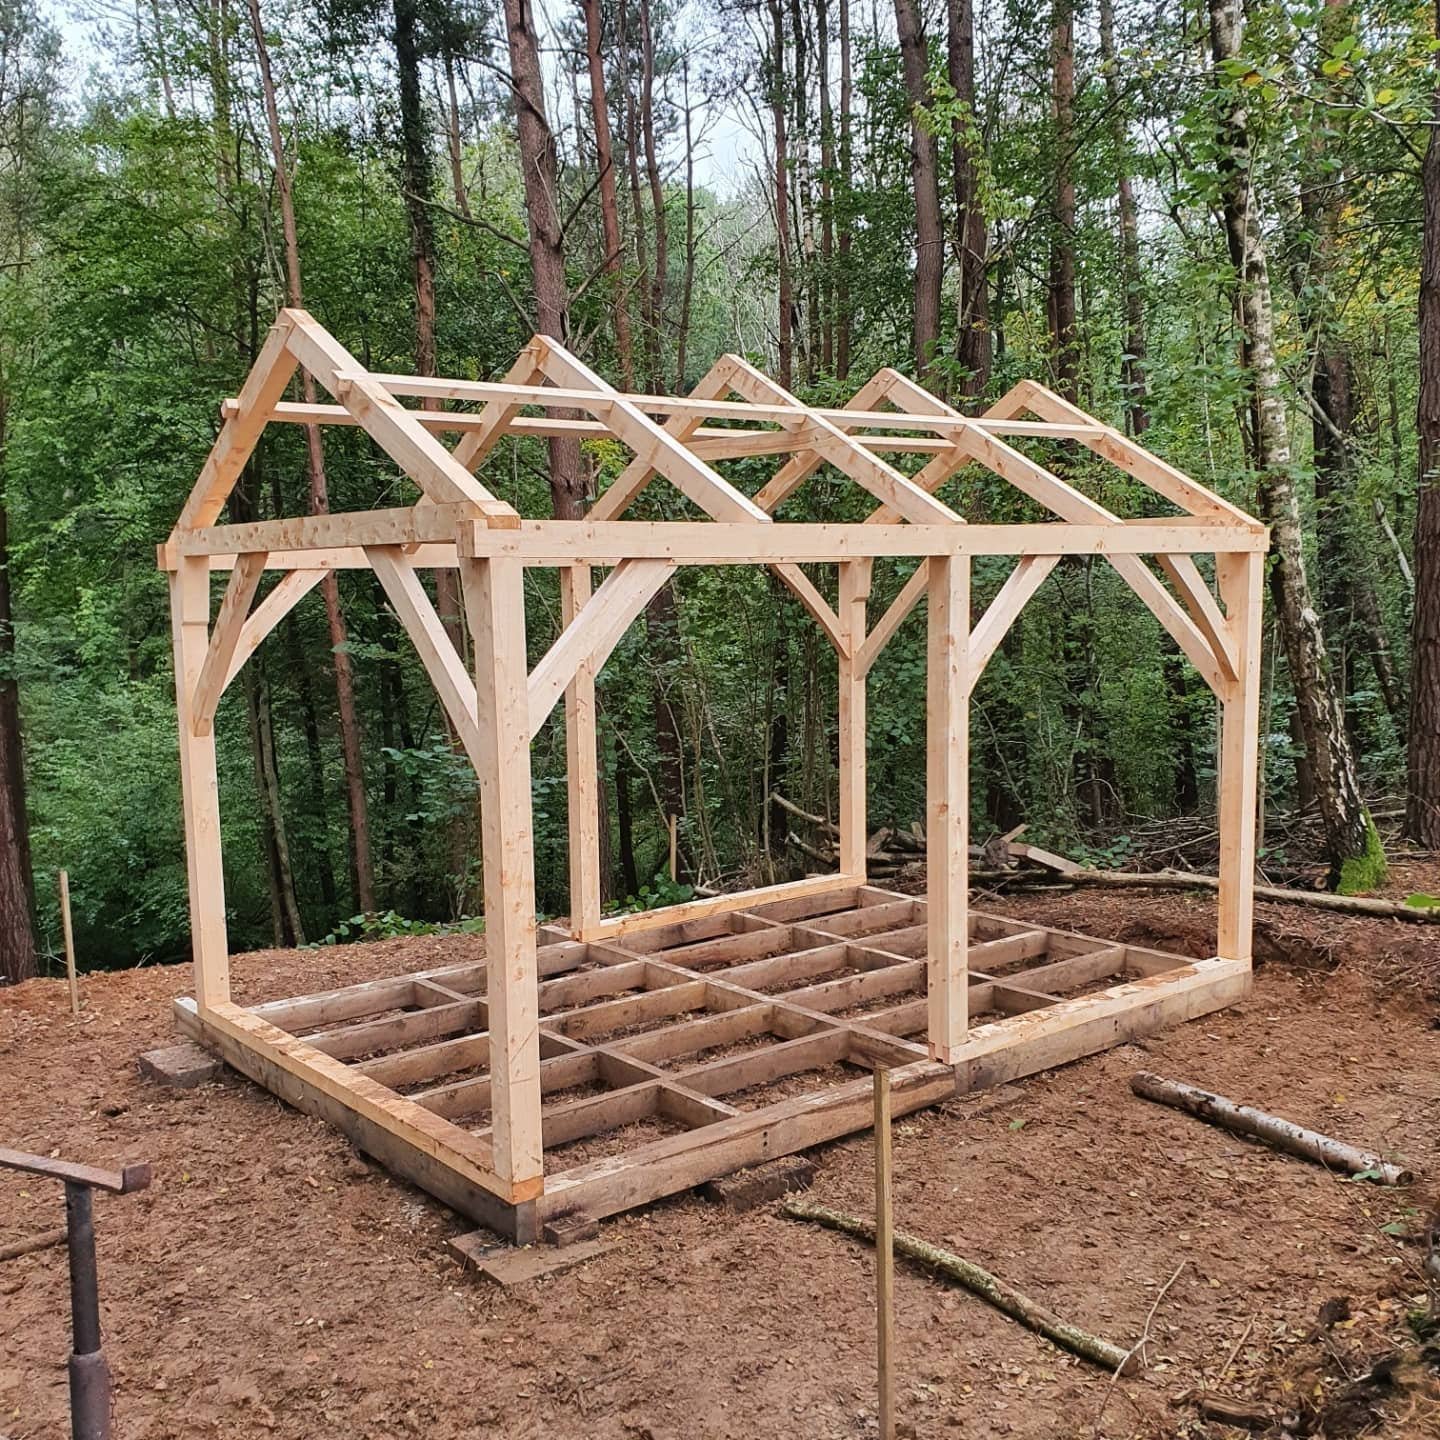
In part 2 there will be a large decking structure heading out into the woods and also verandas coming of each side of the roof.

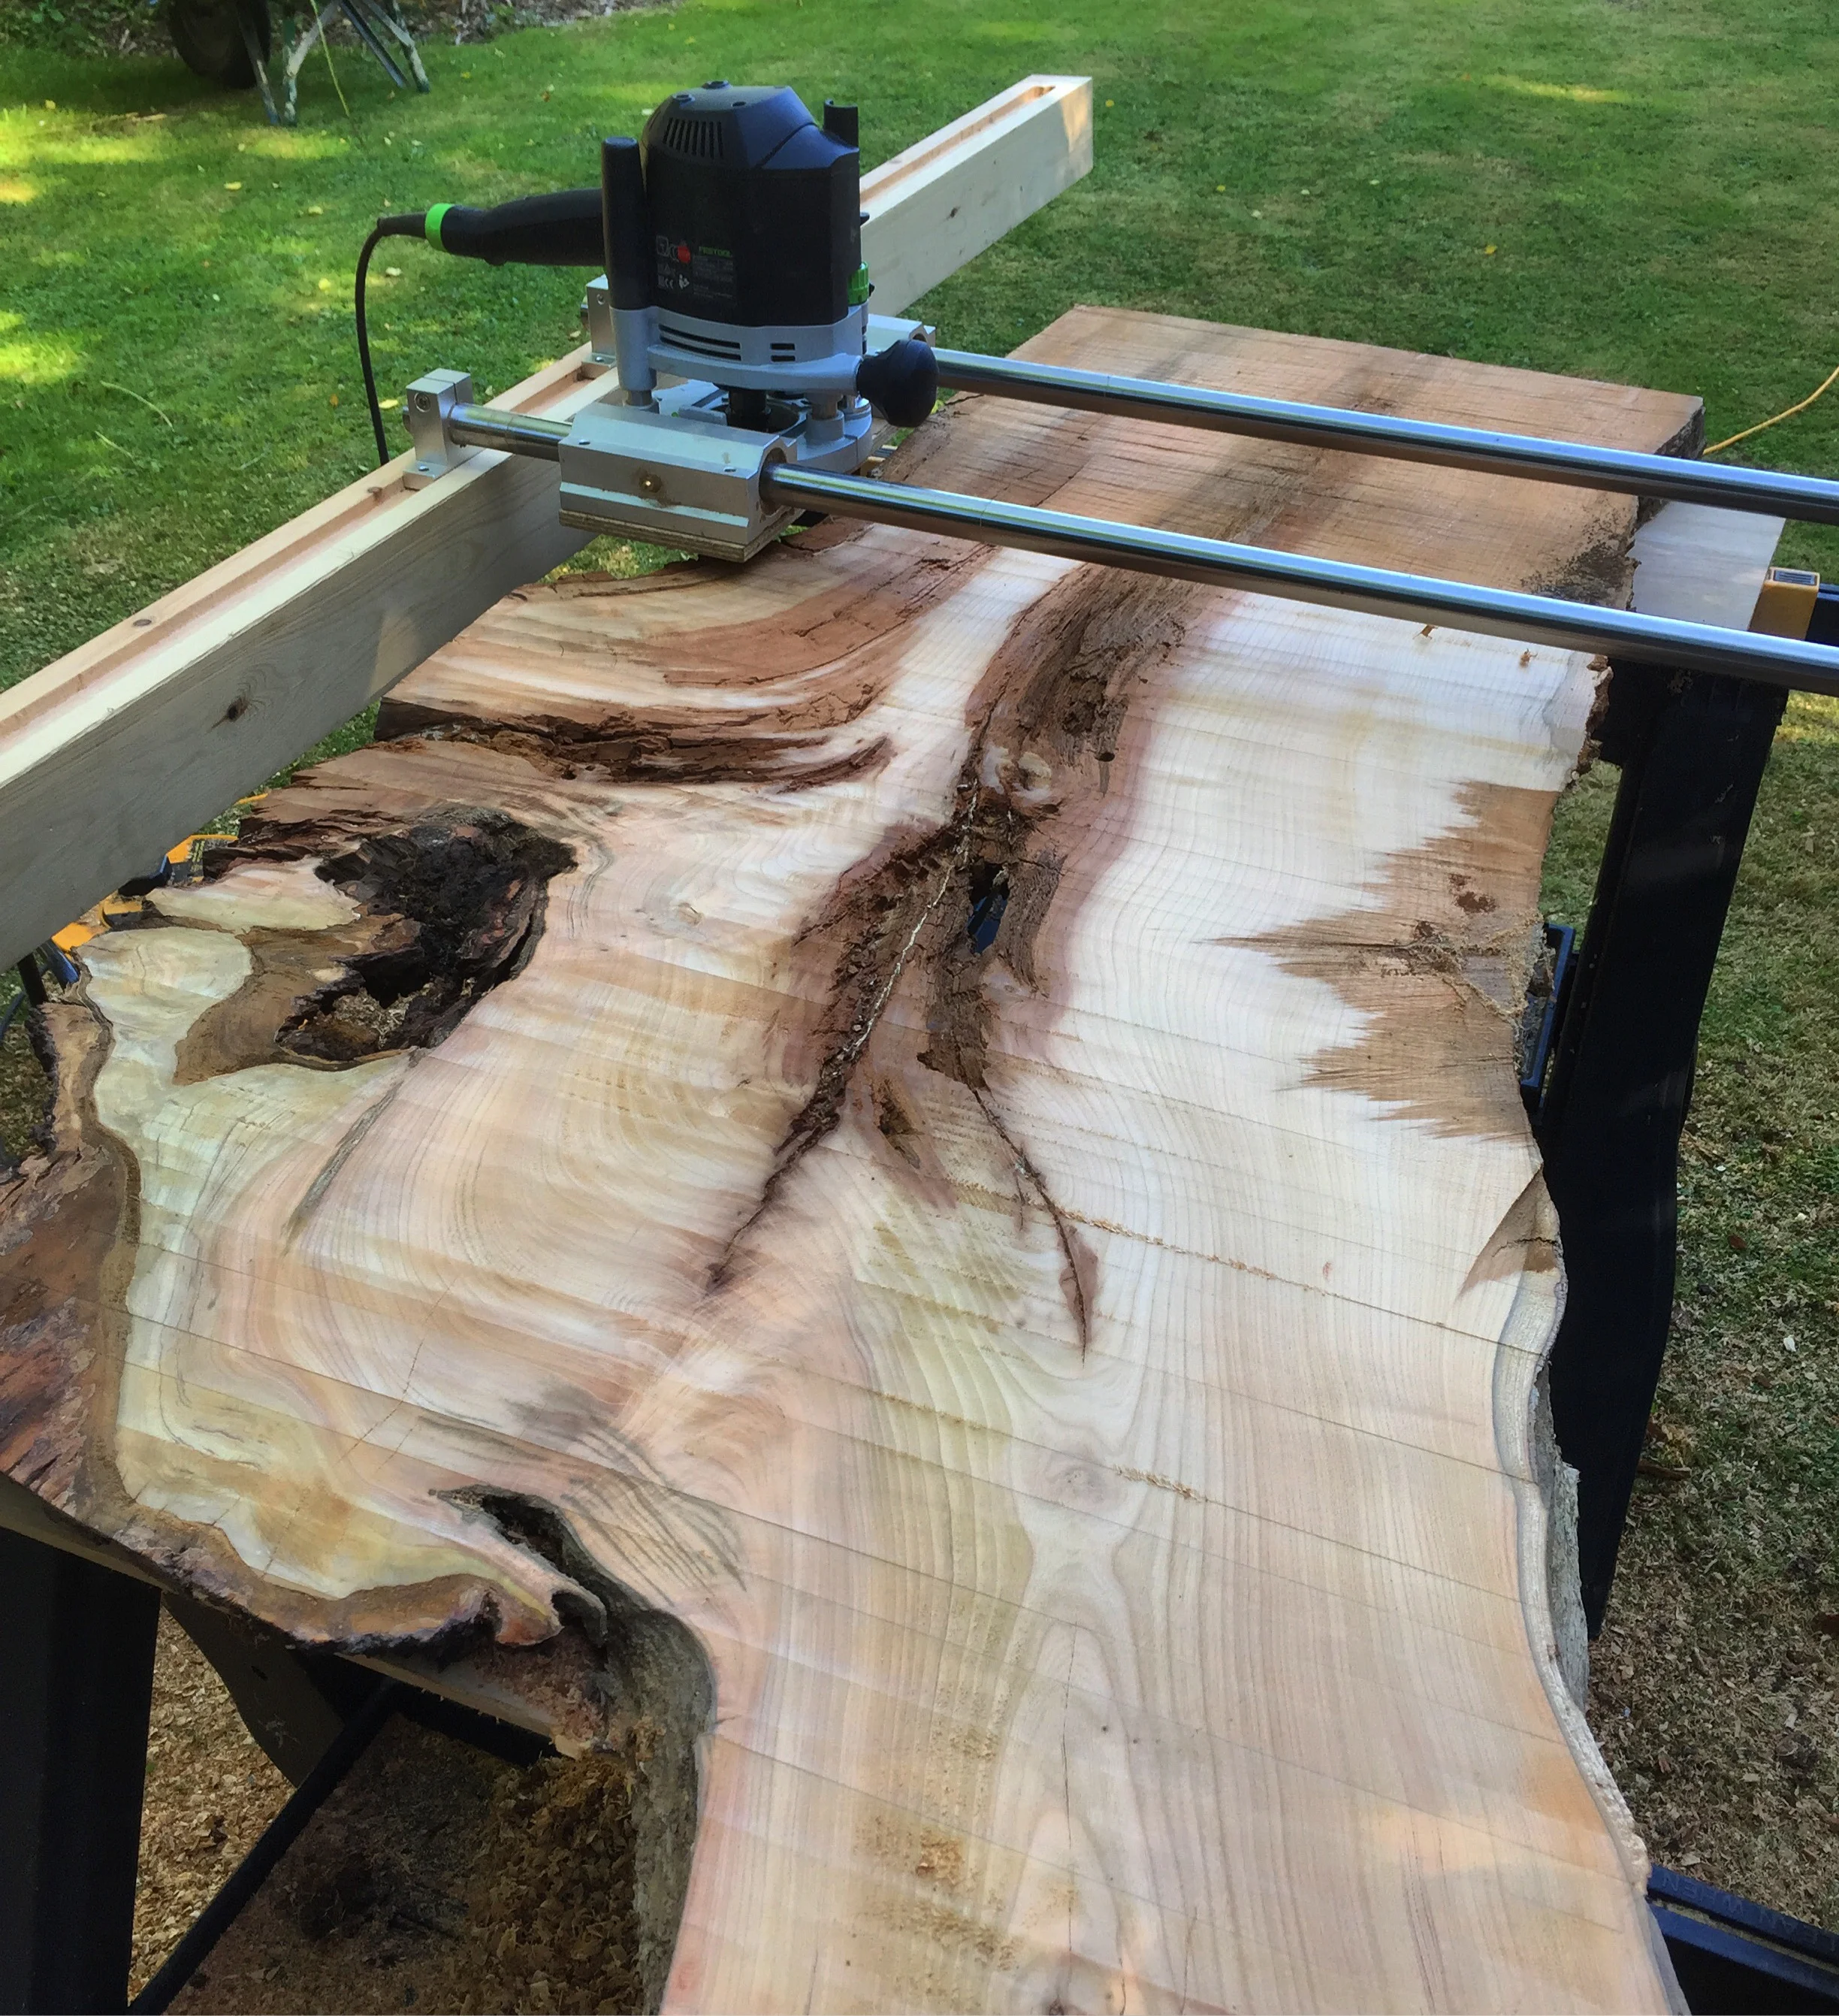
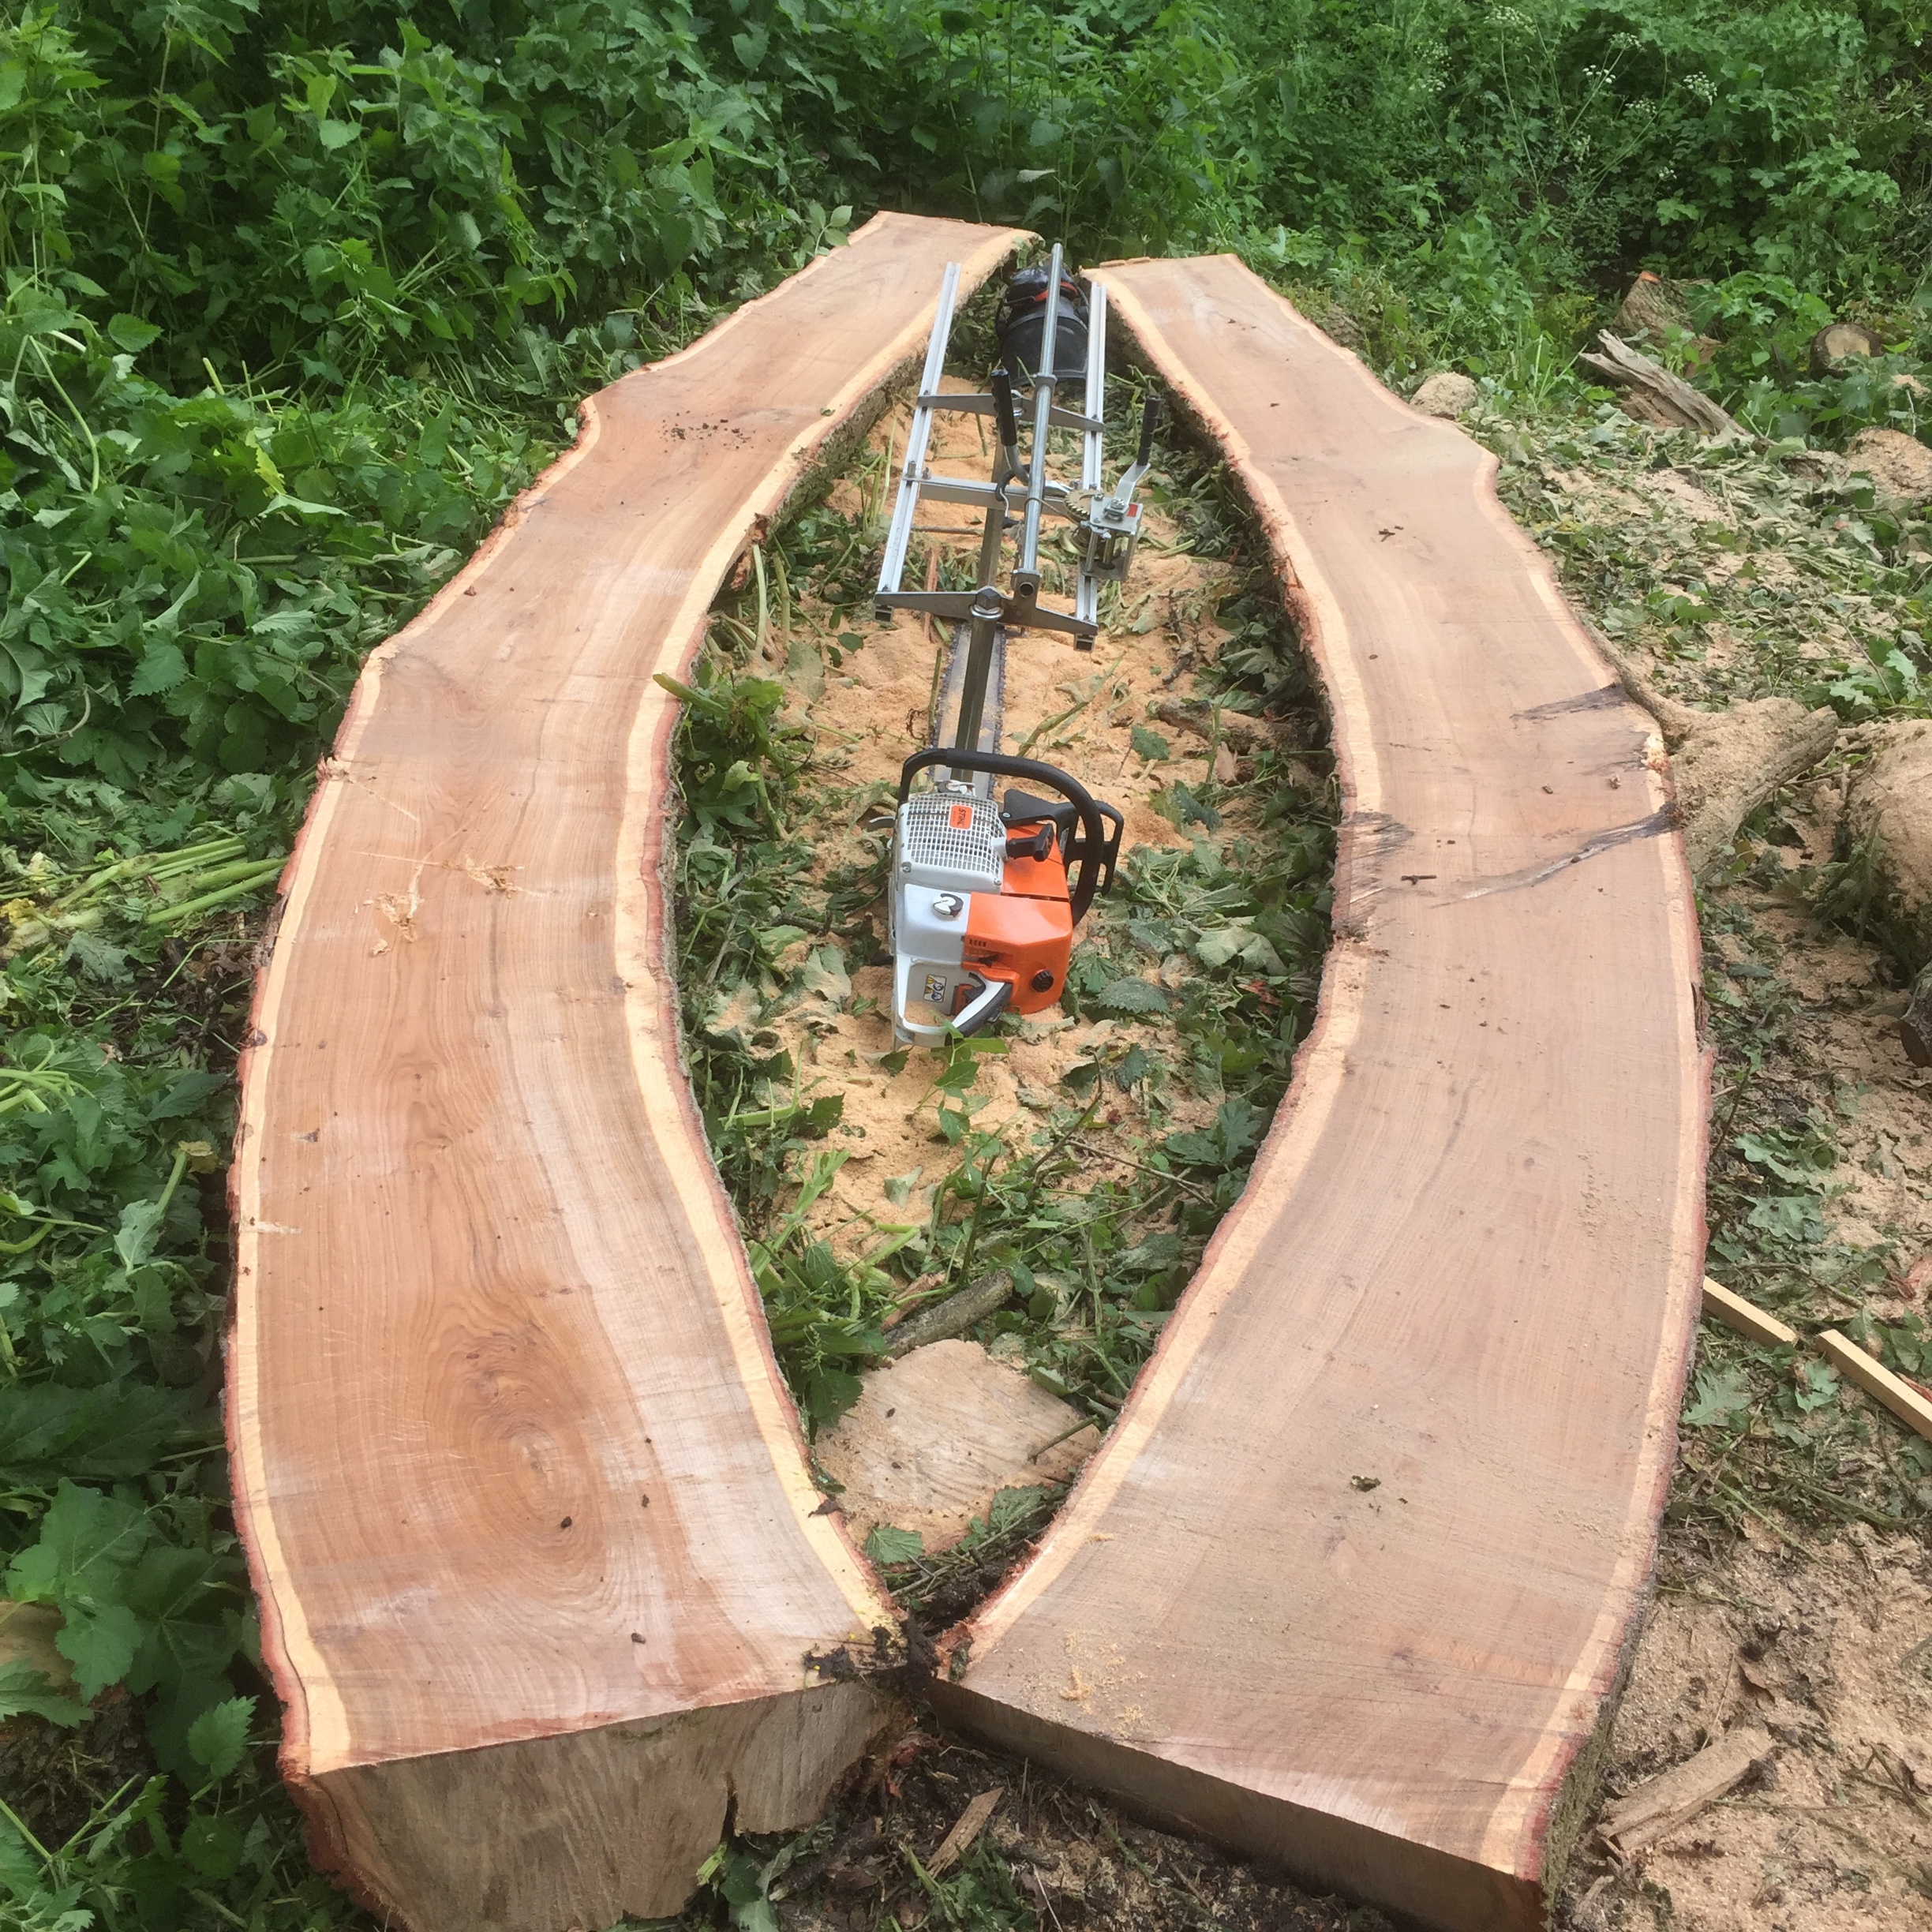
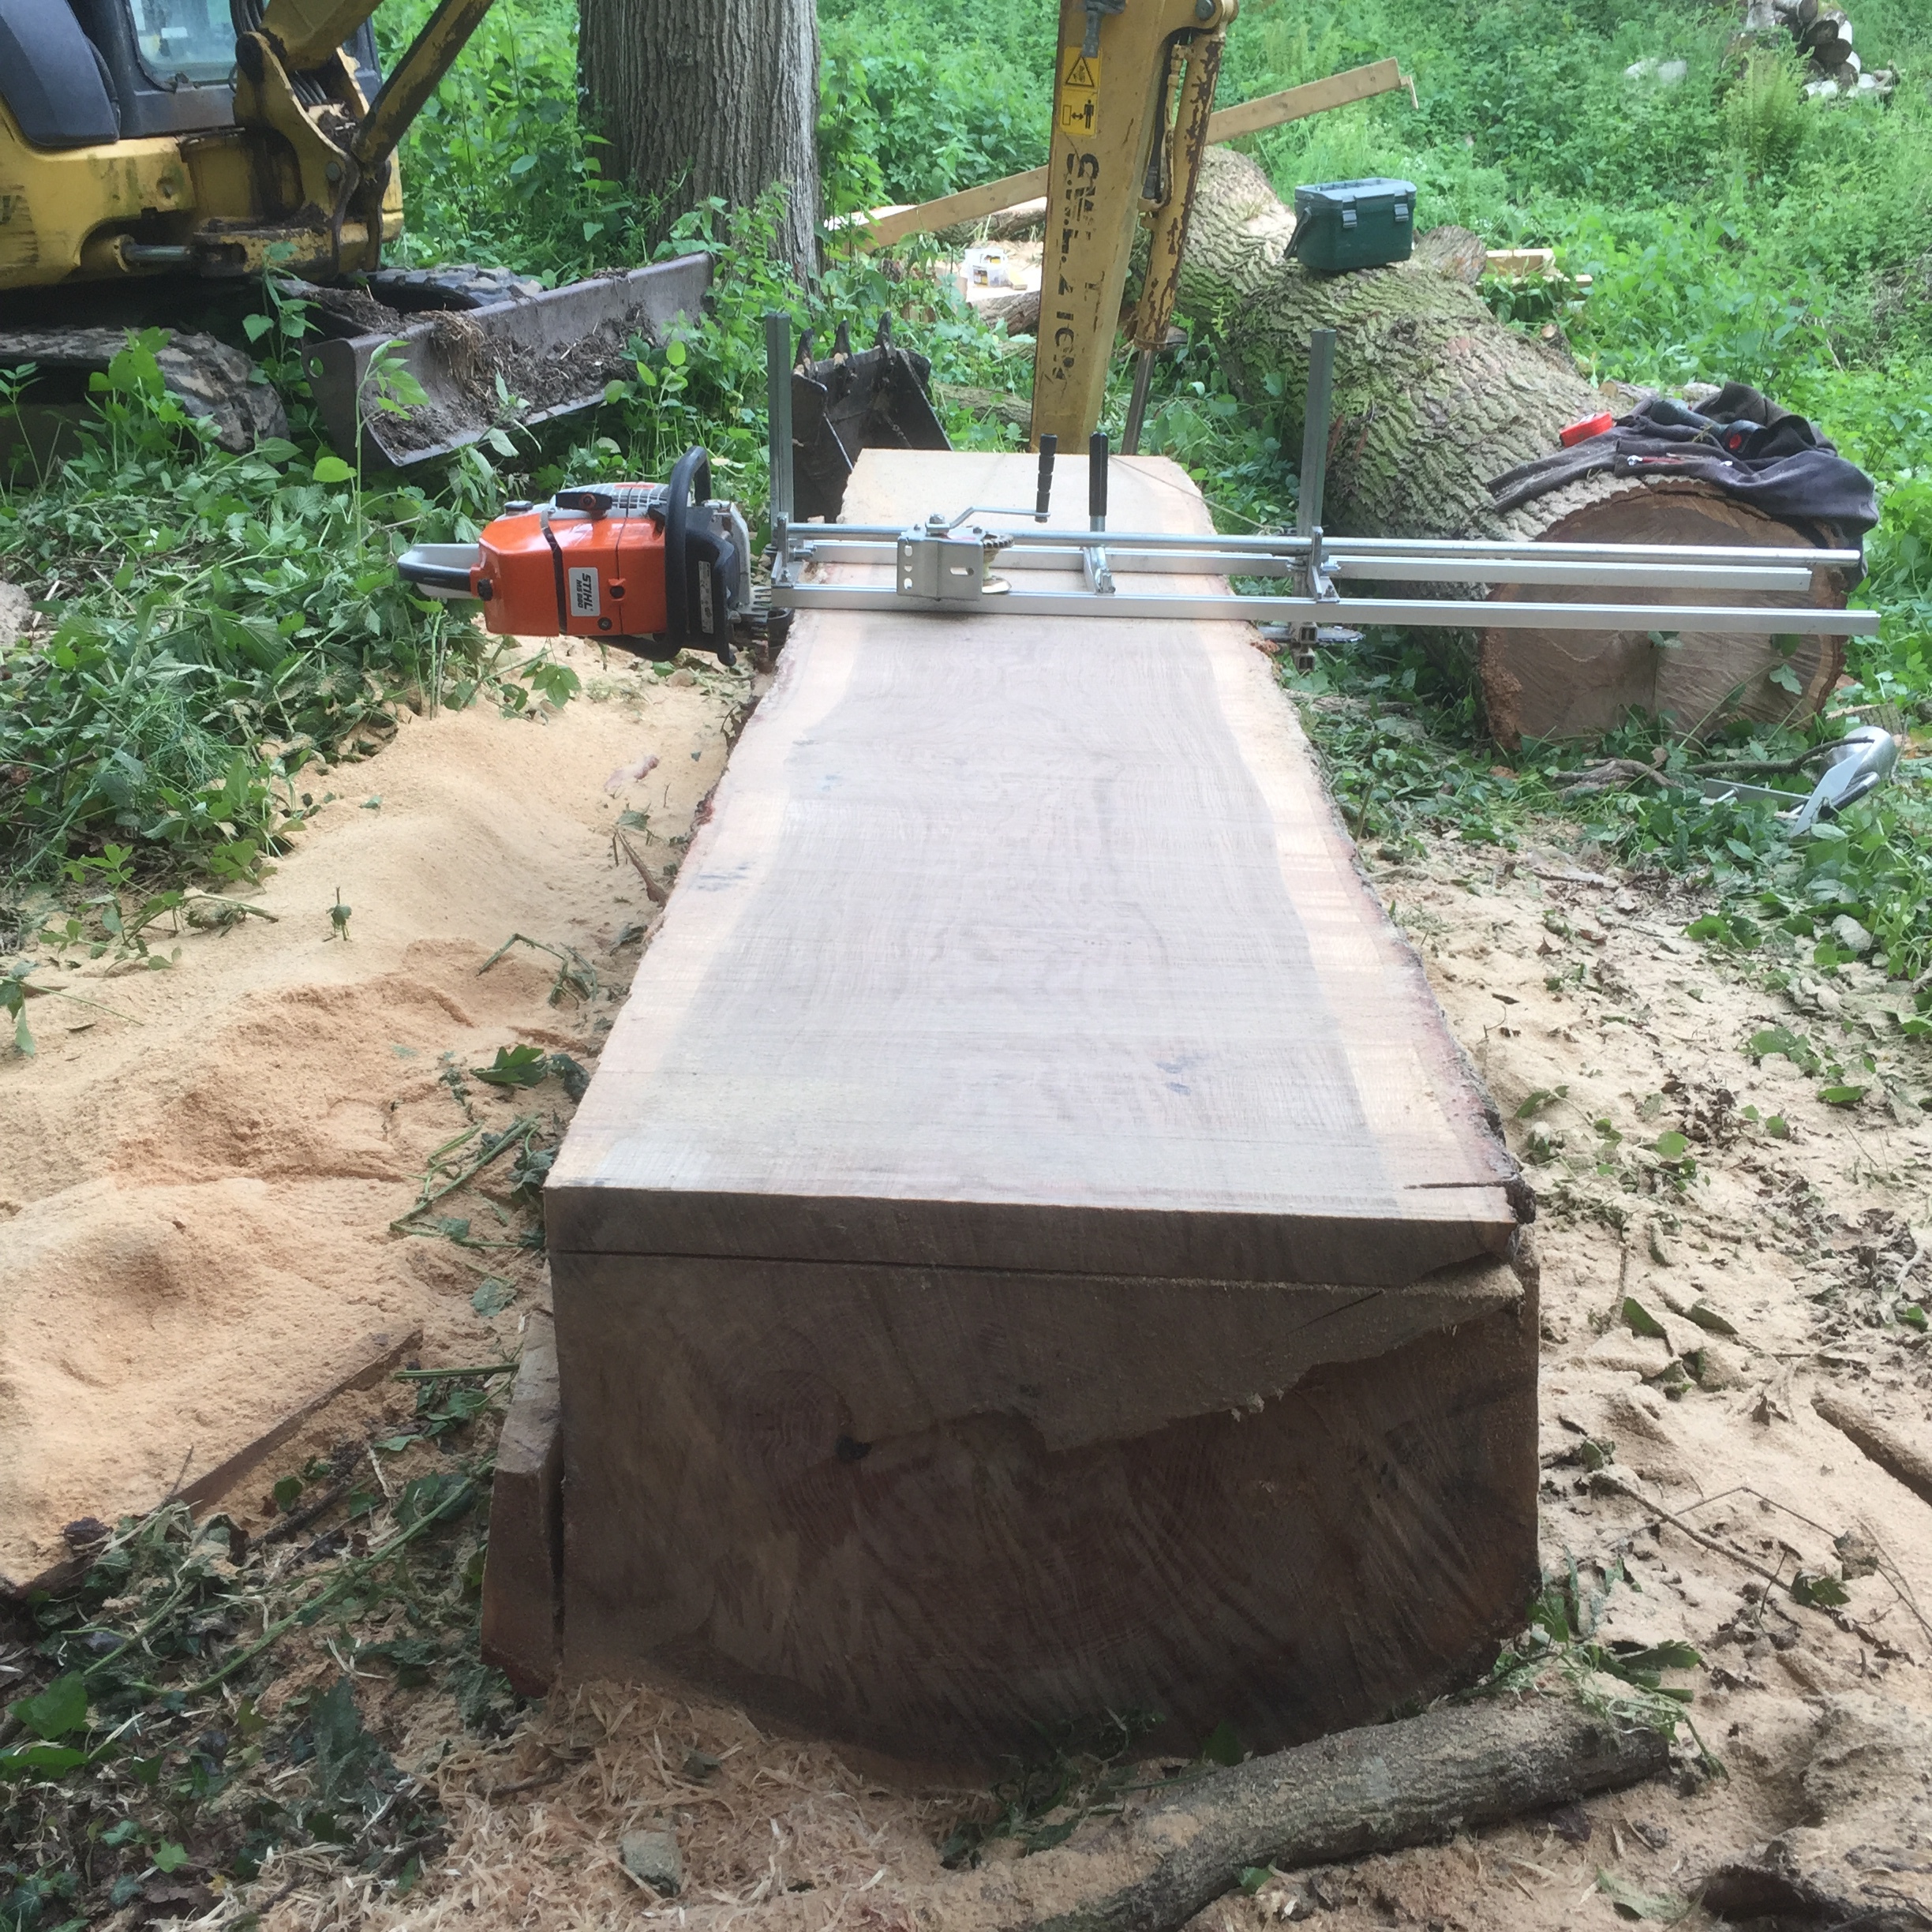
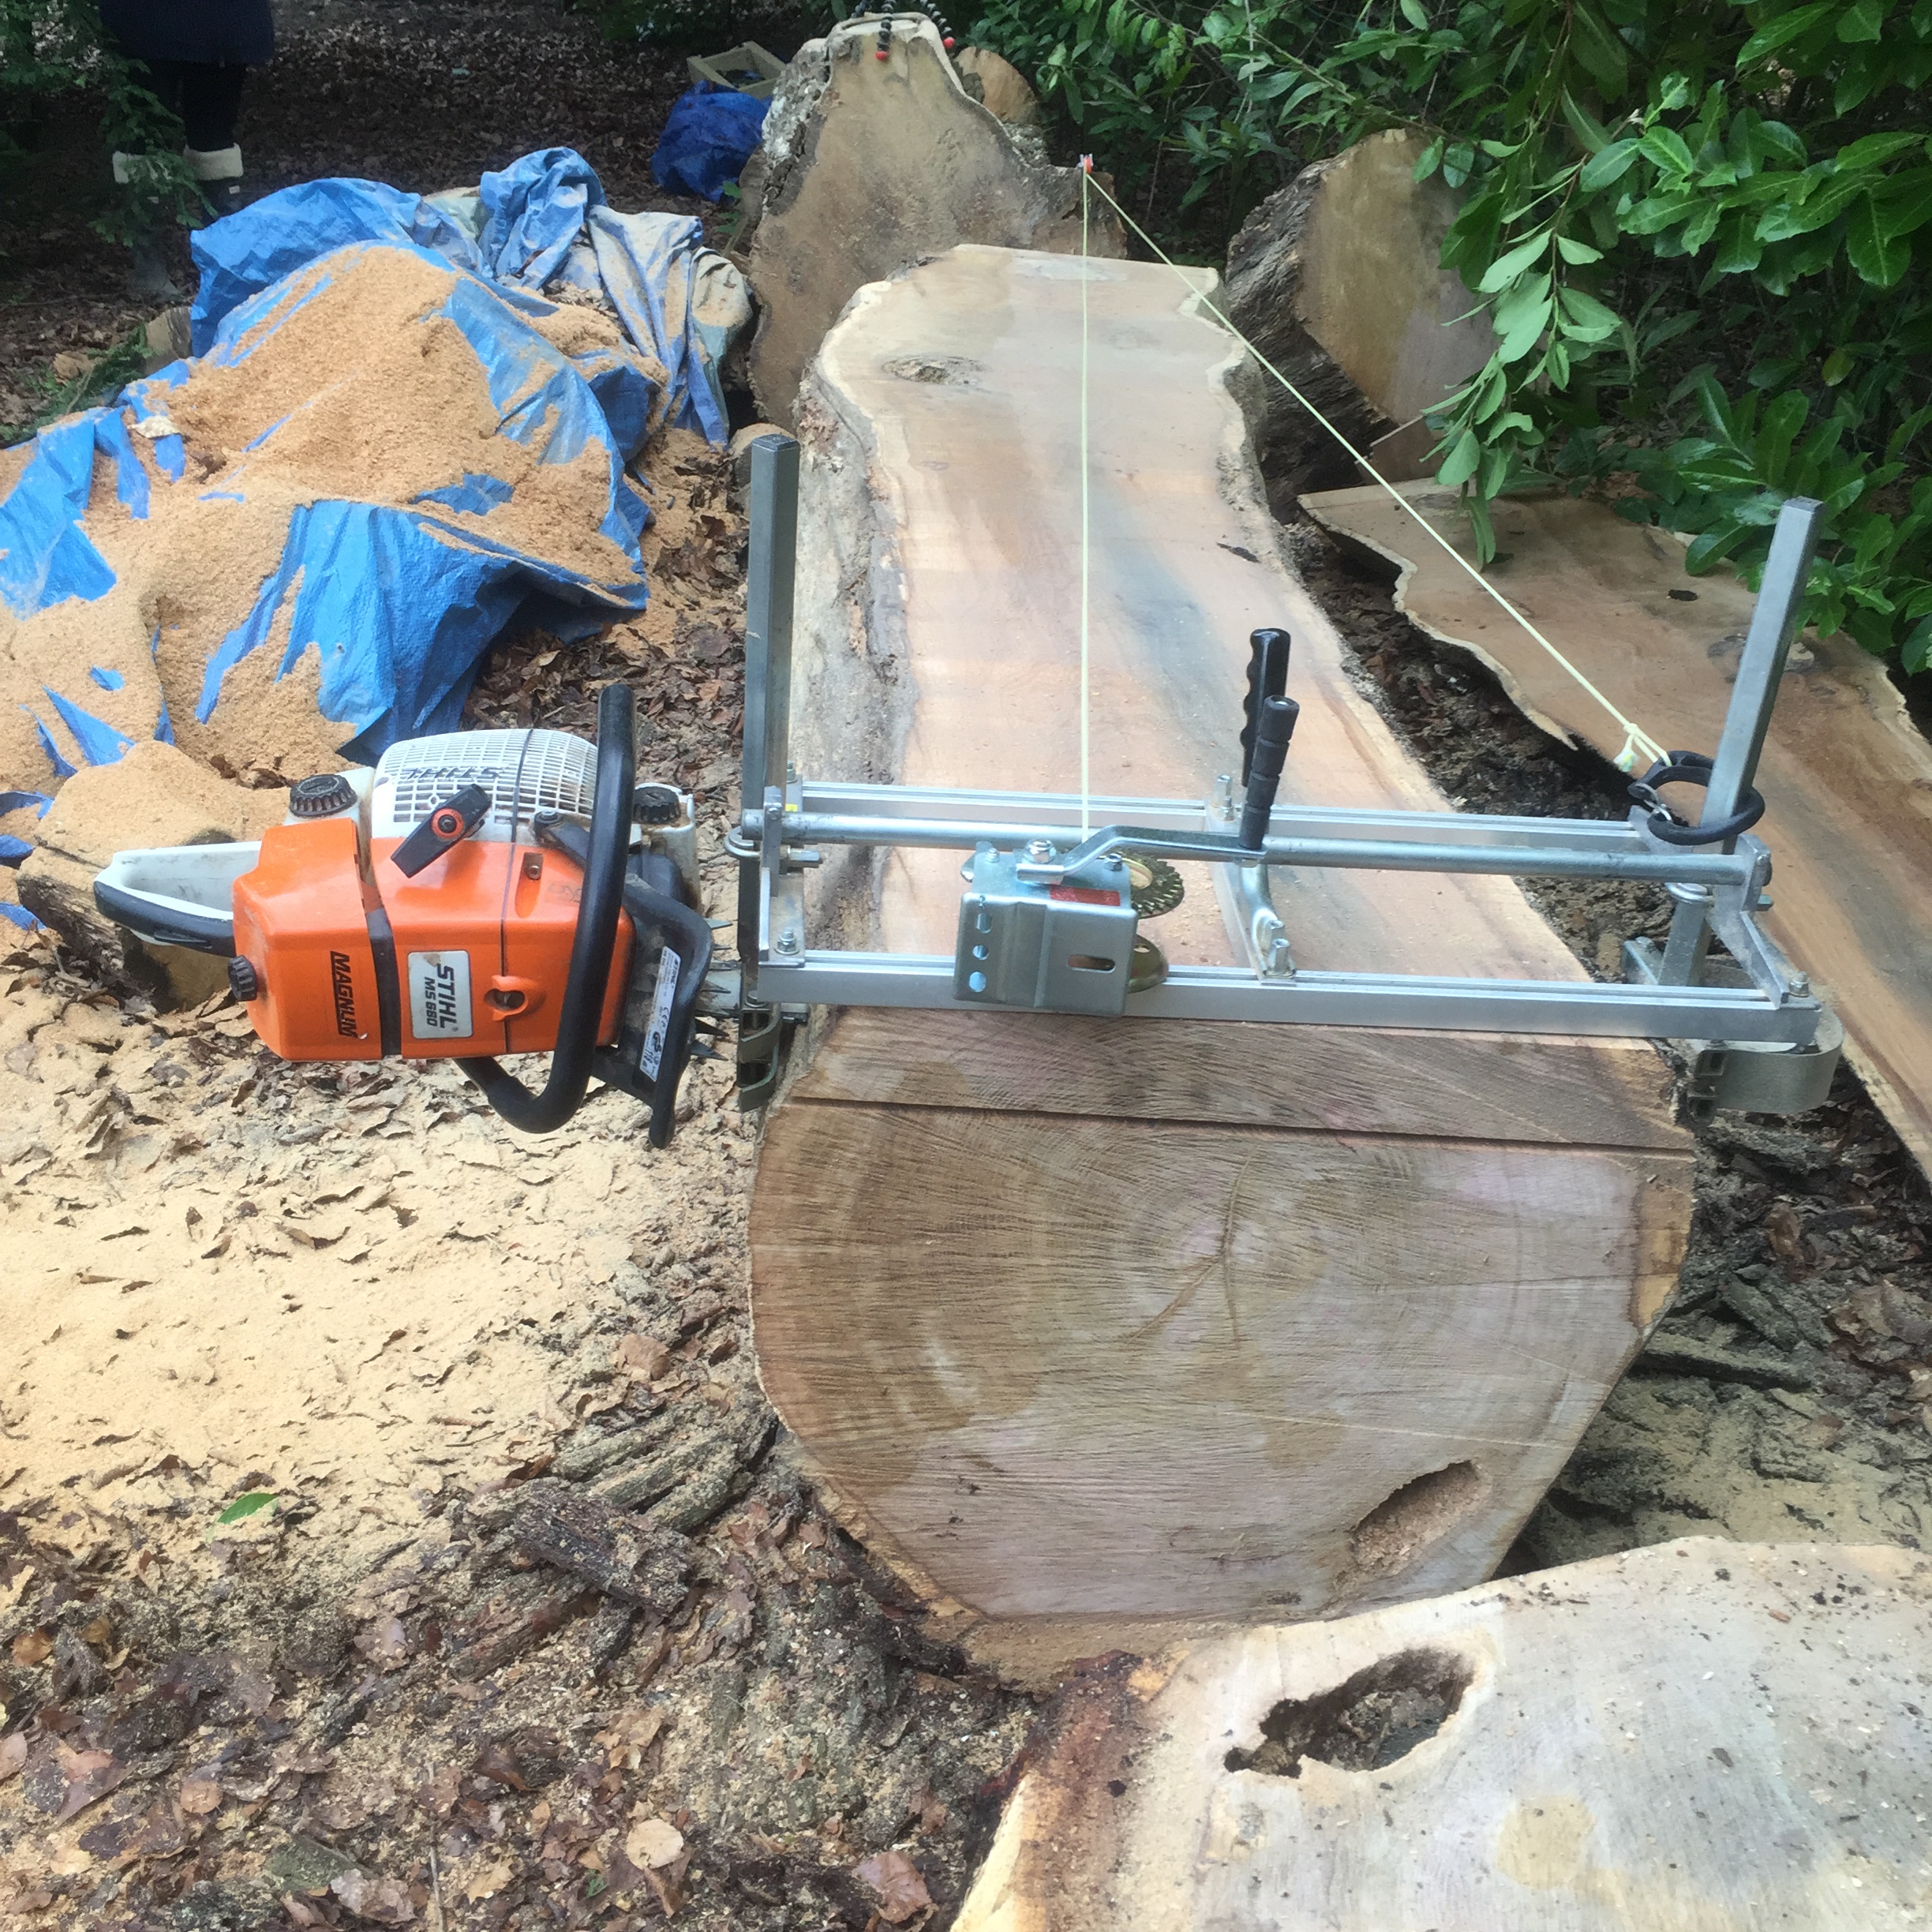
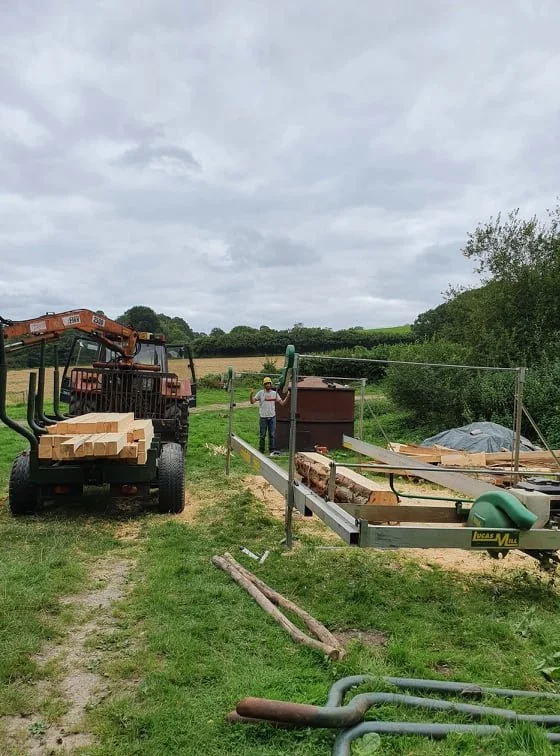
An opportunity came up to salvage a trailer load of good quality cypress logs from a woodland renaturalisation project happening in Heathfield and undertaken by my colleague and good friend Harry Aspinall (www.arvoresarb.com) . All the trees had grown up in a forest setting so were clear of large knots low down in the stems and had at least 6m of straight timber. We saved the best of the logs from the biomass pile.

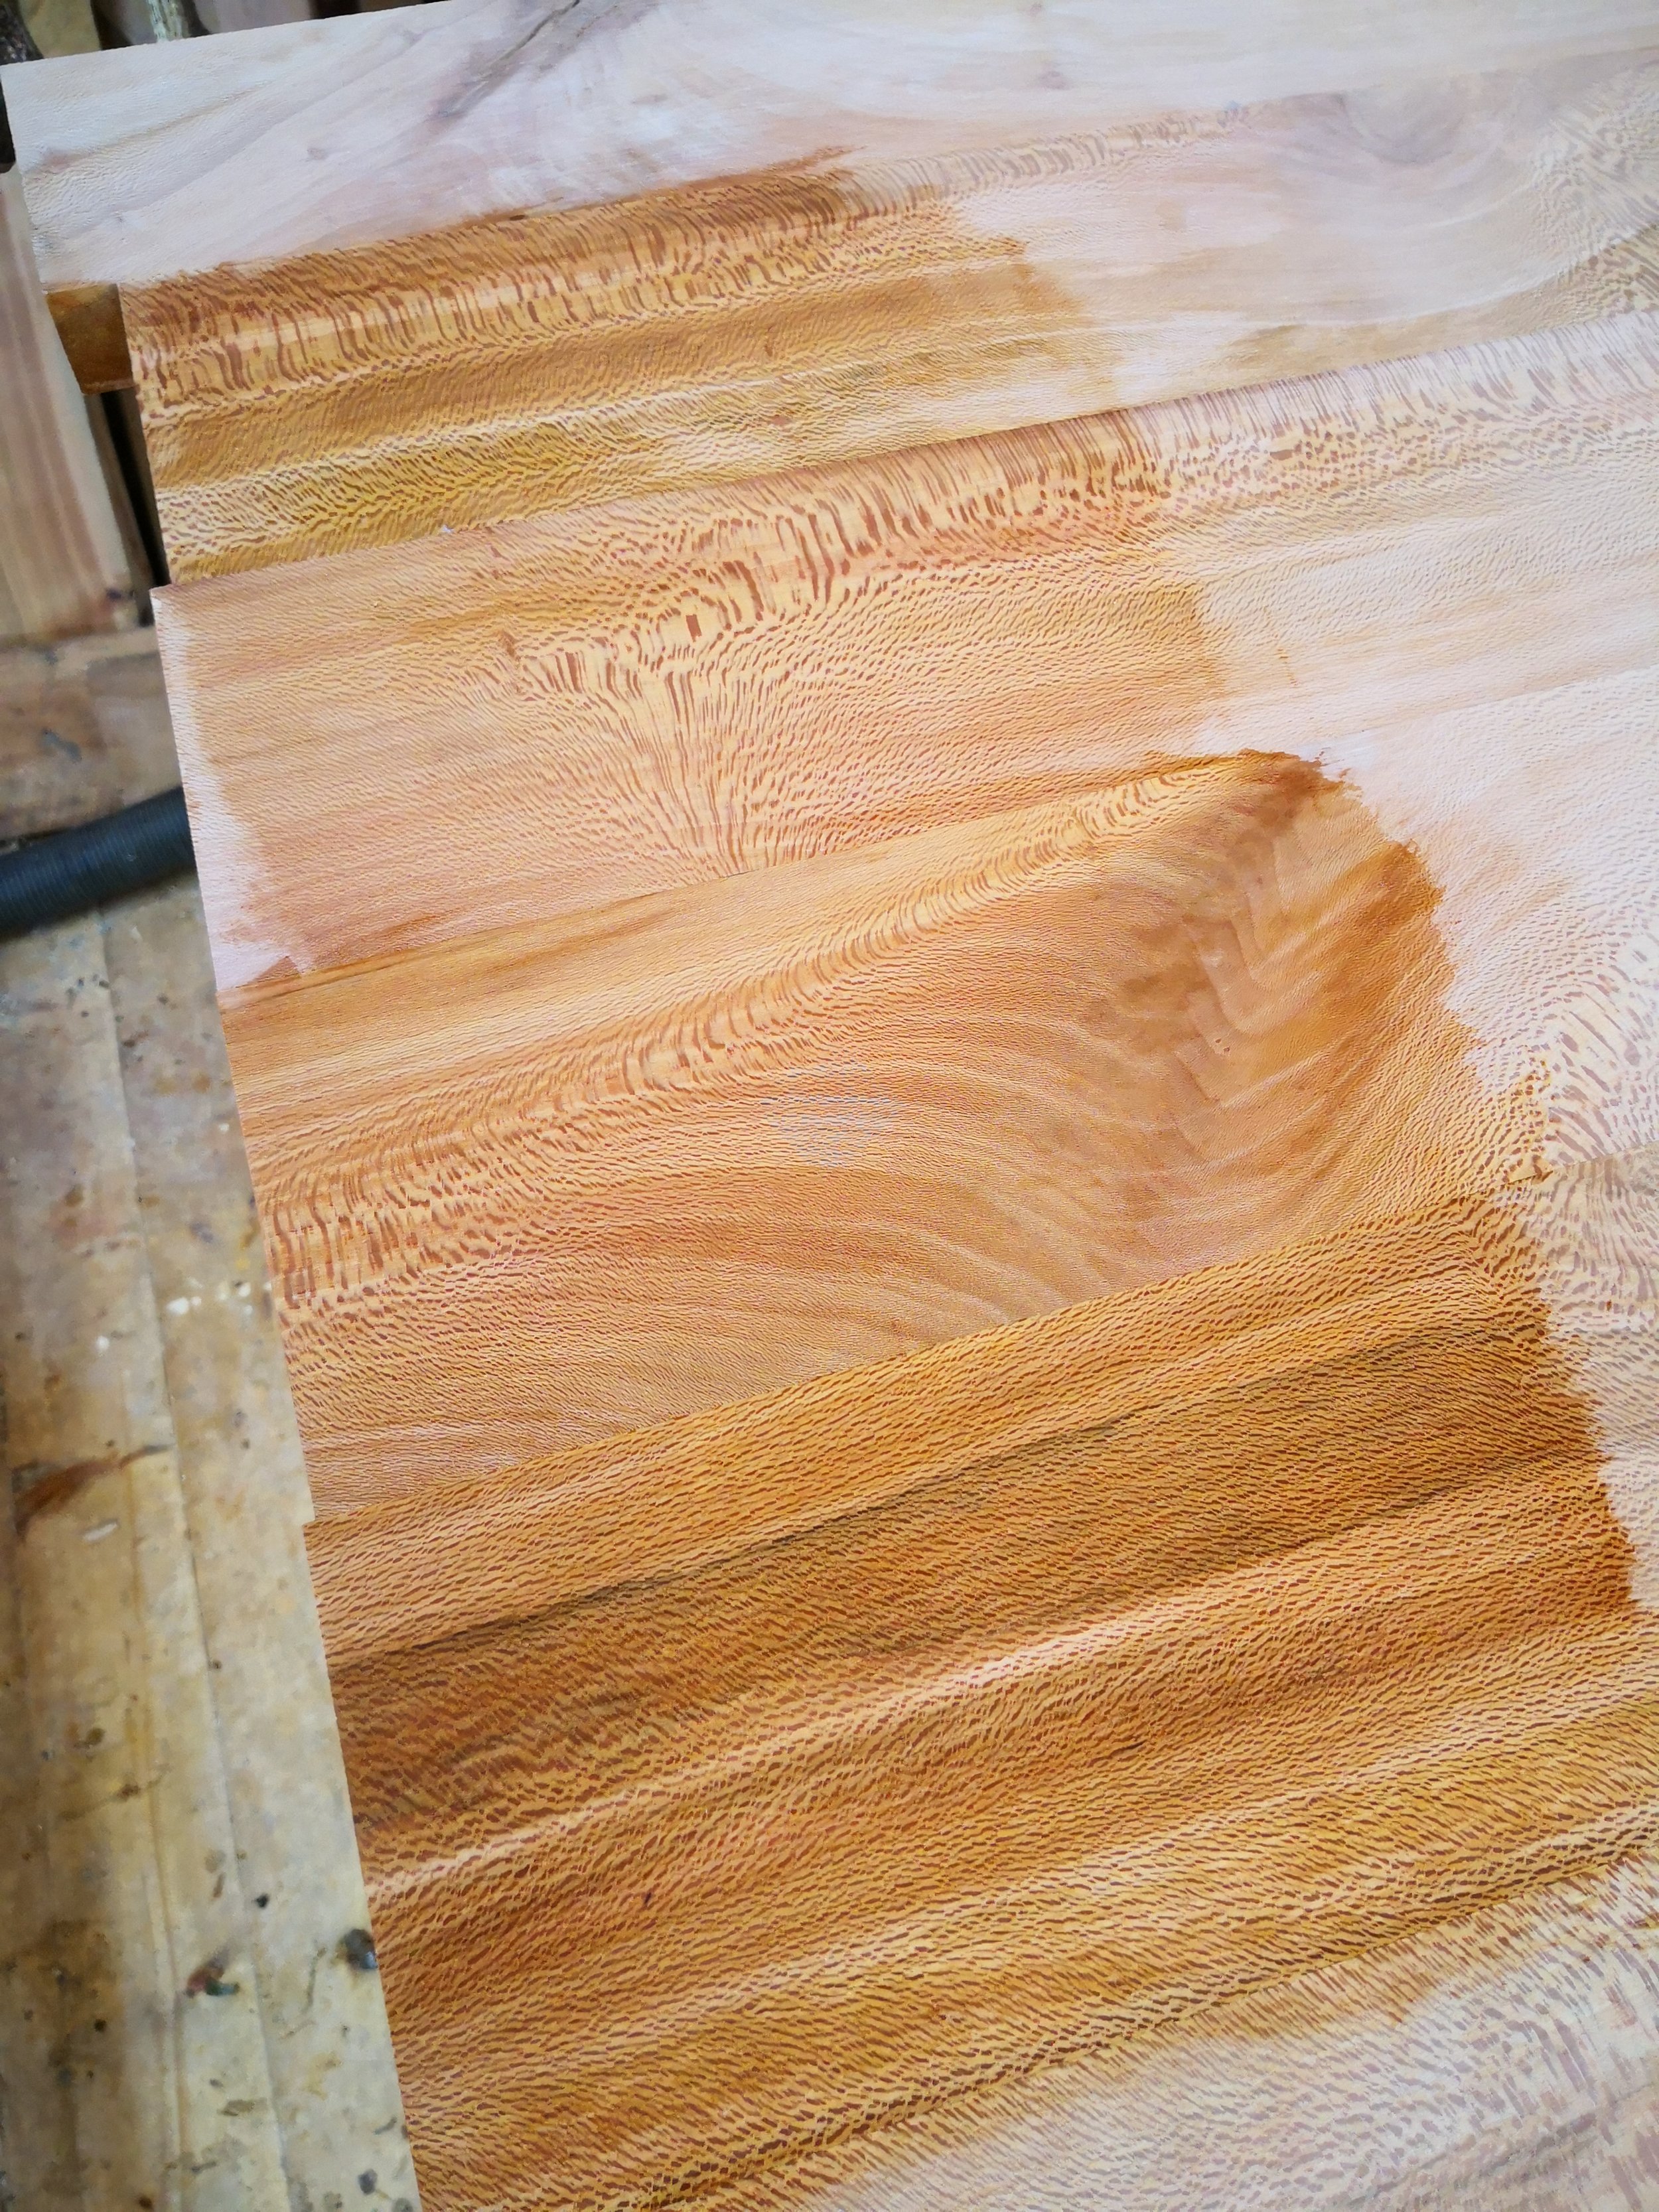
At the same time I was organising a timber framing job in Plaistow for a client with a very environmentally orientated design specification. Most types of cypress are durable outdoors, strong and also quite attractive looking timbers. Its a shame that we have such an obsession with oak framing in the UK when there are many more options available to us that don’t have to be sent across from questionable sources in European countries. Of course Oak is a wonderful timber and this building will be laid out on a mixture of oak and sweet chestnut framework but all sourced within a 40 mile radius of the project.

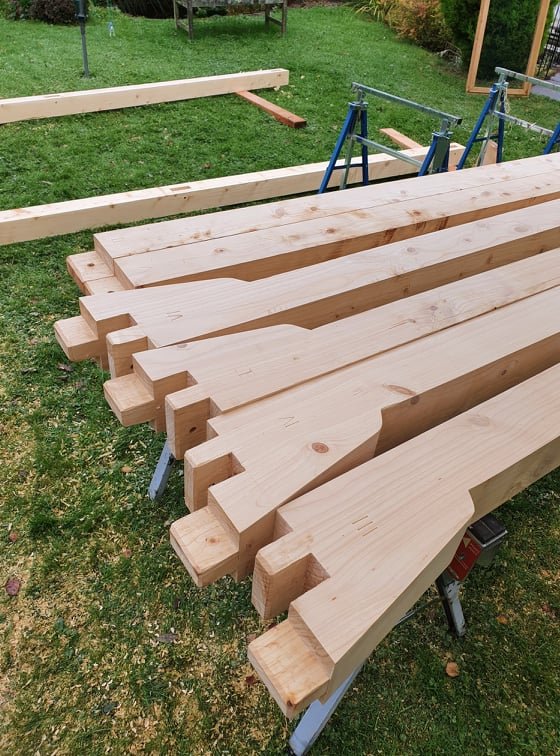
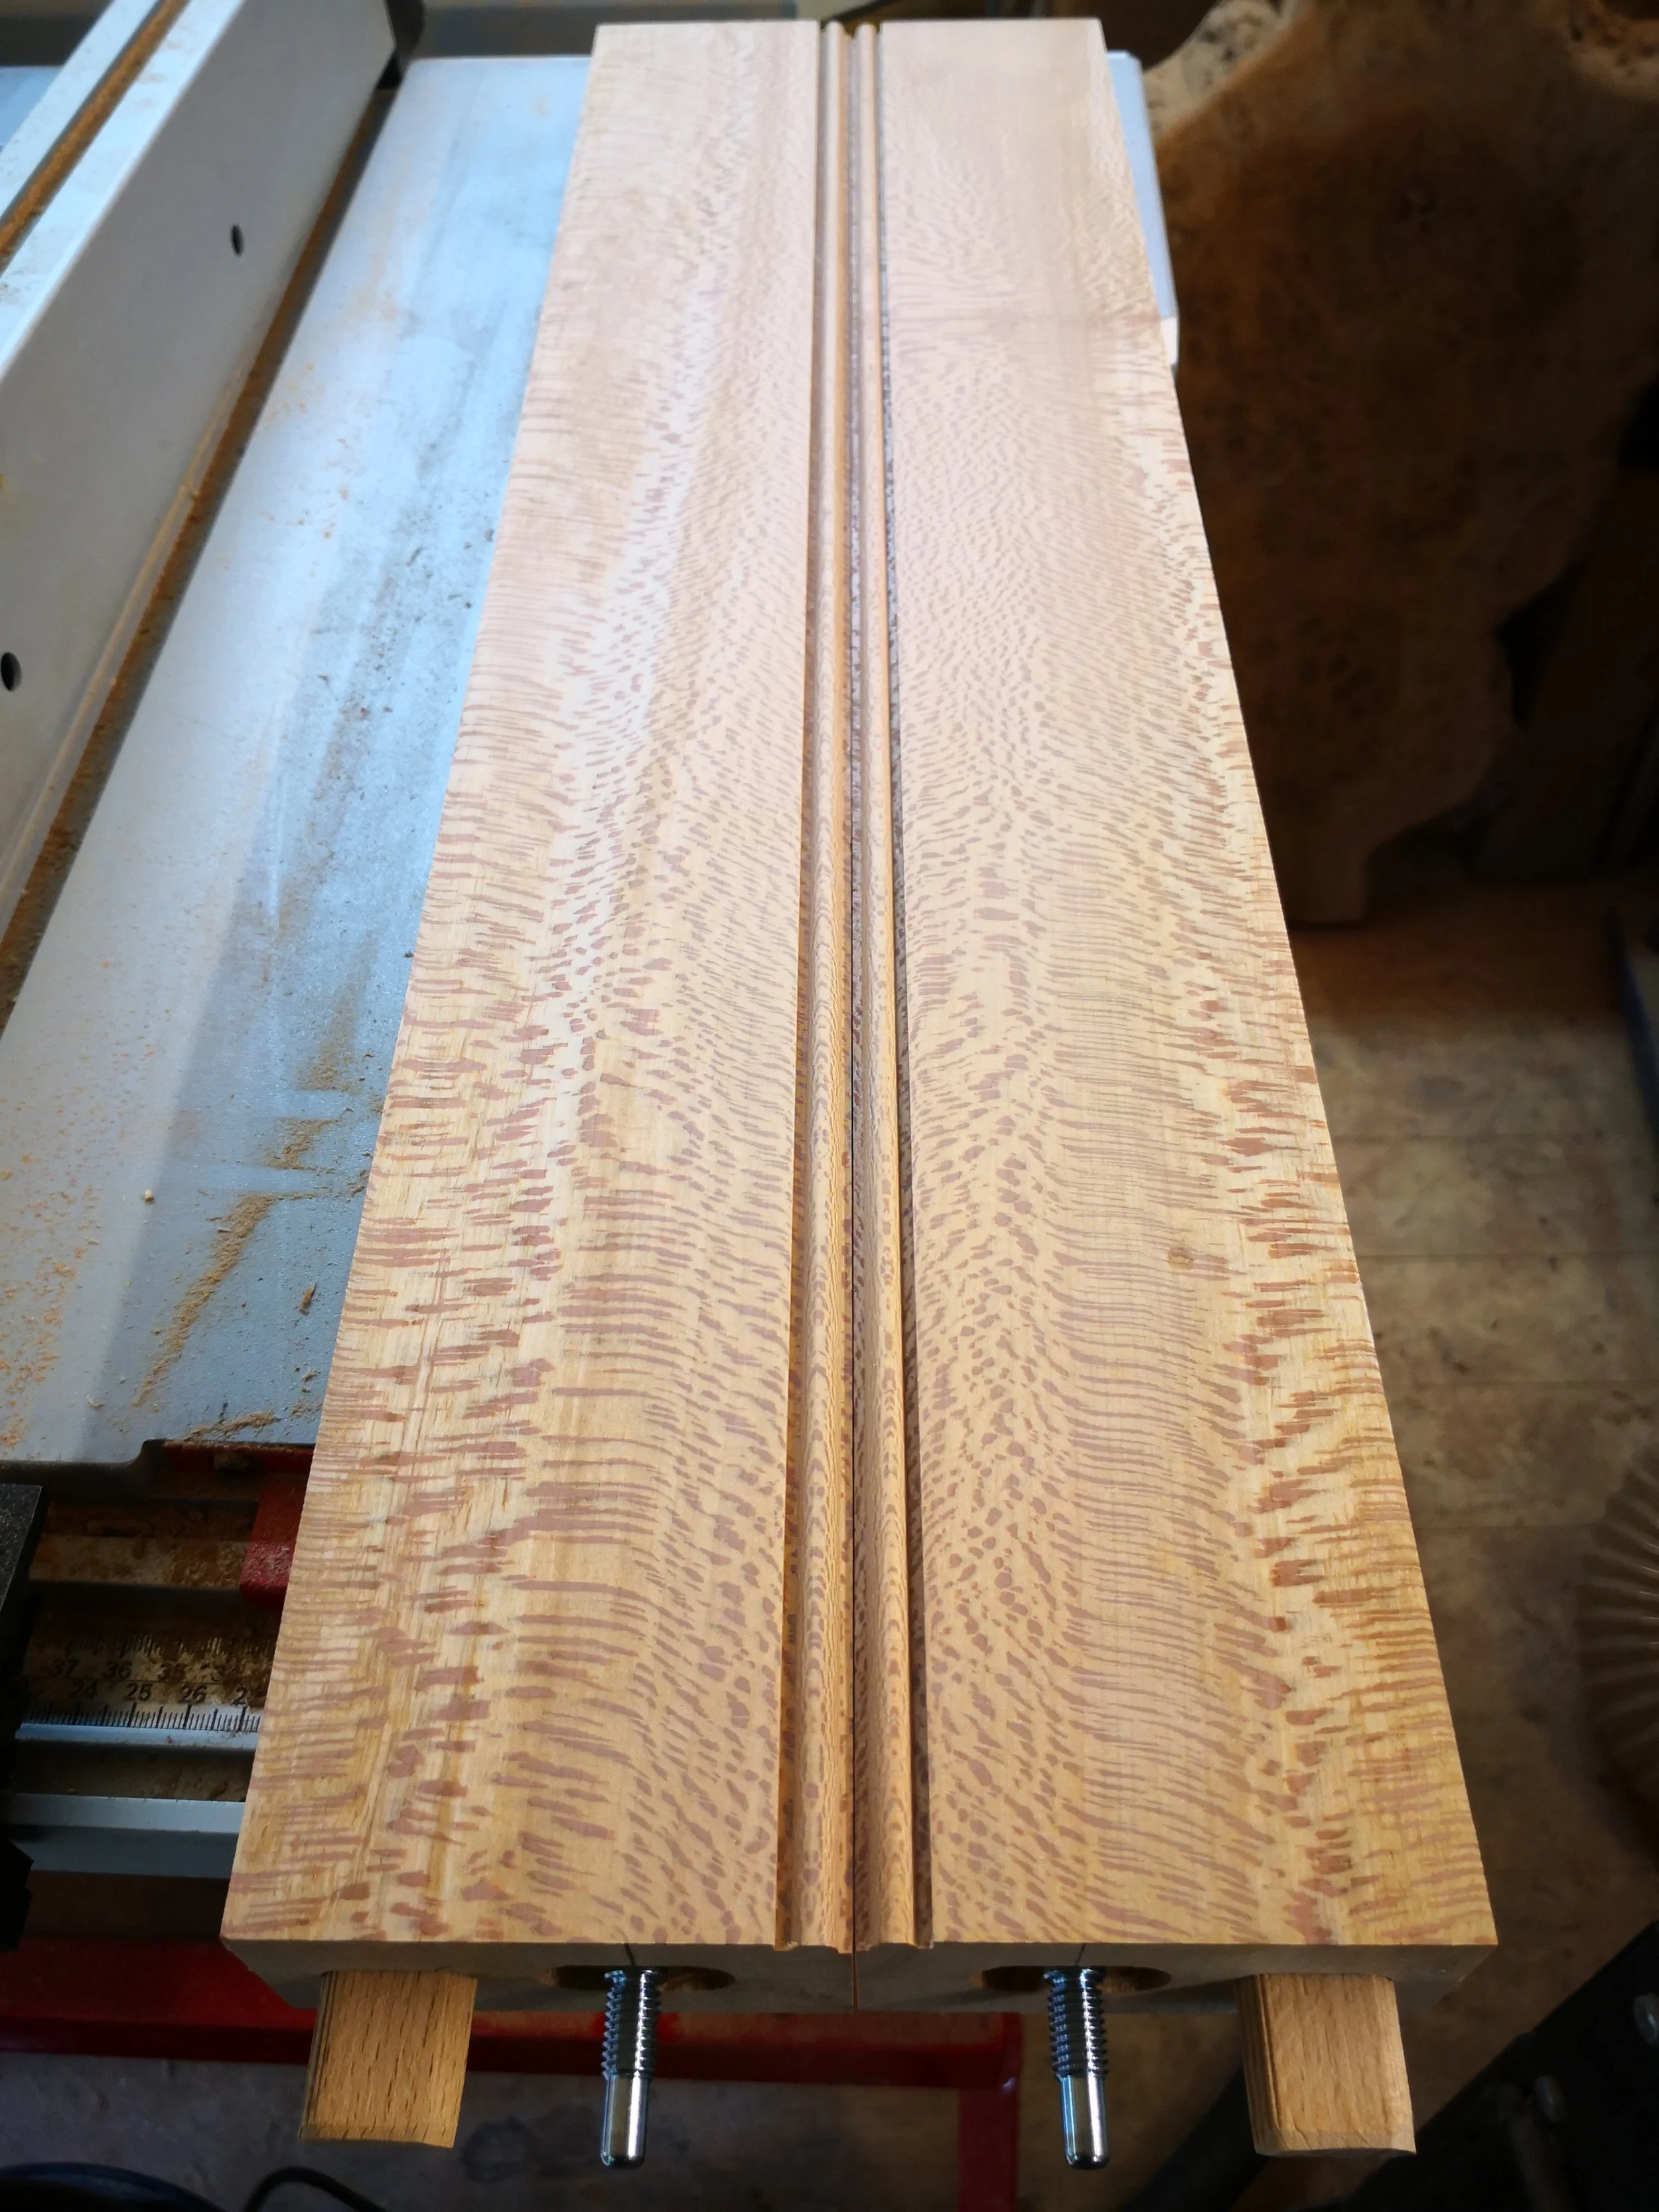
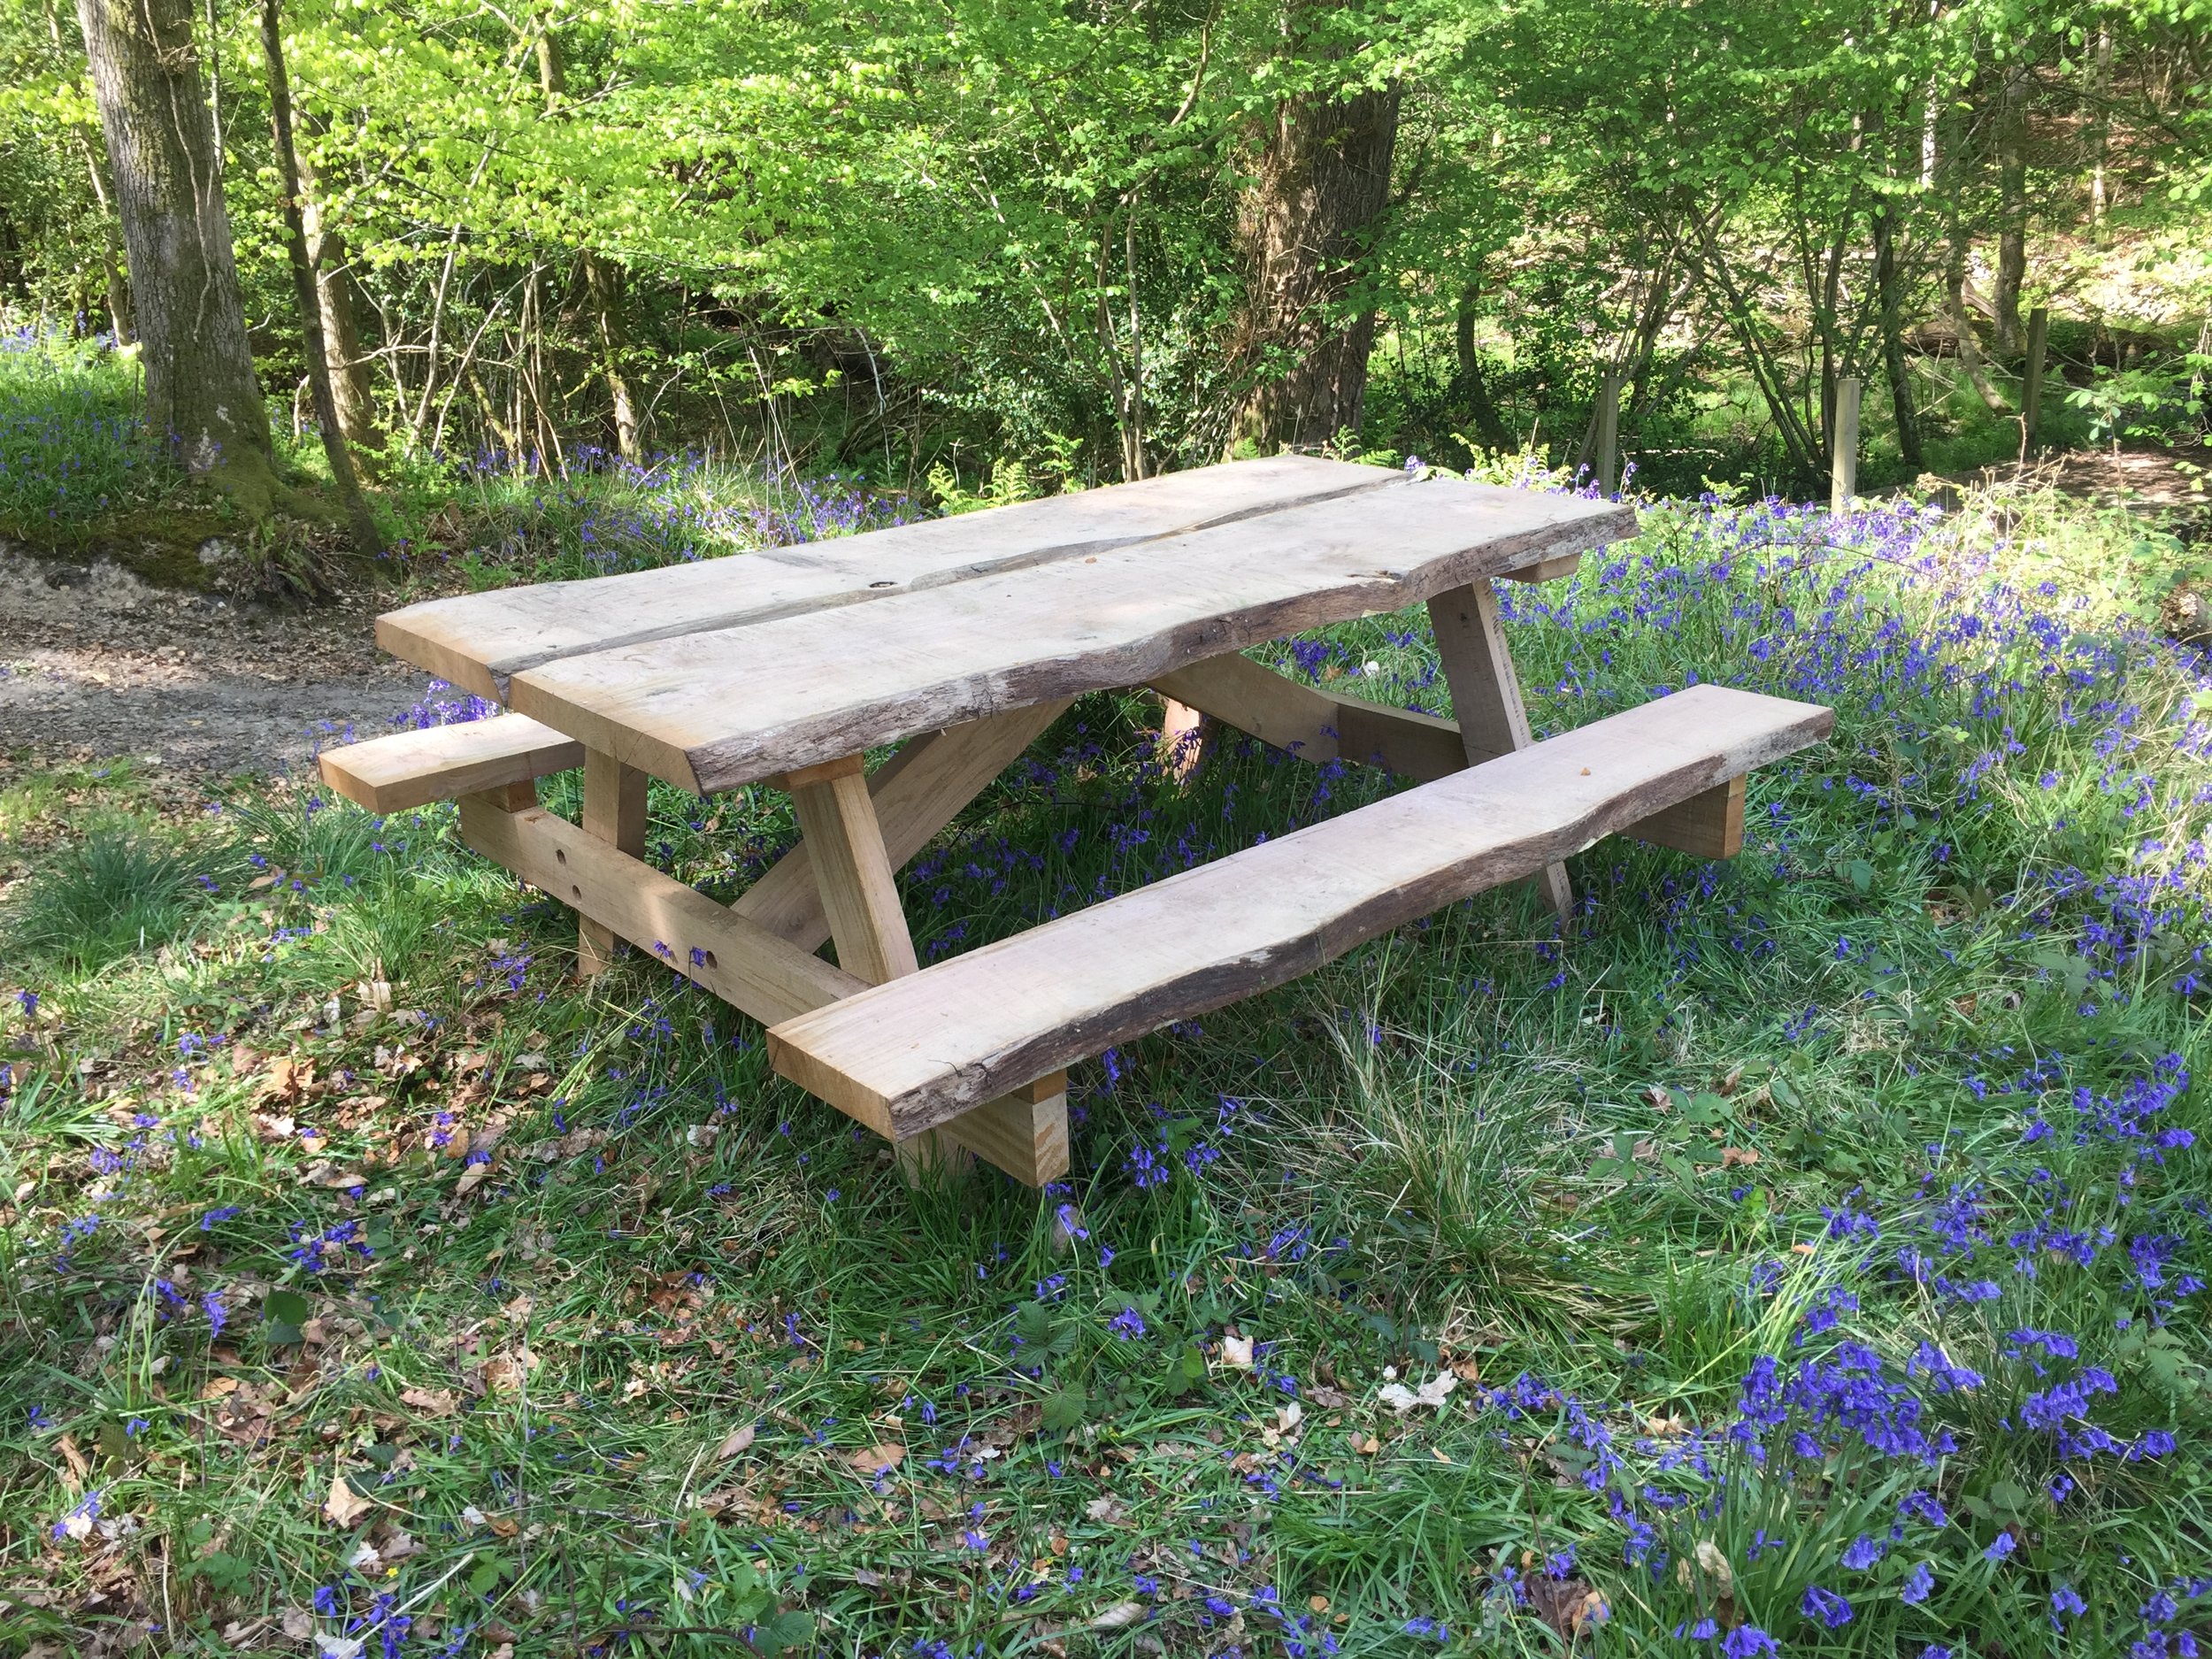
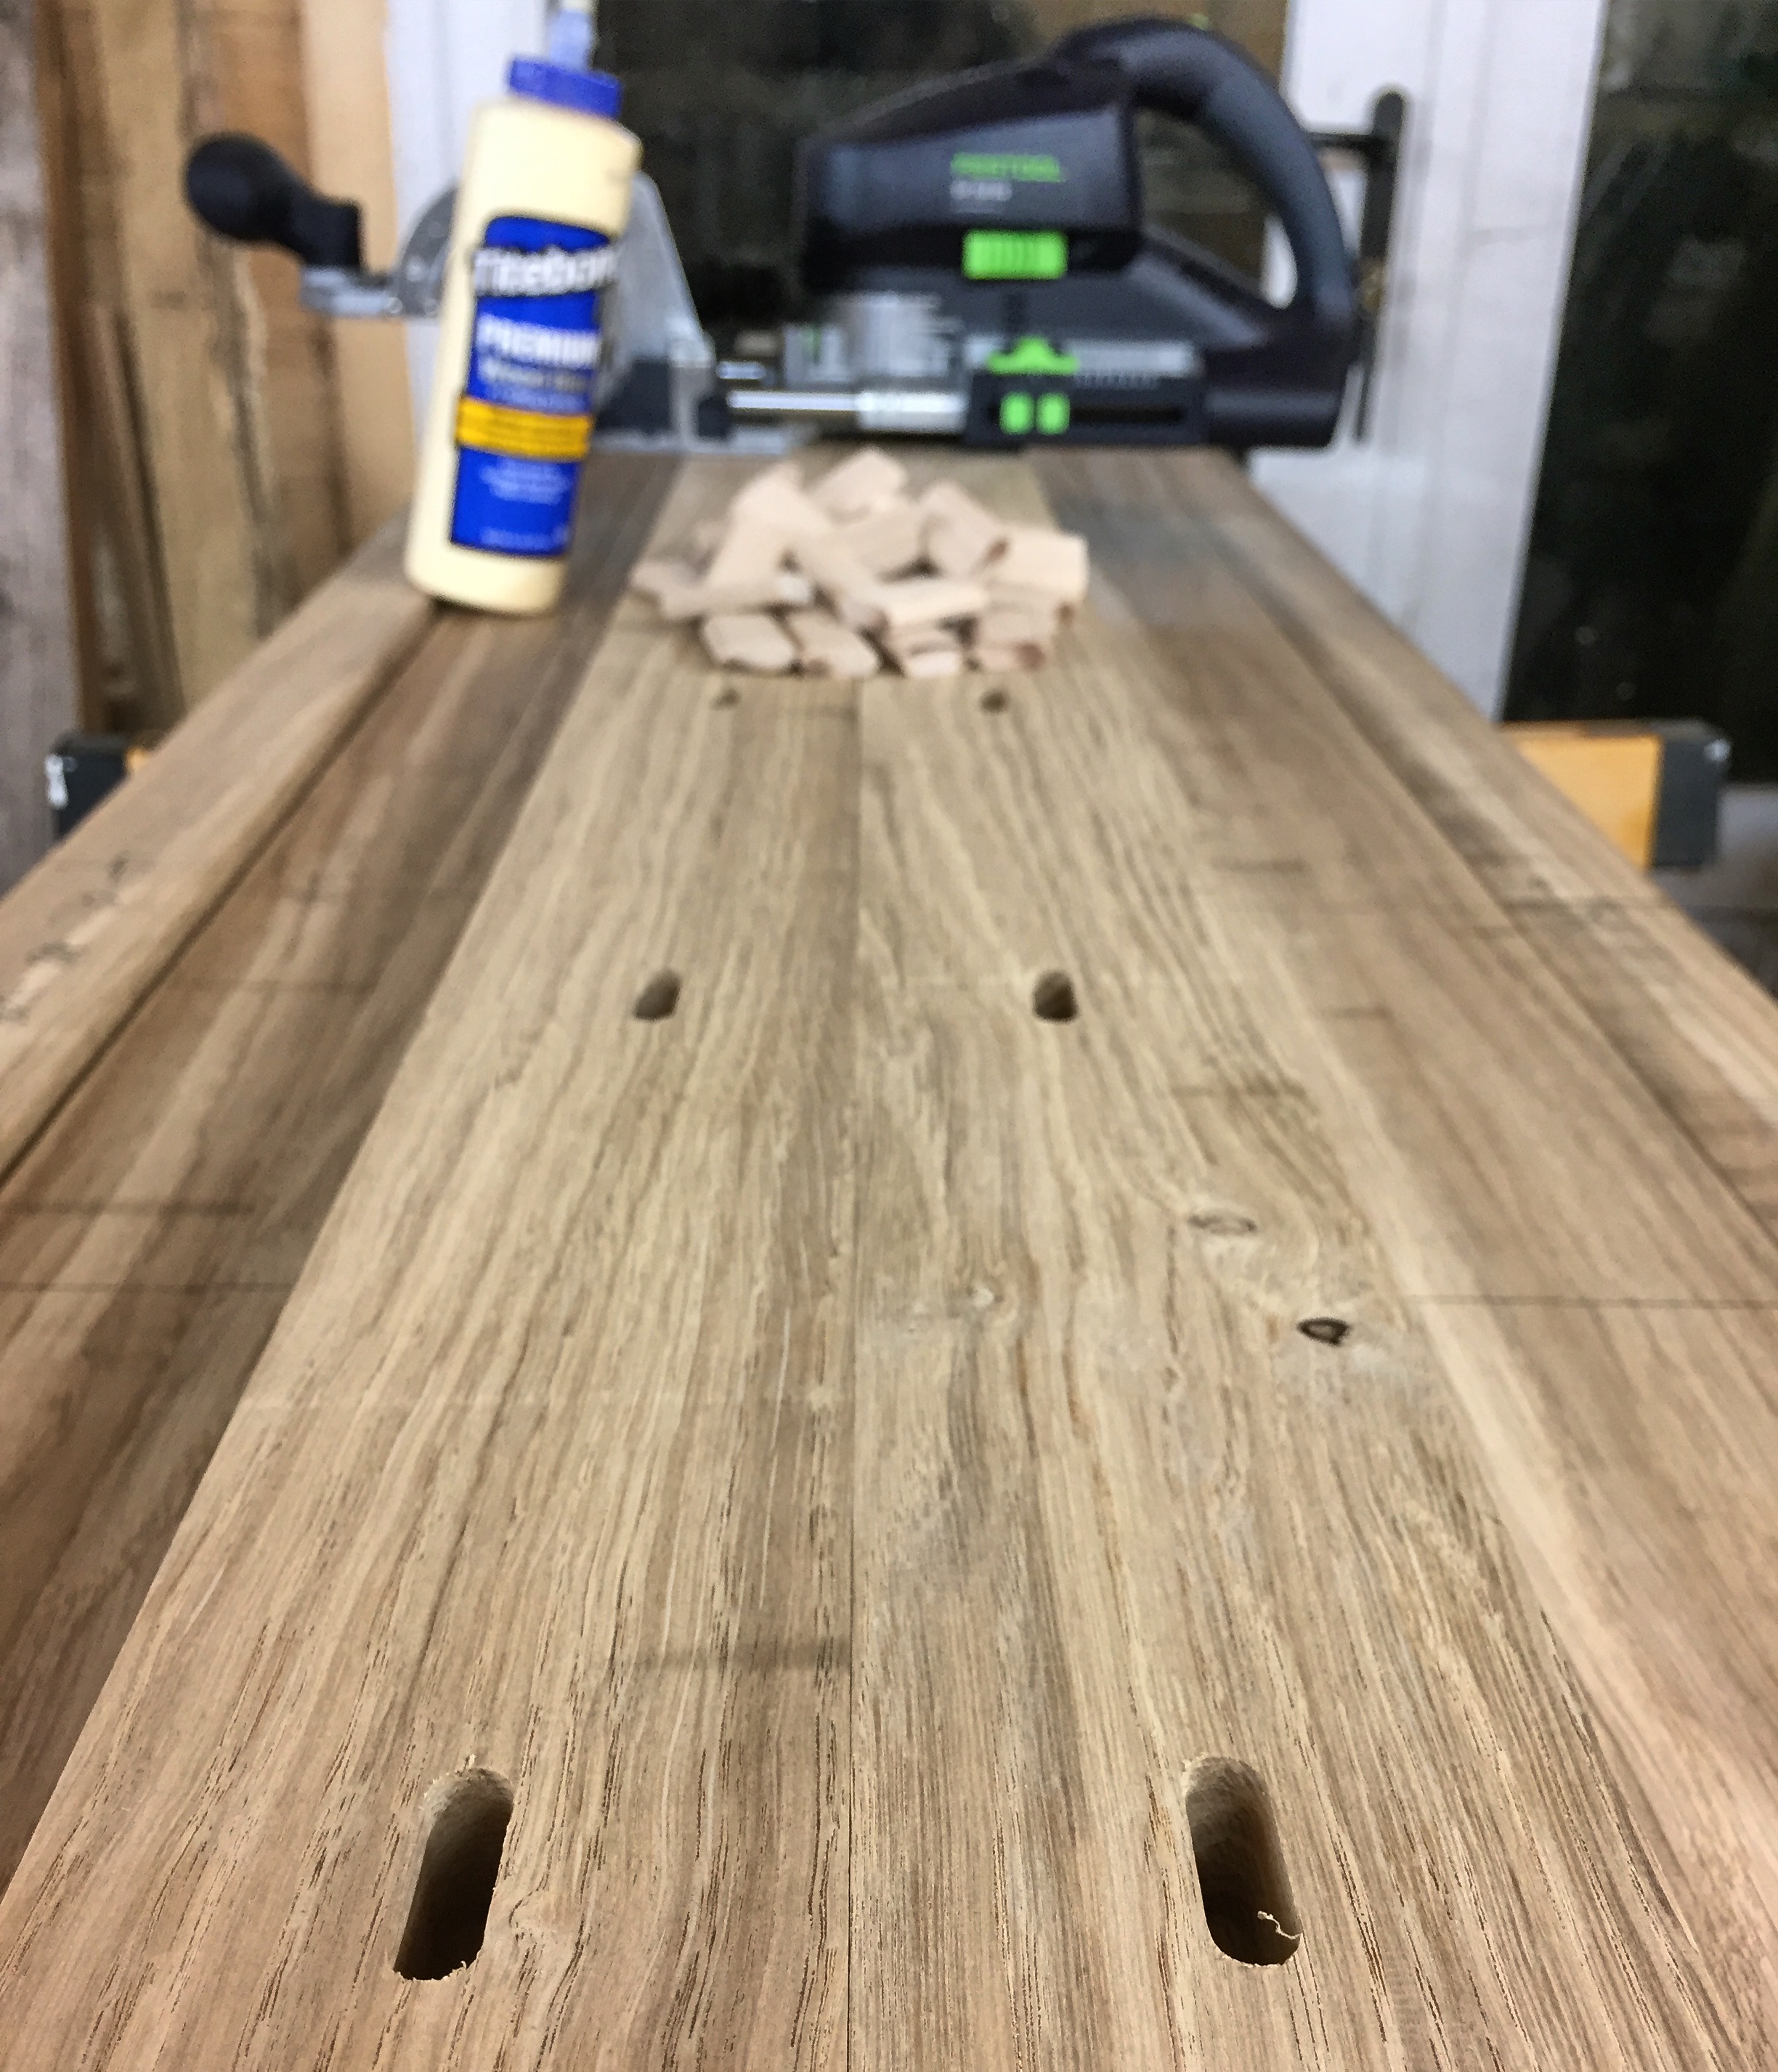
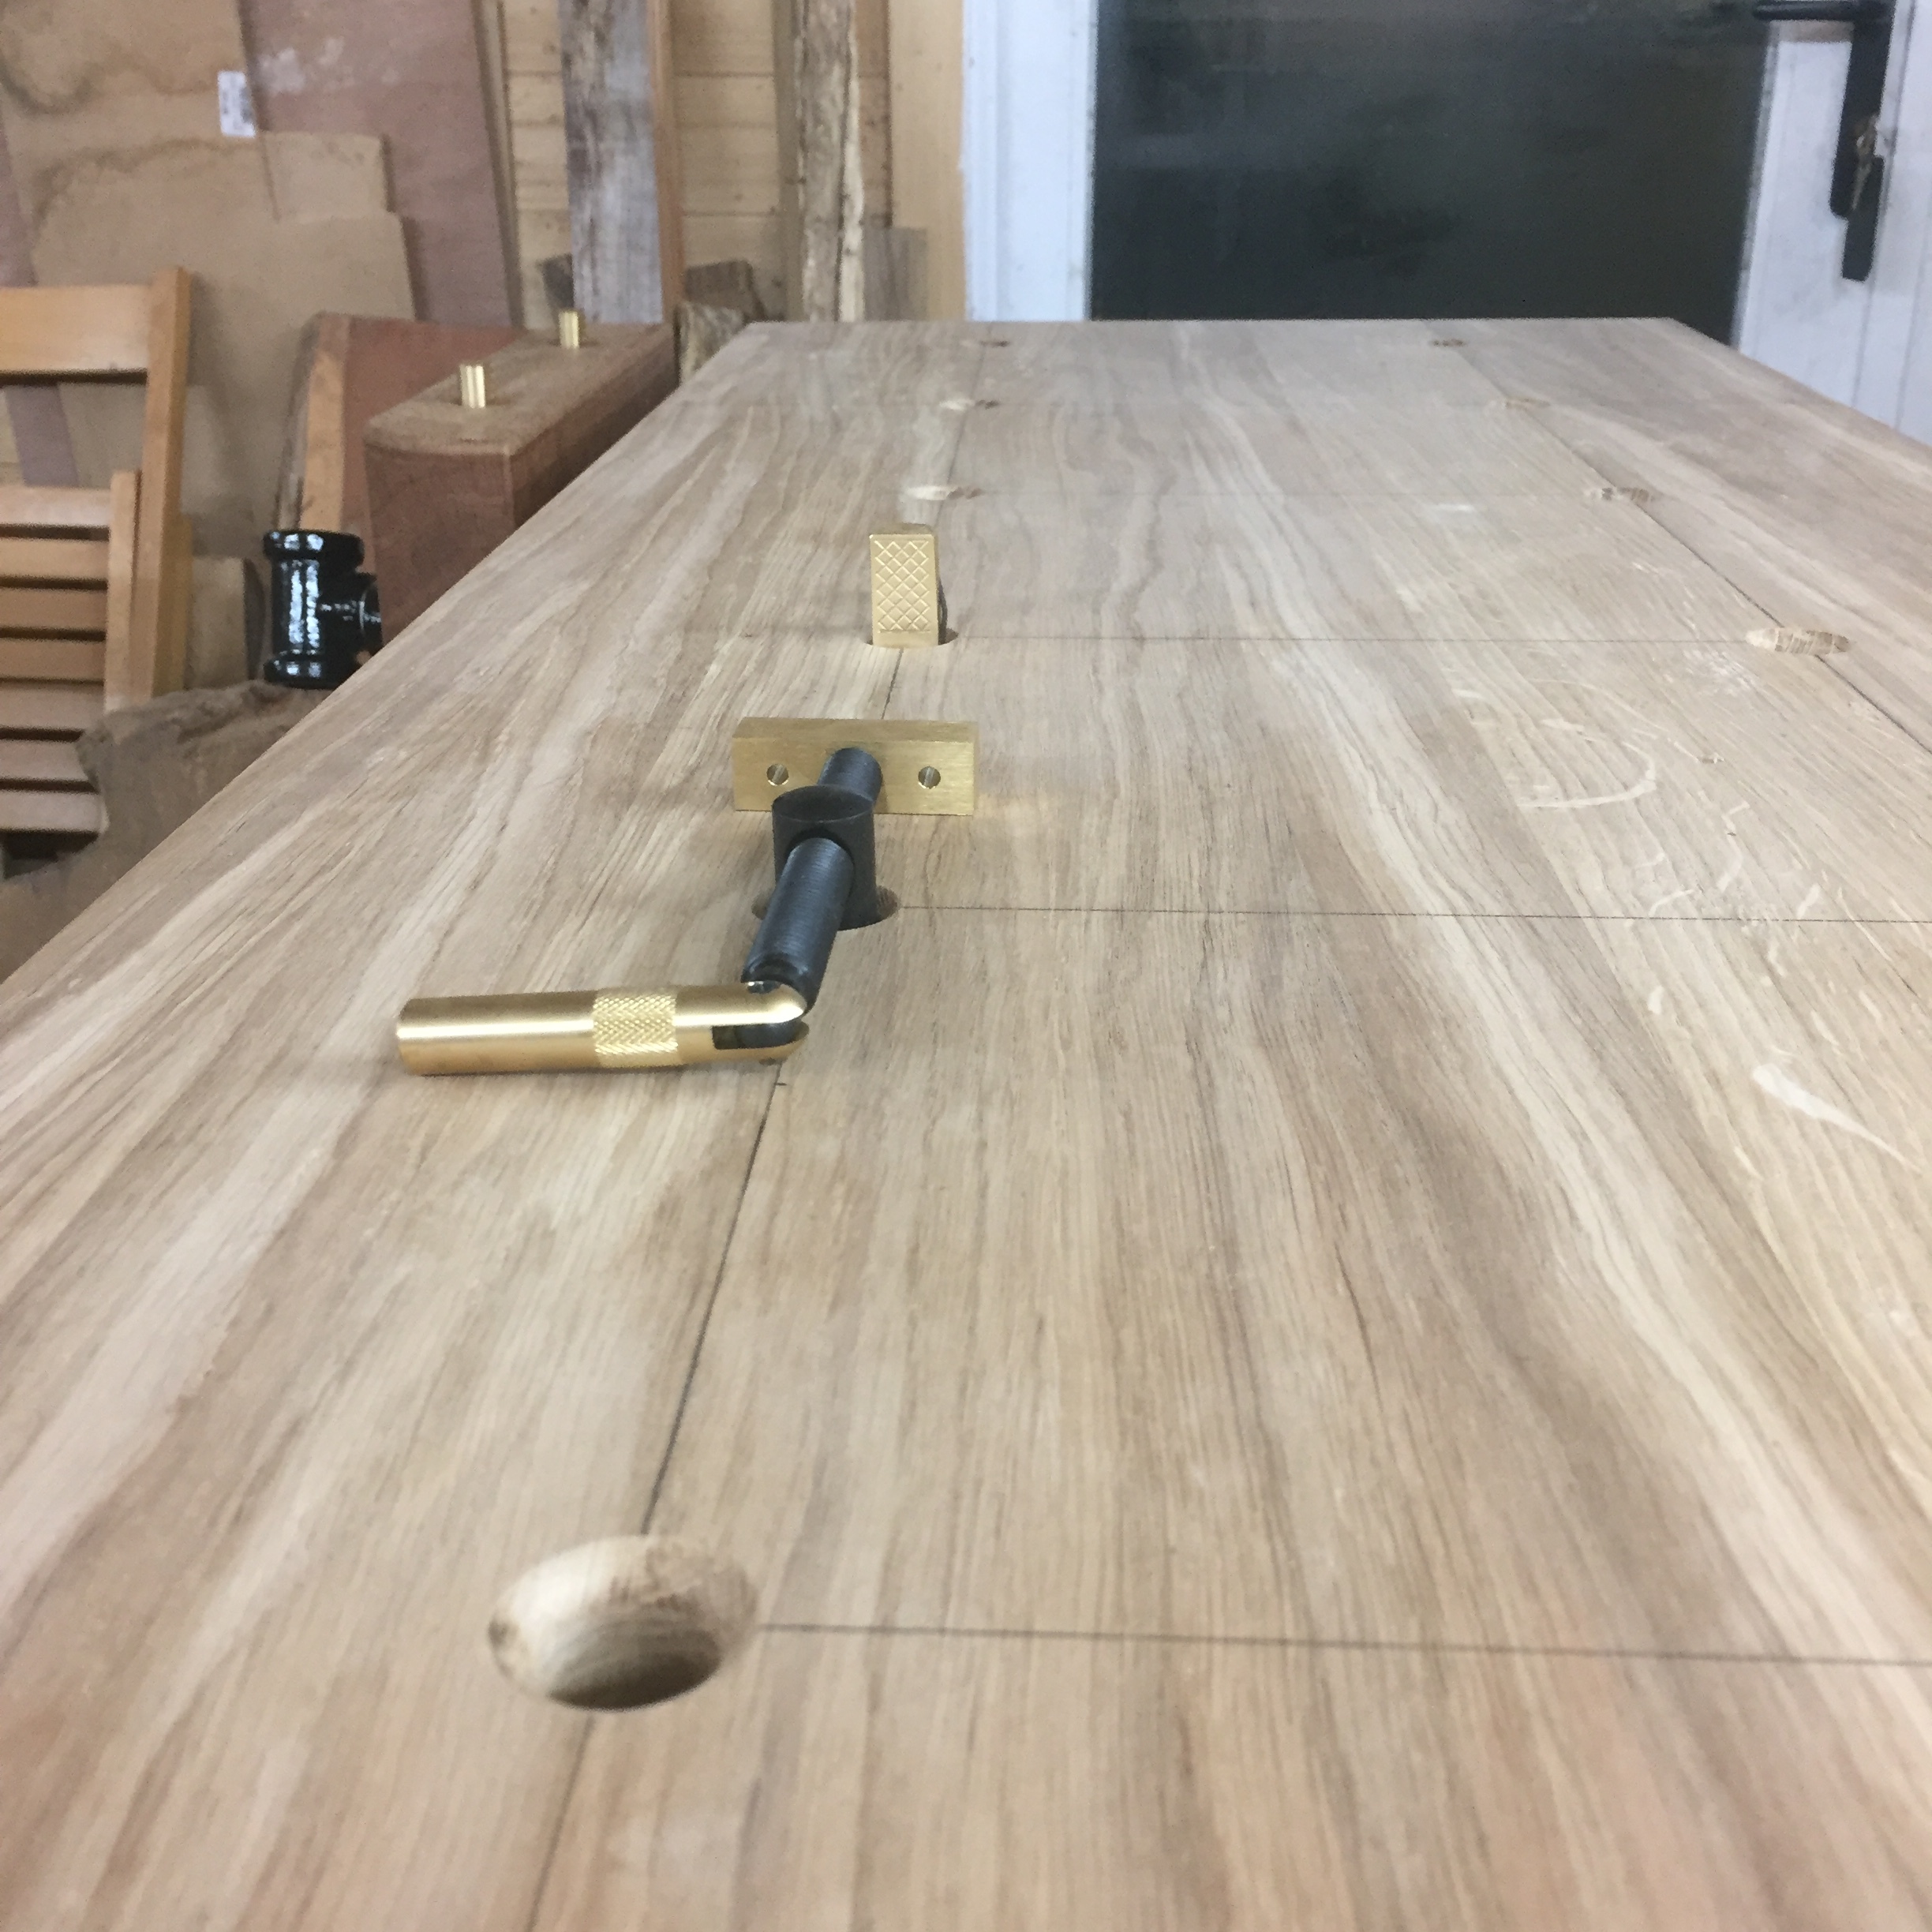
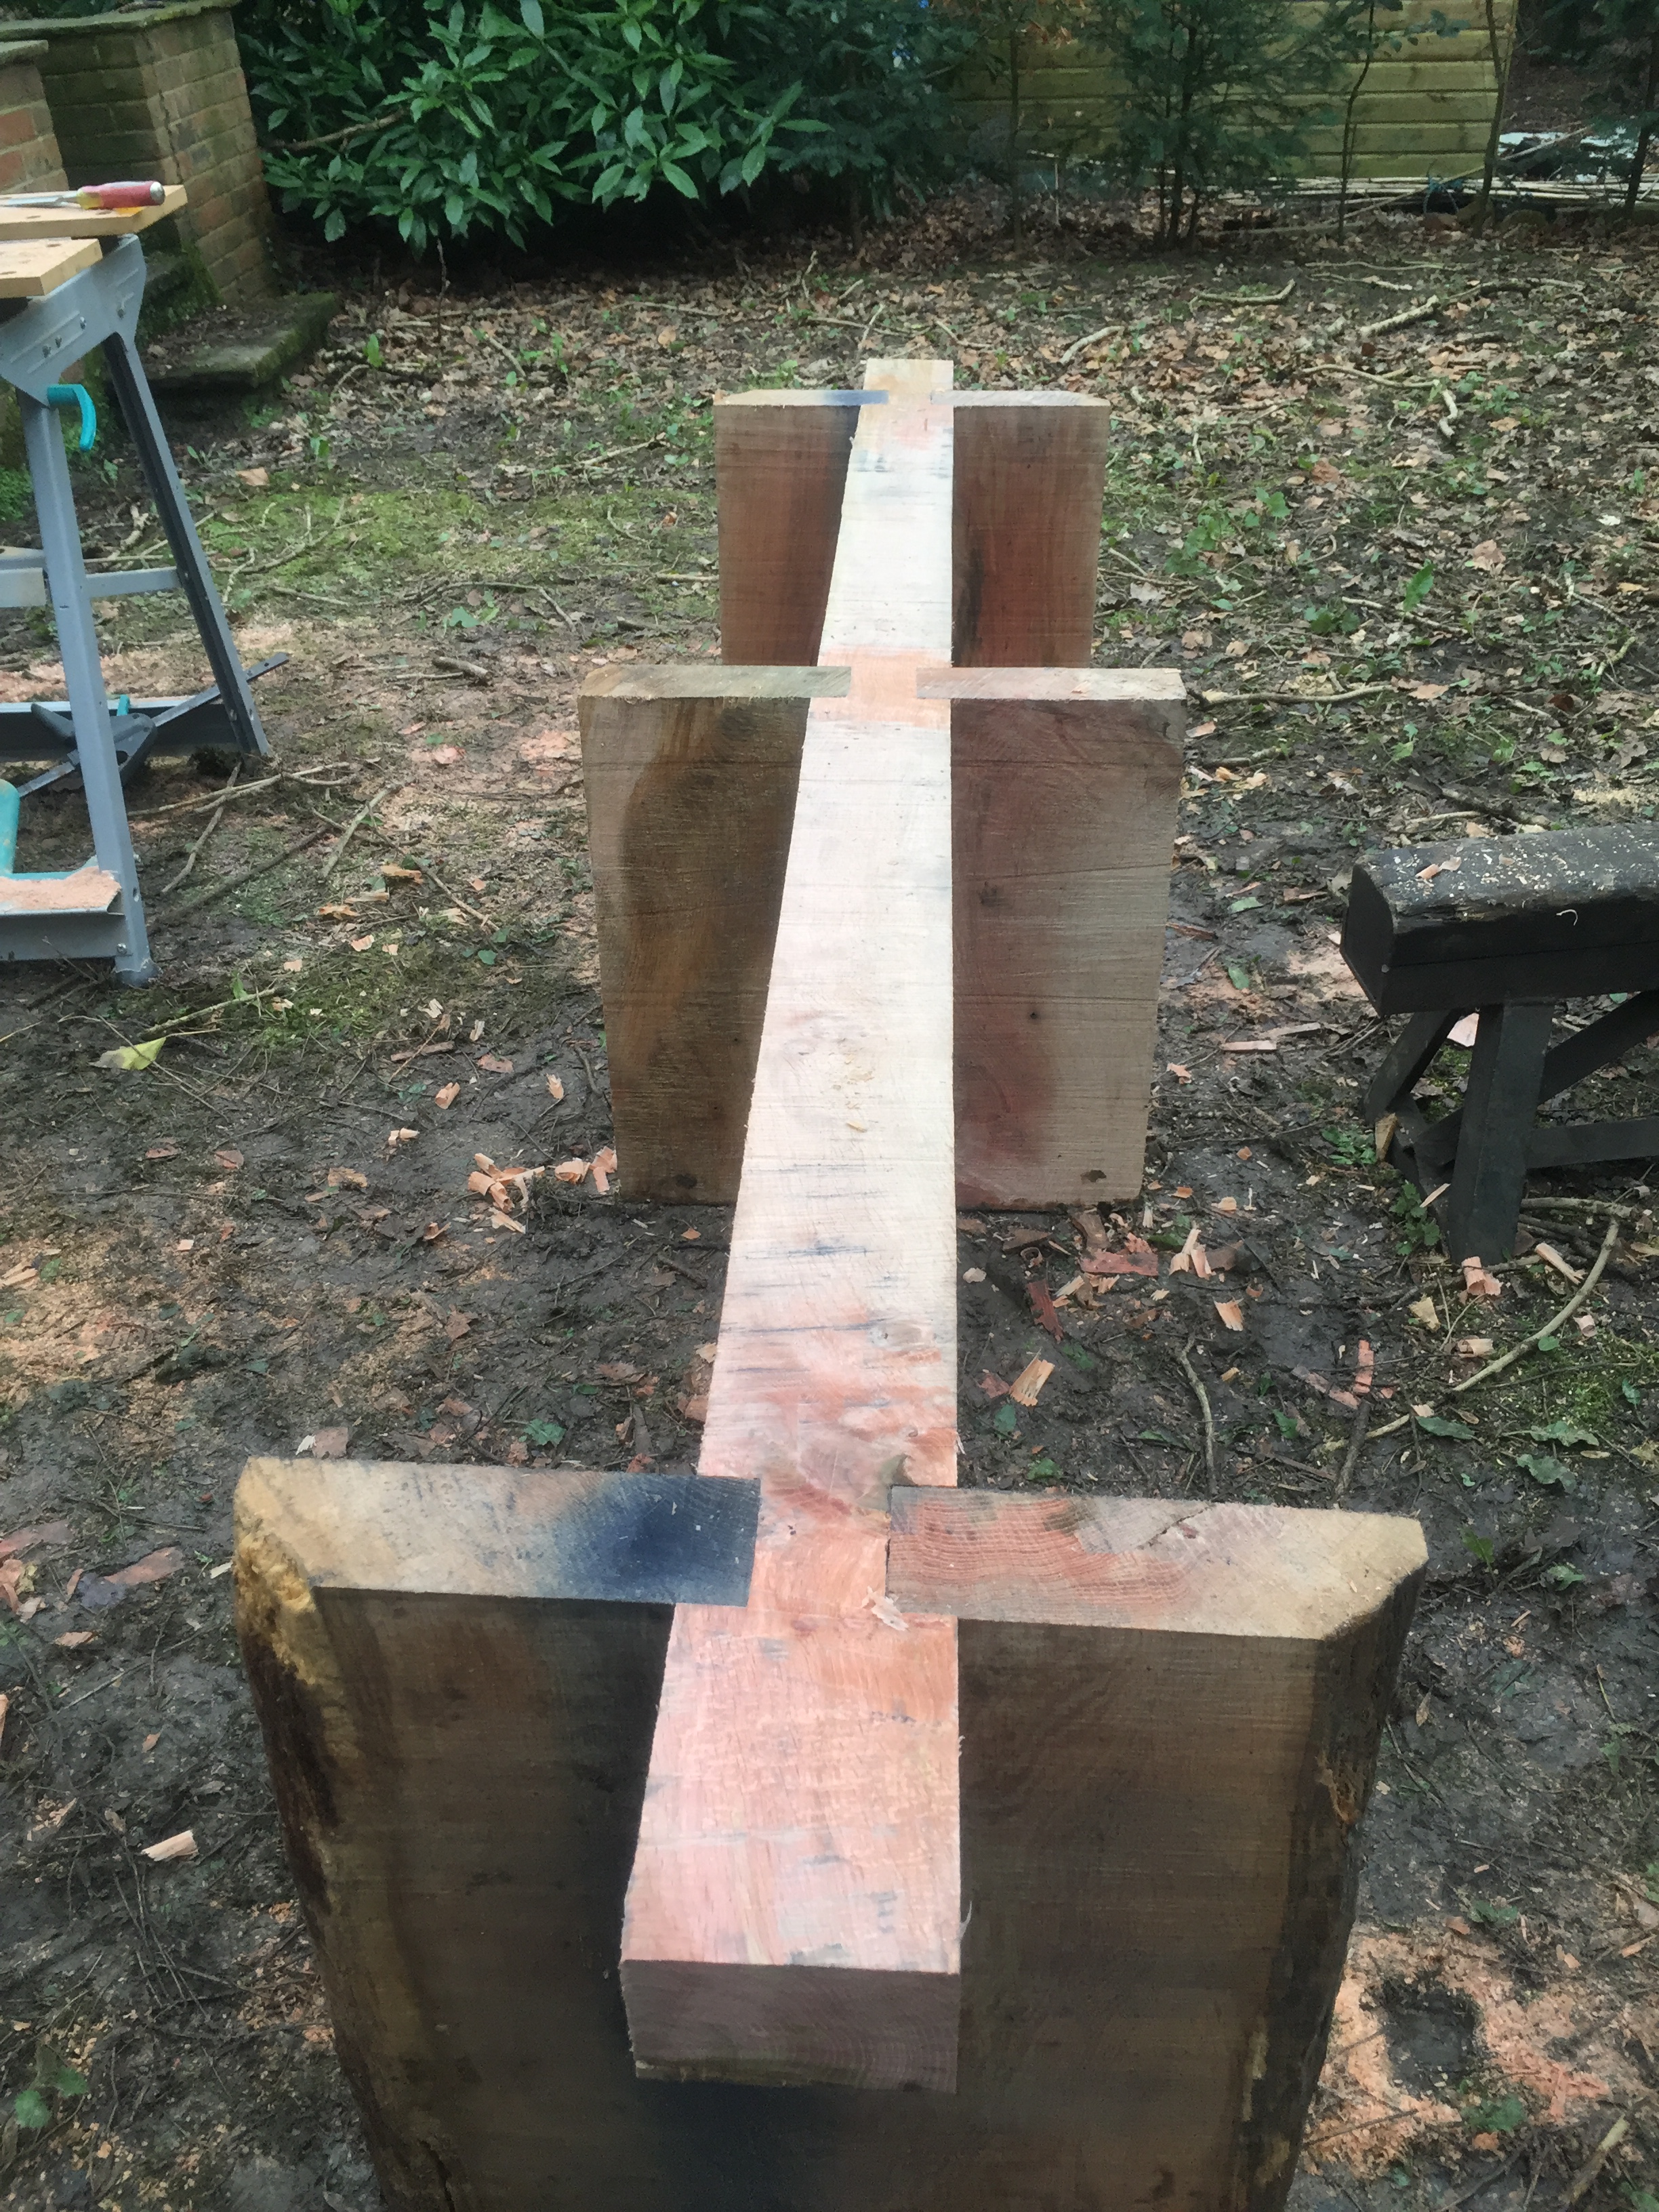
The joints are held together with oak pegs. The holes in the tenons are slightly off set away from the shoulders of the tenons to allow the peg to pull it tighter into the joint. This means as the wood dries out the joint will remain tight.

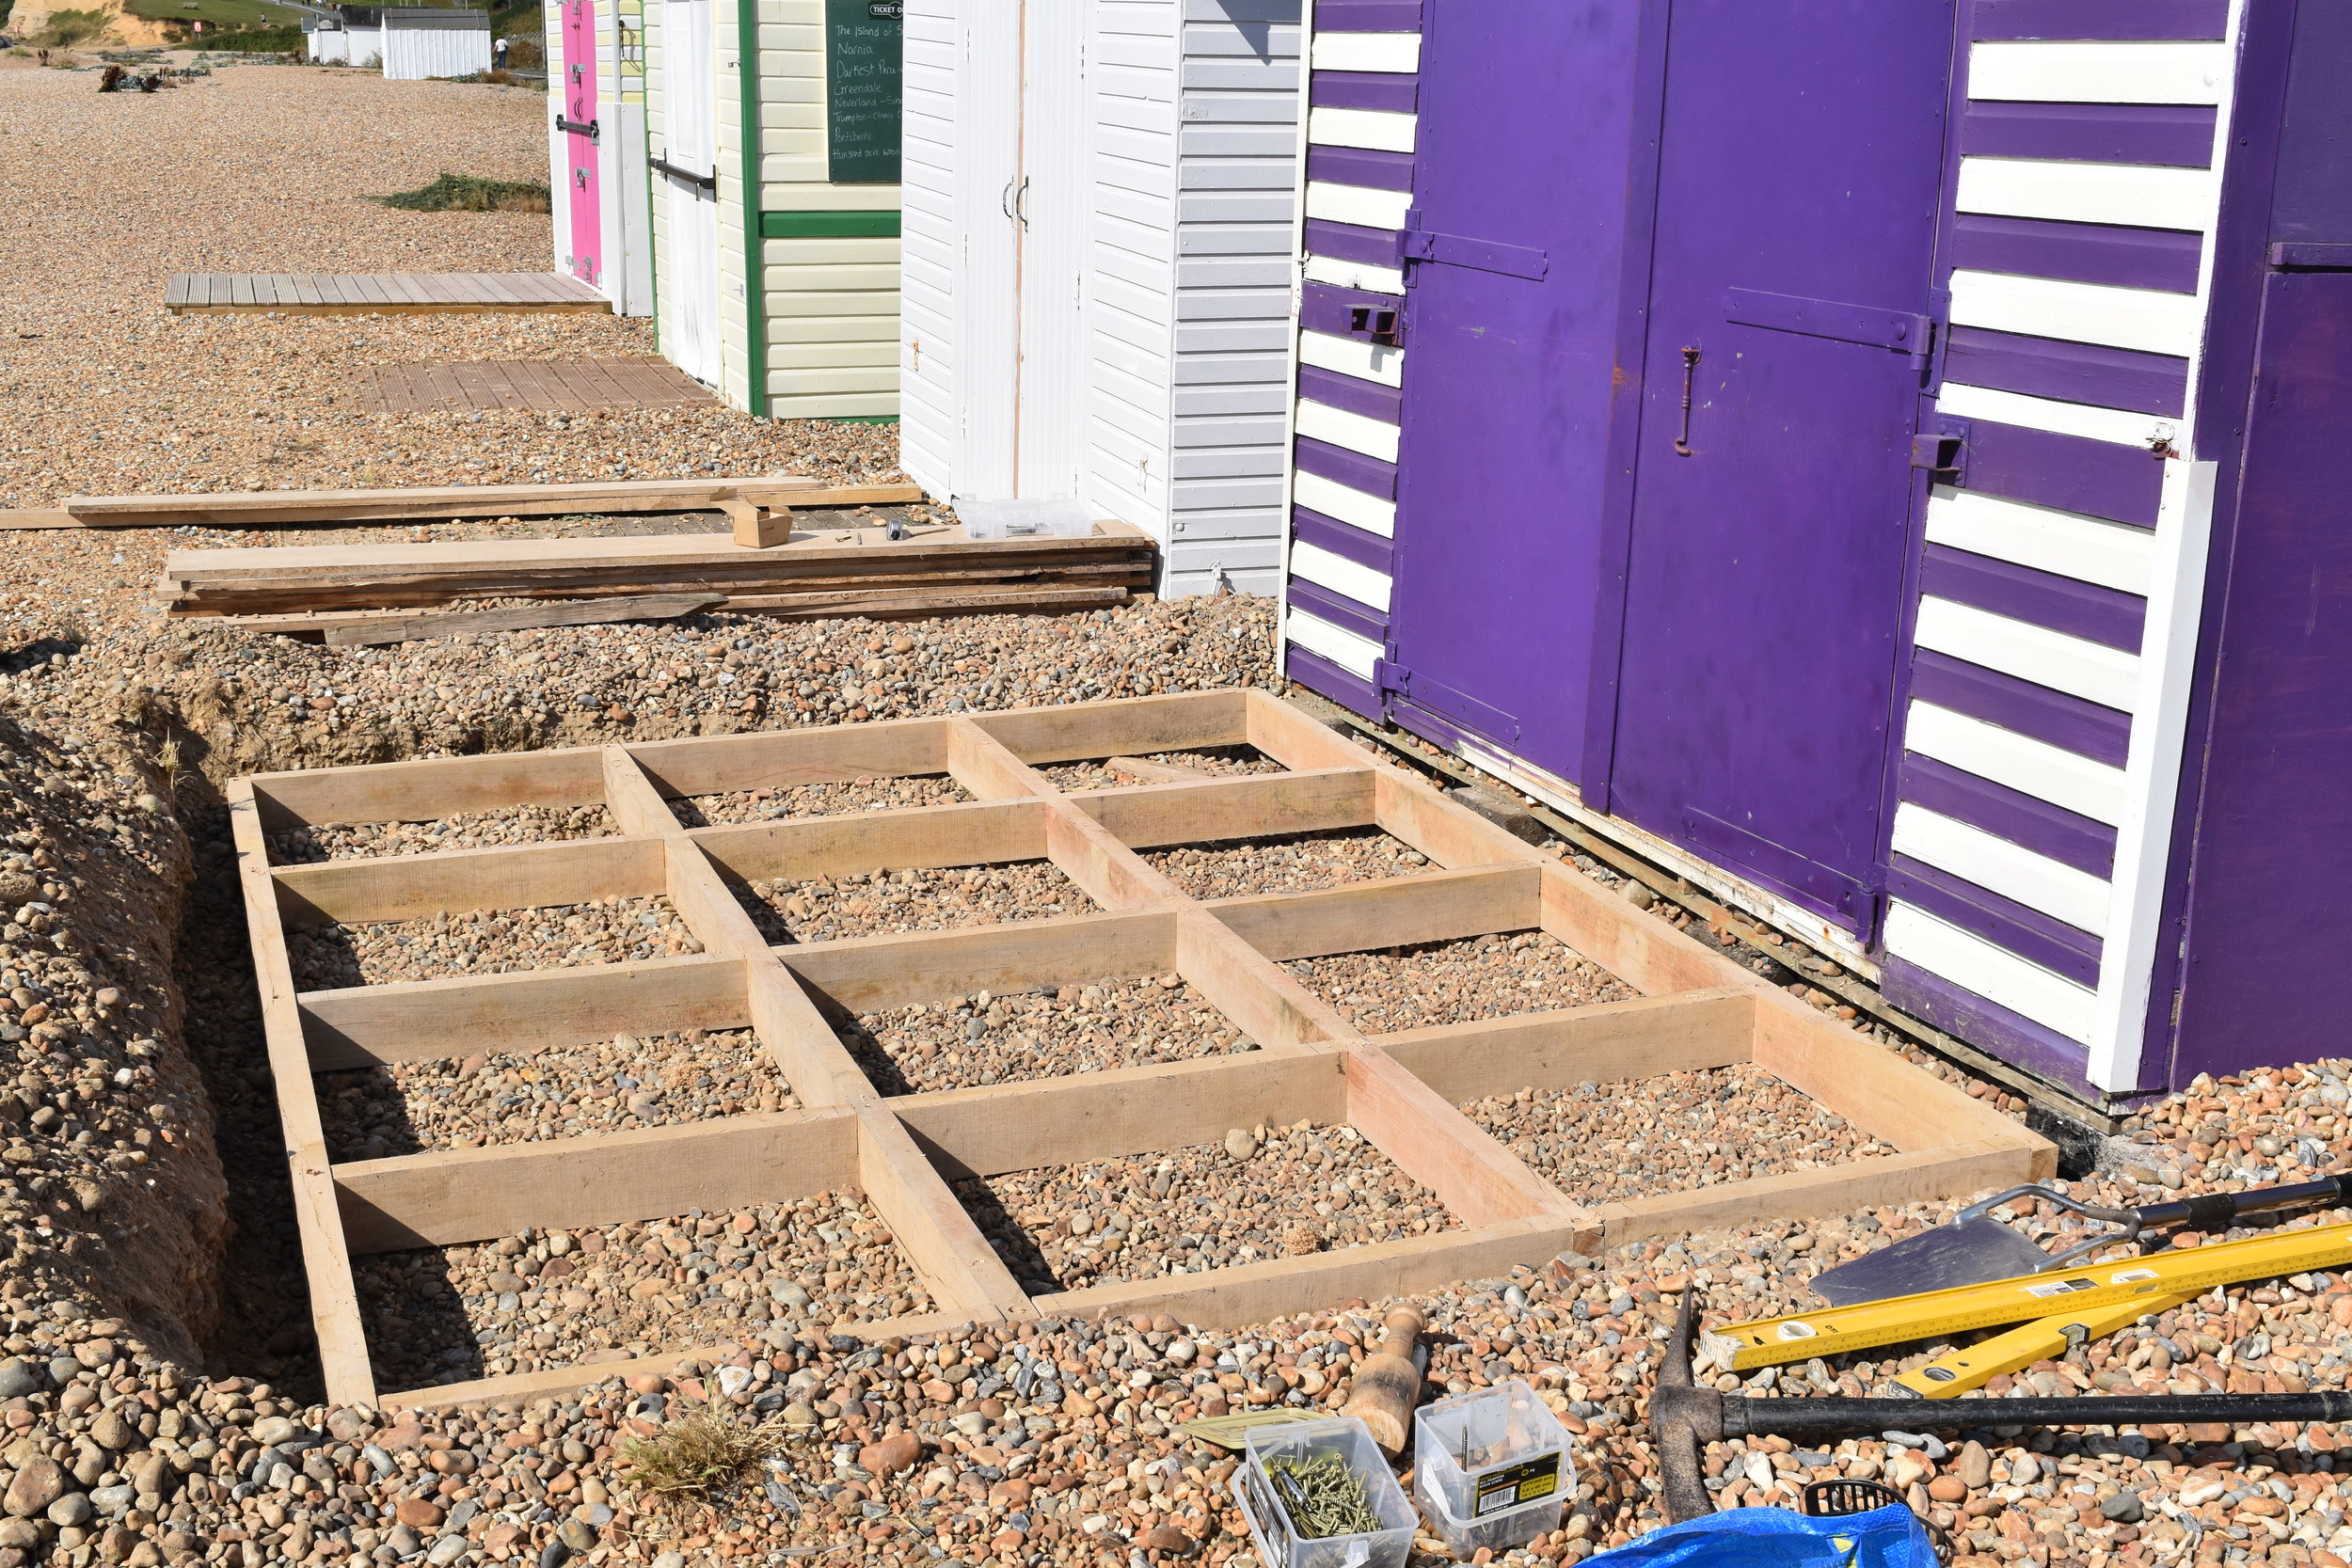
6 concrete pads were put into the ground to allow the oak and sweet chestnut framework to be elevated slightly off the ground. I milled the oak from a tree removal job in forest row. The sweet chestnut came from some coppice in Lamberhurst. Both of these timbers are really durable due to their high tannin content and also very strong which is why I opted to use them for the base.

A lapped dovetail joint in the central truss/rafter tie.

London Plane Dining table

535434264657486457.JPG

A couple of years ago I had the pleasure of getting to mill up a London plane tree in Roehampton. Its the only Plane I have ever milled and it was a real joy to uncover the grain inside of it, especially the ‘lacewood’ which can be seen most prominently on the quarter sawn faces of the wood. The Arb company I was milling the tree for were kind enough to let me keep a few of the boards and I have stacked and dried them for a couple of years.

I wanted to use them for a project of my own as they were such special looking planks. I needed a dining table and decided I wanted to use these boards for it. I only had about half of what I needed but fortunately I was contacted by the same company to mill an Oak tree for them and we worked out an agreement so I could get enough for my table.

DSC_0003.JPG

I tested the moisture content in the middle of summer and they read around 15 percent which isn’t quite dry enough for interior use. I stored them in the roof of my garage for a month (a very dry and warm space) or so which got them down low enough to start on the project. Its important not to try and dry timber out too fast and even at 15% I had concerns about storing them somewhere so warm.

The first step was to plane and thickness the boards down to equal dimensions for the top. I tried a few different layouts before I was happy with the orientations and grain patterns. With such irregular grain patterns its pretty difficult to get them matched up.

IMG_20190728_171433.jpg

I didn’t have any thick enough Plane to make the legs out of single pieces so I glued two boards together to make legs thick enough. In hindsight I should have spent more time on the legs and made them out of 4 pieces rather than 2 so the grain doesn’t contrast too much. I could have also bought thicker stock but I wanted to make it all out of the same wood. I chose to give them a 4 way taper to reduce the chunkiness of the table. To cut these I made a simple jig which is adjusted purely by how far the screw at the bottom is wound out. With a clean sharp blade and a slow feed it left very slight kerf marks which only took one pass over the planer to remove.

IMG_20190811_125228.jpg

On The short rails/aprons I decided to use the domino connectors which allow for the frame to be taken apart and stored/ transported easier. Using these along side a normal domino gives a very strong joint.

I cut a bead into the bottom of the aprons to give it a subtle detail. The grain is quite striking on these and shows the importance of quartersawing . Not only is it usually the prettiest grain it also dries flatter and is more stable when dealing with seasonal movement. There are downsides to quartersawn timber for certain projects. It does have the tendency to split slightly easier if you nail/screw straight through it with no pilot hole.

IMG_20190811_175623.jpg

For the longer aprons I used a haunched mortise and tenon joint which was then glued and pegged. The dowels where then cut with a flush cut saw and then pared down with a sharp chisel.

Using a haunch on this kind of joint is pretty important as it allows a full width tenon to prevent the rail cupping but reduces the amount of short grain at the top of the mortise.

IMG_20190824_112749.jpg

The corners have a brace held in with pocket hole screws for extra strength.

IMG_20190824_144835.jpg

To hold the frame to the top I made some table buttons. these are slightly offset so when the screw is tightened into the top it clamps the top down. It also has space to move in and out and side to side which allows for the top to expand and contract with the changing seasons whilst still retaining a tight connection. Because the top is made of quarter sawn timber the type of shrinkage you have to worry about is radial which can be up to 4%. Using flat sawn you have to worry about tangential which can be up to 8% expansion/shrinkage seasonally.. The overall length or longitudinal movement is very minimal at 0.01%.

IMG_20190824_161929.jpg

I glued the boards together using Titebond II and Festool dominos. Once cured I started sanding with a belt sander with 120 grit before moving onto a random orbital sander with 120,180,240,320 grits before a gentle block sand with 400 grit paper

I usually use Osmo Polyx oil for finishing as its pretty reliable and i’ve mostly got good results with it. The top half is matt and the bottom half is satin. Personally i’m not hugely into really shiny wood but the matt finish was a bit too flat for the plane and I went for satin. I quite like the look of a matt finish on smaller wooden objects and on darker species of wood. I applied the oil very thinly with a foam brush, after 10 minutes I used my orbital sander with a fine cloth attached to the bottom of it to polish out any brush marks. I’ve not tried this before and it worked surprisingly well. After drying for another day I rubbed the top down lightly with 400 grit mirka sandpaper to remove any dust lumps and then applied a second coat in the same way.

IMG_20190814_195823.jpg
DSC_0452.JPG

Finished.

IMG_20190824_175901.jpg
DSC_0472.JPG

Small Oak dining table

IMG_20180319_174736.jpg
DSC_0180.JPG

I made this dining table for a friend of mine earlier this year out of some wood sourced and milled locally by another friend. It was a beautiful windblown oak that had been sat in a field for a few years until they decided to mill it up.

I used traditional mortise and tenon joints with drawbored dowels to keep it held together. For the top I glued together multiple boards with grain directions facing alternative ways. Doing this reduces the likelihood of the top cupping or moving with seasonal humidity/temperature changes. Wide boards look great but I think I actually prefer the look of this top.

DSC_0185.JPG

Large Deodar Cedar milling

Milled up a large Deodar Cedar in Tunbridge Wells. its really beautiful timber and can be used outdoors or indoors. Traditionally it was used to line boxes, drawers and cupboards because it has a lovely fragrant aroma that lasts a long time compared to other timber fragrances . I cut some wide boards for furniture as well as narrow planks for some fencing.

IMG_20180213_154341.jpg
IMG_20180223_151253.jpg
IMG_20180213_105820.jpg
IMG_20180223_093931.jpg

Wood prints

IMG_20180705_153952.jpg
IMG_20181208_093011.jpg

Recently I’ve been playing with ink and wood in order to create some interesting end grain relief prints on paper. I’m still working on the method required to get definition between the yearly growth rings. The results can be quite striking.

I made a frame for one of the Sweet Chestnut prints using Sweet Chestnut timber! Bridle joints with brown Oak dowels hold the whole thing together.

IMG_20181208_093035.jpg

Stable renovation with Western Red Cedar

IMG_20181114_083850.jpg
IMG_20181115_091239.jpg
DSC_1007.JPG
IMG_20181016_091025.jpg
DSC_0997.JPG

Earlier this year I worked on a tree job with my friend Alex from http://www.forestryandfencing.com

He was asked to removed a huge Western Red Cedar from a clients garden and we discussed the idea of milling the stems to provide some timber that could be used around the house and garden. WRC is a naturally durable timber which means it doesn’t need any chemical treatments in order to be used outside. It is also a very beautiful looking timber and is the most stable softwood which lends itself to construction use as seasonally it moves very little. It smells great which is another perk!

Between us we decided that the best use for the timber was to renovate an old horse stable that they had been using to store various things in. the old stud work and cladding were pretty far gone in terms of rot so we carefully dismantled the sides of the barn and used props to keep the roof held up.

WRC is one of my favourite timbers to use for external building work. it cuts and takes fixings very well without the need to do a pilot hole for the screws - even close to the ends of the boards where you would usually get split out. I opted for the use of stainless steel screws and black coated fixings to maximise weather durability.

All the timber used to build this was milled with my portable Lucas mill which was perfect for cutting the dimensions needed for a job like this.

Pippy Oak Coffee Table

9036693538812212320.JPG

A recent commission I worked on over Christmas was this Pippy/burr Oak coffee table. The spec was for something rustic but also bespoke and sleek. A hard combination sometimes as I often think most 'rustic' furniture can look pretty lazy.

I used some stopped, dovetailed half lap joints to tie the rails together. 

4974728385277088365.JPG
8365204749910506670.JPG

For the legs I decided to go with a X shape and used strengthened Lap joints which are incredibly strong but also pretty time consuming to get perfect!

I Have to admit I feel like bowtie/butterfly keys are becoming a bit overused in furniture at the moment. I do appreciate the need to stop cracks from opening up though so put a couple in the top

11517025277122524735.JPG
3476117917847366067.JPG

All assembled and oiled with Osmo Polyx oil

8955033336978122194.JPG

Oak Picnic Table

I got asked to build a picnic table in a woodland that is pretty much inaccessible for any kind of vehicle... luckily the client had his own little ATV which made carrying the alaskan mill and all my other tools into the woods a whole lot easier. They had a few oak logs that were the result of a couple of windblown trees from a few years back and finally decided they would like to make use of some of the timber. Its a beautiful woodland and I was fortunate enough to be working in there just as the bluebells were out.


Oak Workbench - Build

I did fairly large stub tenons for the legs at the top and bottom. Cut out with a skill saw then wasted all the material with a chisel before cleaning up with a rebate and block plane. 


I used a dowel maker which is basically an upgraded pencil sharpener to make a whole load of dowelling. The joints were draw bored and then pegged to make a pretty solid frame... I don't think it will be coming apart any time soon.


The vice was a bit of a fiddle to put together and to get it to run properly. I probably should have read the instructions a little better but they were in Canadian so everything was imperial and I was using metric drill bits.. Got it running sweet though and its a really really smart vice. I left the vice a bit proud with the intention of planing it down perfectly flush with the top after fitting. 


Test fitting the Veritas brass dogs and wonder dogs. Cant wait to put them to use. 


Bolted the frame to the top as its pretty heavy and if I need to move it anywhere in the future it would be a lot easier to move it separately rather than if it was one single bench. Fitted a western red cedar shelf underneath. I used Osmo top oil to give it a nice resistant finish - I use matt oil as I personally am not a fan of shiny wood. 


All it needs now is a handle for the vice!

Its been a while since I made something for myself and after getting very inspired by other peoples workbenches I decided to embark on creating my own workbench that fits my needs. 

Certain criteria had to be met

  • Methods of holding any shaped bit of timber firmly but also with the ability to do certain tasks such as routing and sanding without any interference from clamps or such
  • A shelf to hold tools that are in constant use.
  • Heavy enough to be hold timber being Hand planed without rocking.
  • Decent sized vice which is strong enough for hand planing jobs.


I started with the top which I made out of some really nice kiln dried oak. It was sawn into 3 inch thick pieces, planed/thicknessed then joined together with dominos. The domino is a great bit of kit and makes this kind of job a lot easier as it keeps the boards perfectly aligned. 


I cleaned all the glue lines off the top and roughly planed it flat with a mixture of a low angle jack and a smoothing plane. I decided to go with a mixture of brown oak and normal oak for the legs as I quite like this theme and have used it before. 

I used Brown oak for the vice as well. All the brown oak came from a log I milled quite a few years ago with my father back on the farm we used to run our firewood business from. The Veritas large front vice kit I bought was originally green but I decided I wanted to paint it black as it seemed to match the Brown oak better.


Everything cleaned up, I can't resist putting chamfers on things...


I chose to use Veritas bench accessories as they are pretty well made and the brass looks pretty bling. I drilled out 19mm holes in the top to accommodate these. Drilling pretty much perfectly square holes was a lot easier with this drill holder I bought off Axminster. 


Log to Table

I milled this oak log in Gatwick in the summer on a beautiful sunny day. It was absolutely riddled with nails, screws and fencing so the bottom metre had to be cut off completely and the rest carefully examined before each cut. Despite the large amount of blue staining I was lucky enough not to hit anything at all. 

I cut two slabs for the top of the table then some 5x5 and 4x4 for the frame underneath.


On this table it was decided that I could spend an extra day on the table and plane and size all the timber. This really makes a big difference to the finish of the table and allows the grain to show through. As it dries out and ages the grey of the oak will be enlightened with the silvery medullary rays and will look really smart. 


The frames I build for these tables are all made with pegged mortise and tenons. The pegs are made out of seasoned oak so when the rest of the table dries out the joints only get tighter


As I had planed the timber I also added more finishing touches such as chamfered edges. 


I built the two ends in the work shop and then completed the rest of it on site. This included cleaning up and hand planing the top smooth.


The finished product. One very heavy table!


Deodar Cedar

Deodar Cedar is becoming one of my favourite timbers to mill! It is one of the best smelling timbers around and it doesn't seem to fade even after it is seasoned.


This tree had previously had some very harsh pruning on it and was a bit of an eyesore. The client decided to have it taken down but wanted to make use of the nice straight stem. After cutting the top slice it was decided that it was far to good to use for structural material. Instead, it was decided to mill it up with the intention of turning it into a large dining table or two!

Stacked up and ready for seasoning... 

Cherry Coffee Table

This piece of cherry was milled from a log a customer had been storing for a couple of years. It was pretty rotten and I'd said it may not be worth milling originally....

We persevered and milled it anyway with the intention of possibly using one of the boards to make a coffee table. I picked the best one out and stored it until it was dry enough to use. I then flattened the board and the extent of the rot was pretty bad. However, it also had some really pretty grain patterns and colours in it.

I dug most of the rot out and shaped it back to solid wood. It meant cutting out the whole centre of the board....

Sanded down and polished the grain really started to pop.

Nothing particularly technical with this - Just a pretty board with metal legs bolted to it.

Beach hut Oak deck

I built this deck with a friend of mine to go outside his beach hut in Hastings. Using a hardwood like Oak for this has many benefits. Firstly, it is far more resistant to rot than treated softwood. Secondly, it is a much harder timber which means it is much less likely to get eroded by foot traffic. Thirdly, it looks a fair bit more unique!

The base layer of stone and sand was dug out for the framework to be put in. I built it using lap joints which makes for a sturdy base!

The boards were screwed down with 4 inch brass screws with brass cups. 


Oak Log Arch Bridge

Its always a shame when a big oak tree succumbs to stormy weather. Especially when they were as nice as this one. The first 6 meters of the trunk were perfectly straight and there were no large knots in it. After that there was a large curved section. I discussed what it could be used for with the client and it just so happened that the tree fell right towards a small river which they had intended to build a bridge over. Shipwrights of the past used to treasure natural curves in oak as they are much stronger than ones that are cut from straight grained timber. So it was decided to make use of the curved part to make two sides of a footbridge.

After milling the curved bit in half I then went on to cut 2 inch planks out of the first straight section of the trunk. These were for the treads of the bridge. I also cut some 3 inch planks which were sawn again to make 3x3 for the structural parts of the bridge.


The gardeners did a brilliant job of clearing the area and then setting two concrete pads for the bridge to sit on. 

The hand rails and treads were then cut in and attached. It was a really nice job to follow from start to finish and I'm pretty happy with it. Its all made out of solid Oak so I'd imagine it will last the foreseeable future!


Two days sawmilling in London

I've spent the last couple of days sawmilling in London. The first job in Hampton was to mill a couple of cherry logs into inch and a quarter thick slices for the client who was also a keen woodworker. It was really interesting to see some brilliant projects he had made before out of some sycamore which they'd had milled. 


The cherry had some real nice colours in it. I'm sure it will be put to good use!


The second job near Crystal Palace was a large Cedar which the client had taken down by tree surgeons the week before. It pretty much rained the whole day which can get a bit frustrating. However, I persevered and got this pretty wide log milled up into inch and 3/4 boards which I will be getting kiln dried and then turned into desks in the future. I still have another day or so milling there as the tree is huge and has plenty of good timber in it. 

Its going to be a really interesting project and I'm pretty excited to start building some desks... 


Nature observation tower part 1

Over the past few months I've been working on this observation/high tower/cabin on stilts. All the wood has been milled by either myself or my good friend Matthew from Plumpton College.


The 4 main 5x5 legs are cut from a single Oak log, the rest of the frame work is Sweet Chestnut. Both of these timbers are very structurally strong and also very resistant to decay. The 4 legs are also sat on chestnut feet which can be replaced if they start to rot. At some point during the summer we plan to jack the legs up and put small concrete pads under them.


The roof and floor are both made from inch thick Western Hemlock boards. The roof then has a plastic membrane and then felt on top of it which makes for a very waterproof roof! The fascias are all Western Red cedar which is an ideal timber to use for things that are always exposed to the elements.

The sides of the cabin were covered with a breathable membrane and then cladded with 8x1 Western Red Cedar boards. Its a lovely timber to work with and smells great when you cut it. It's really starting to come together now, just the front and one side left to clad then its onto the windows which we are planning to make out of oak 2x3 with polycarbonate windows.

Oak milling in Bromley

Making use of a victim of the recent storm Katie. This oak was milled into a 3 inch thick boards and also 1.5 inch boards. After the top slab was cut I sawed one of the sides off to removed a large flair in the log. The log itself was on a pretty steep hill (pictures don't do it justice..), it was interesting to see how adaptable the Alaskan set up is for logs that are in difficult spots.


I recently invested in a larger saw and Alaskan sawmill frame which means I have the option to cut boards up to 1.5 meters wide! 


Outdoor Oak Dining table

First off, the oak was milled into 3 inch thick boards and 3 meters long then some of the planks were then converted into 5x3 rails. It was a really awesome piece of oak with nice streaks of dark brown, pink and blue from a piece of metal inside the tree which I somehow managed the miss with the saw!


When it came to building the table I used a combination of bridle joints, lap joints and stainless steel bolts to hold it together. This combination makes for a very solid table - Which it needed to be as the two planks that formed the table top took 4 people to lift!

It was a great project to build and I'm pretty sure it will outlive me...